Quantcast
Channel: Containers Archives - CormacHogan.com
Viewing all 78 articles
Browse latest View live

Deploy Kubernetes manually on Photon Controller v1.1 and vSAN

$
0
0

PHOTON_square140I mentioned in a previous post that we have recently released Photon Controller version 1.1, and one of the major enhancements was the inclusion of support for vSAN. I wrote about the steps to do this in the previous post, but now I want to show you how to utilize vSAN storage for the orchestration frameworks (e.g. Kubernetes) that you deploy on top of Photon Controller. In other words, I am going to describe the steps that need to be taken in order for these Kubernetes VMs (master, etcd, workers) to be able to consume the vsanDatastore that is now configured on the cloud ESXi hosts of Photon Controller. This is what I will show you in this post. I have already highlighted the fact that you can deploy Kubernetes as a service from the Photon Controller UI. This is showing you another way of achieving the same thing, but also to enable the vSAN datastore to be used by the K8S VMs.

The first step is to make sure that you have a VM with photon controller command line interface (cli) installed. I used a Photon OS VM once more, and did a git clone of the photon controller cli, as shown in this previous post here. Afterwards, I verified the version of photon controller cli as follows:

# photon -v
photon version Git commit hash: 41ea26b

While you can do all of the following steps manually, here is a script that I used to set up networks, tenants, images, flavors and so in photon controller, before eventually deploying Kubernetes. You will notice that there is a reference to an image called kubernetes-1.4.3-pc-1.1.0-5de1cb7.ova“. This can be found on the photon controller 1.1. release page on github here  but be aware that the number may change. You will need to download the OVA locally, and modify the script to point to the correct location (if not /root) and the correctly named OVA. You will also need two static IP addresses for the master VM and the etcd VM in the cluster create line near the bottom. You will need to modify the ip addresses that I used, as well as gateway, DNS and netmask info that is correct for your environment. I have also chosen to deploy 10 worker VMs, and these will pick up IP addresses via DHCP. You can change this number as needed. Then it is simply a matter of selecting the correct target by running “photon target set http://ip-address-of-photon-controller” and then running the script. Just to be clear, this is provided as is, with no support whatsoever. But I have used it a few times myself and it seems to work fine.

#!/bin/bash

echo "... create network ..."
photon -n network create --name dev-network --portgroups "VM Network" \
--description "Dev Network for VMs"
NETWORK_ID=`photon network list | grep "dev-network" | cut -d\ -f1`
photon -n network set-default $NETWORK_ID

echo "... load image ..."
K8S_IMAGE_FILE="/root/kubernetes-1.4.3-pc-1.1.0-5de1cb7.ova"
photon -n image create $K8S_IMAGE_FILE -n photon-kubernetes-vm-disk1 -i EAGER
IMAGE_ID=`photon image list | grep photon-kubernetes-vm | cut -d\ -f1`

echo "... enable k8s on deployment ..."
# get the deployment id
DEPLOY_ID=`photon deployment show | grep 'Deployment ID' | cut -d\ -f3`
photon -n deployment enable-cluster-type $DEPLOY_ID --type=KUBERNETES \
--image-id=$IMAGE_ID

echo "... create disk flavor ..."
# create disk flavour
photon -n flavor create --name "vsan-disk" --kind "ephemeral-disk" \
--cost "storage.VSAN 1.0 COUNT"

echo "... create vm flavor ..."
# create vm flavor
photon -n flavor create --name cluster-tiny-vm --kind "vm" --cost "vm 1 COUNT,\
vm.flavor.cluster-other-vm 1 COUNT,vm.cpu 1 COUNT,vm.memory 1 GB,vm.cost 1 COUNT"

echo "... create tenant ..."
photon -n tenant create k8sEng
photon -n tenant set k8sEng

echo "... create ticket ..."
photon -n resource-ticket create --name k8s-gold-ticket \
--limits "vm.memory 64 GB, vm 200 COUNT"

echo "... create project ..."
photon -n project create --resource-ticket k8s-gold-ticket \
--name k8s-project --limits "vm.memory 64 GB, vm 200 COUNT"
photon project set k8s-project

echo "... create cluster ..."
photon -n cluster create -n k8s-cluster -k KUBERNETES \
 --dns 10.27.51.252 --gateway 10.27.51.254 --netmask 255.255.255.0 \
 --master-ip 10.27.51.118 --container-network 10.2.0.0/16 \
 --etcd1 10.27.51.119 --worker_count 10 -v cluster-tiny-vm -d vsan-disk

The way in which we are consuming vSAN storage for these VMs is the inclusion of a disk flavor called “vsan-disk”. When we create the cluster at the end of the script, we are specifying this as a disk flavor using the “-d” option. If you have problems, add a -x to the #!/bin/bash in the first line of the script to get debug output. Here is a sample run of the script.

root@photon-full-GA-1 [ ~ ]# ./deploy_k8s.sh
./deploy_k8s.sh
... create network ...
85647972541f6d14d0be9
... load image ...
3fca0ff2-de1b-4b8d-bf47-389258391af6
... enable k8s on deployment ...

... create disk flavor ...
85647972541f6d3463824
... create vm flavor ...
85647972541f6d347f959
... create tenant ...
85647972541f6d3483fa9
... create ticket ...
85647972541f6d34bbe31
... create project ...
85647972541f6d34d96ec
Using target 'http://10.27.51.117:28080'
Project set to 'k8s-project'
... create cluster ...
2016/11/23 12:41:21 photon: Timed out waiting for task \
'85647972541f6d34f86f1'. Task may not be in error state, \
examine task for full details.

One caveat, as highlighted in the last line of the output above, is that it may take some time for the K8S OVA image to upload to your image datastore. If it does, then the cluster creation may timeout from a user perspective as it will need these images uploaded to create the VMs running K8S. Even if it does timeout, it should still continue to run in the background. One option is to pause or sleep the script, and monitor the upload progress task via the host client of the ESXi. Once the image has been uploaded, you can then resume the script/cluster creation. You can examine the state of the cluster with the following command – note that in this case, it is still “creating”:

root@photon-full-GA-1 [ ~ ]# photon cluster list
Using target 'http://10.27.51.117:28080'
ID                                    Name         Type        State     Worker Count
402ae2c7-36f1-45ba-bd44-514af1d10008  k8s-cluster  KUBERNETES  CREATING  10

Total: 1
CREATING: 1

Eventually, everything should deploy. A successful run, where the image has been pre-loaded, should look something like this:

root@photon-full-GA-1 [ ~ ]# ./deploy_k8s.sh
... create network ...
85647972541f881fce638
... enable k8s on deployment ...

... create disk flavor ...
... create vm flavor ...
... create tenant ...
85647972541f882157749
... create ticket ...
85647972541f88218f5d0
... create project ...
85647972541f8821ad659
Using target 'http://10.27.51.117:28080'
Project set to 'k8s-project'
... create cluster ...
fab086ac-35cf-4972-9478-447c4bf847e6
Note: the cluster has been created with minimal resources. You can use the cluster now.
A background task is running to gradually expand the cluster to its target capacity.
You can run 'cluster show ' to see the state of the cluster.
root@photon-full-GA-1 [ ~ ]#

And when it deploys completely, you should see something like this:

root@photon-full-GA-1 [ ~ ]# photon cluster list
Using target 'http://10.27.51.117:28080'
ID                                    Name         Type        State  Worker Count
1a6abca3-406c-4b30-85c7-0a23a28b024d  k8s-cluster  KUBERNETES  READY  10

Total: 1
READY: 1
root@photon-full-GA-1 [ ~ ]#

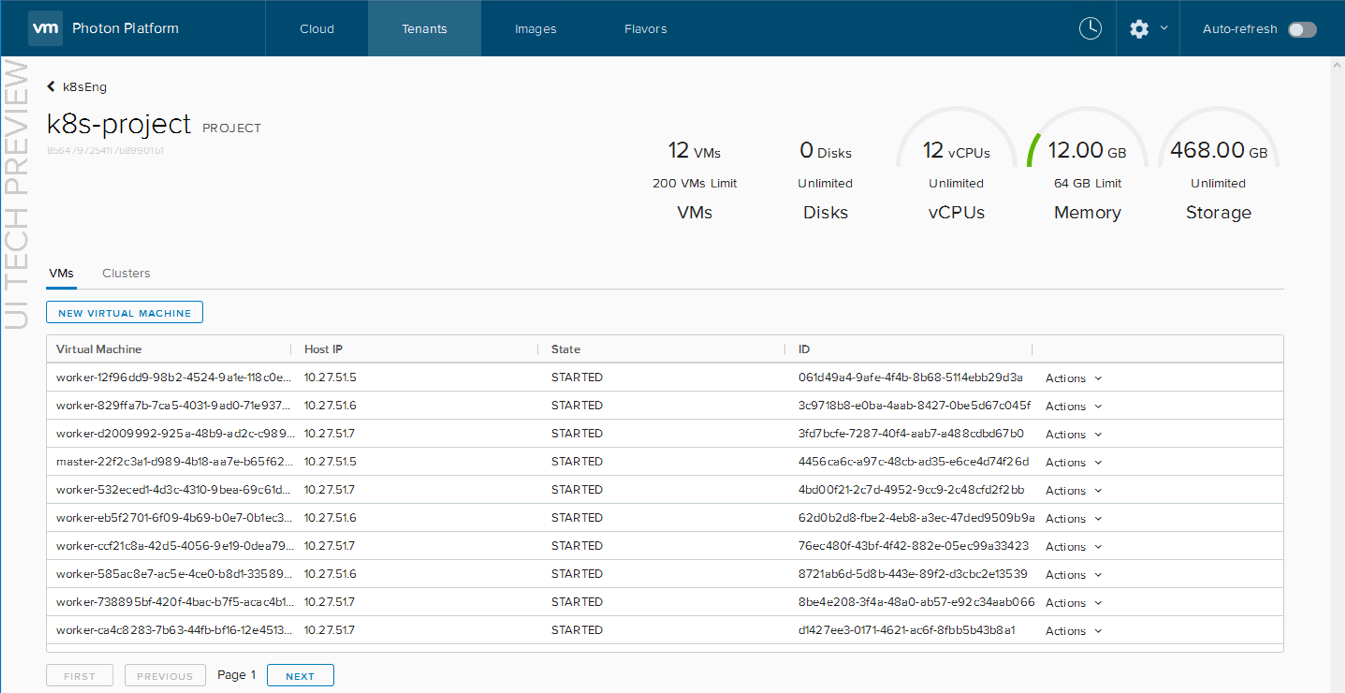
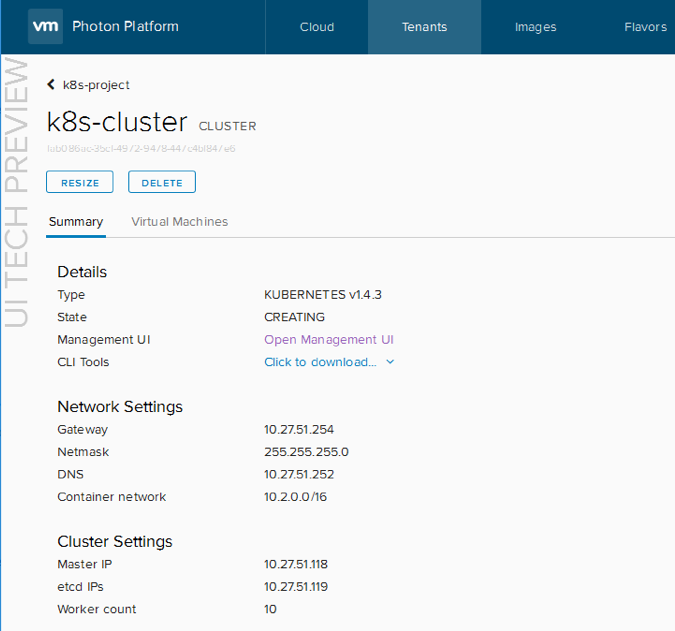
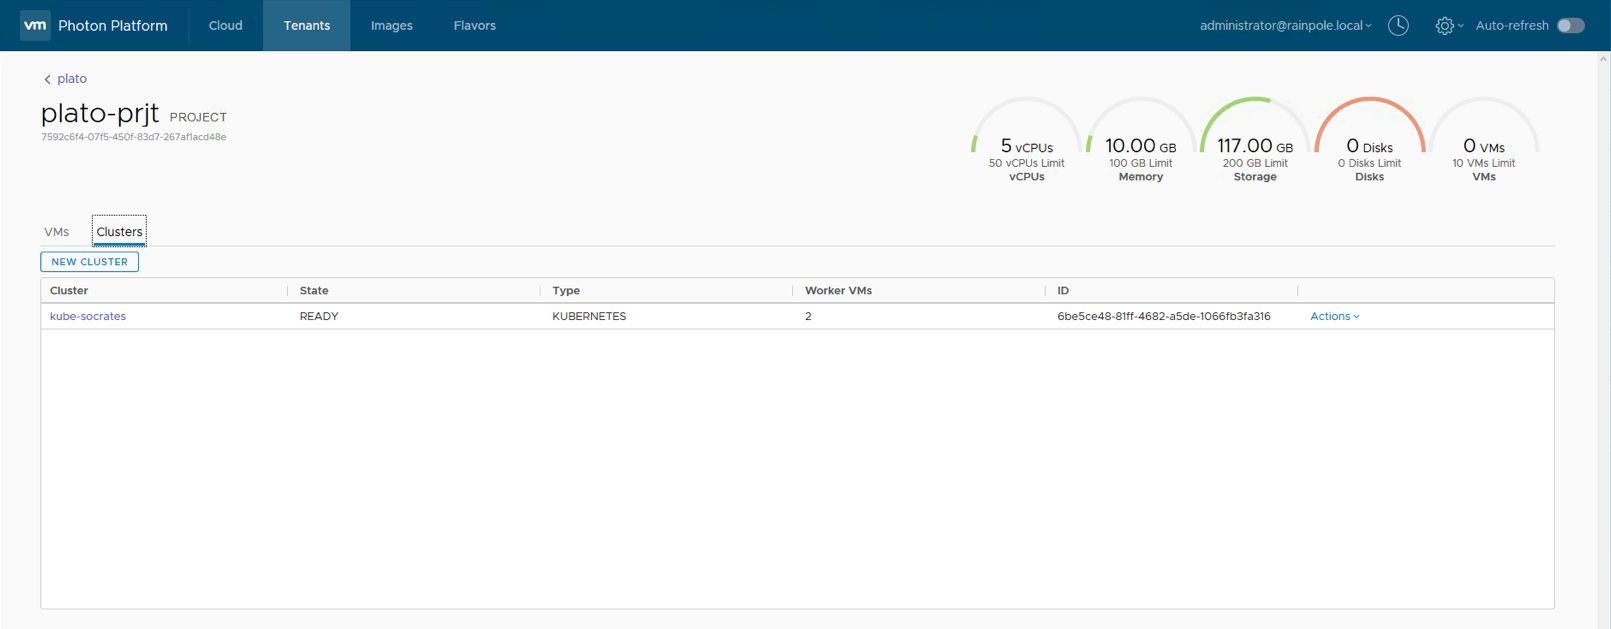
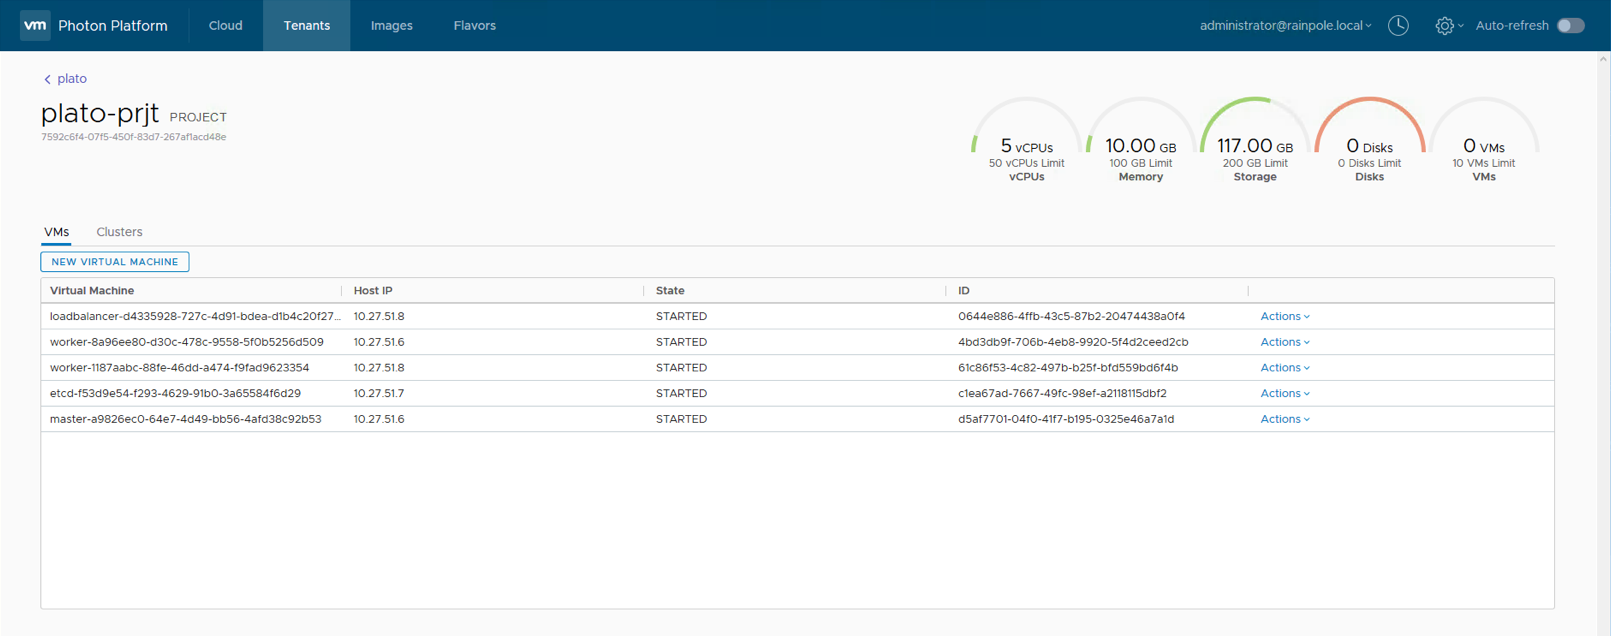
Either way, once the master and etcd VMs are deployed, you should be able to navigate to the tenants, images and flavors section of the Photon Controller UI, and examine the cluster. Under Tenants, click on the k8sEng tenant (or whatever you called your tenant). Then under projects, click on the name of the k8s-project (or whatever you called your project). This should show you the master, etcd, and worker VMs as they are deployed. k8s-vm-listFrom there, click on Clusters, followed by clicking on the name of the cluster. In the summary tab, you can click on the option to Open Management UI, and this should launch the Kubernetes dashboard for you.

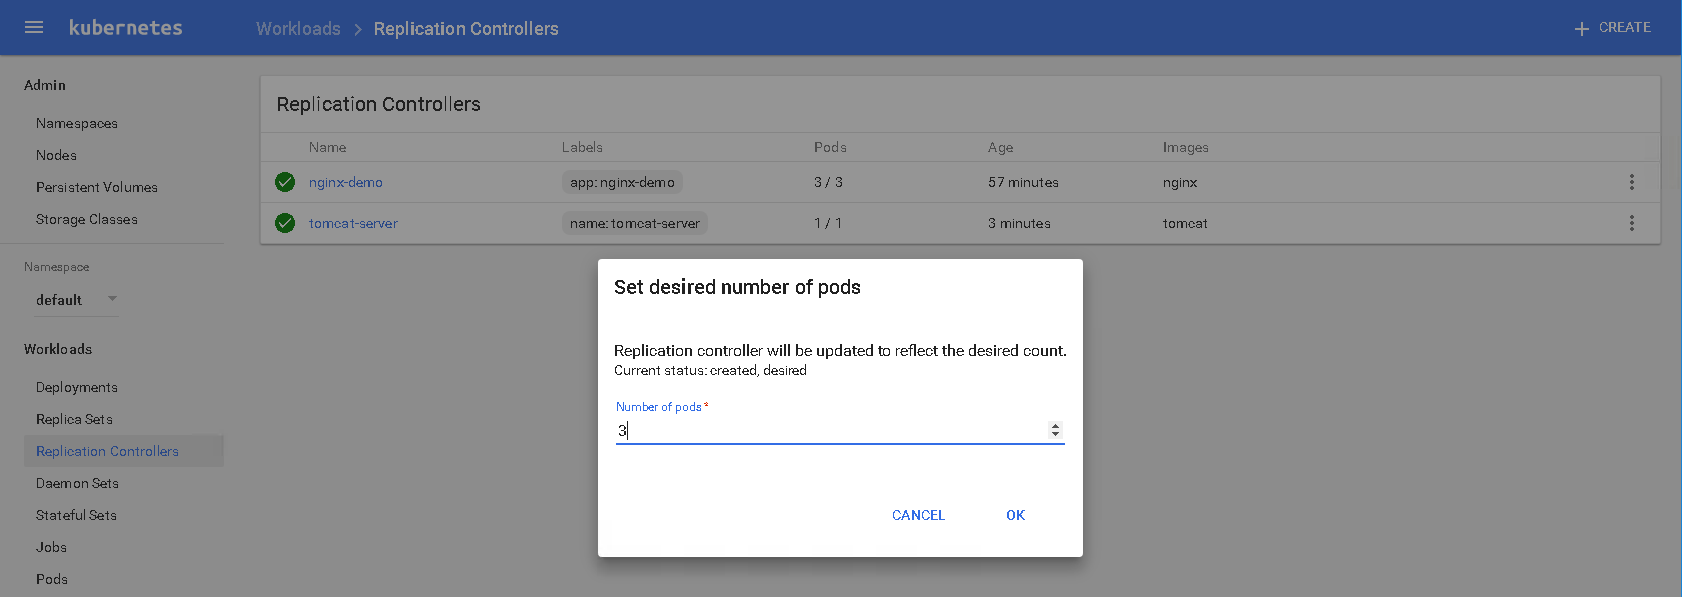
k8s-mgmt-uiThe Kubernetes dashboard can then be handed off to your developers.

The last part of this is to just make sure that vSAN is being utilized, i.e. that the VMs are actually consuming vSAN storage. Yes, you could log onto the ESXi hosts, and check the storage of the VMs. But since we also have RVC available, let’s run a few commands to see whats happening there. For example, the object status report shows us the following:

/vsan-mgmt-srvr.rainpole.com/Global/computers> vsan.obj_status_report 0
2016-11-23 14:32:38 +0000: Querying all VMs on VSAN ...
2016-11-23 14:32:38 +0000: Querying all objects in the system from esxi-hp-05.rainpole.com ...
2016-11-23 14:32:39 +0000: Querying all disks in the system from esxi-hp-05.rainpole.com ...
2016-11-23 14:32:39 +0000: Querying all components in the system from esxi-hp-05.rainpole.com ...
2016-11-23 14:32:39 +0000: Querying all object versions in the system ...
2016-11-23 14:32:41 +0000: Got all the info, computing table ...

Histogram of component health for non-orphaned objects

+-------------------------------------+------------------------------+
| Num Healthy Comps / Total Num Comps | Num objects with such status |
+-------------------------------------+------------------------------+
| 3/3 (OK)                            |  42                          |
+-------------------------------------+------------------------------+
Total non-orphans: 42


Histogram of component health for possibly orphaned objects

+-------------------------------------+------------------------------+
| Num Healthy Comps / Total Num Comps | Num objects with such status |
+-------------------------------------+------------------------------+
+-------------------------------------+------------------------------+
Total orphans: 0

Total v1 objects: 0
Total v2 objects: 0
Total v2.5 objects: 0
Total v3 objects: 42
Total v5 objects: 0
/vsan-mgmt-srvr.rainpole.com/Global/computers>

42 objects would account for the master, etcd and 10 worker VMs , when you add in boot disks, swap files and home namespaces. And of course, you have many other RVC commands to use, such as vsan.cluster_info and of course the health of vSAN using vsan.health.

PS – I also created an “undeploy” script to run through the process of tearing down this Kubernetes cluster afterwards. This uses the same names for tenants, project, clusters, etc, as the “deploy” script, so if you change them, you will need to edit the “undeploy” script accordingly.

#!/bin/bash

# cluster show
echo "... cluster show ..."
K8S_CLUSTER_ID=`photon cluster list | grep 'k8s-cluster' | cut -d\ -f1`
photon cluster show $K8S_CLUSTER_ID

echo "... cluster remove.."
# remove cluster
photon -n cluster delete $K8S_CLUSTER_ID

# get the deployment id
DEPLOY_ID=`photon deployment show | grep 'Deployment ID' | cut -d\ -f3`

echo "... disable k8s in deployment ..."
# disable K8s from deployment
photon -n deployment disable-cluster-type $DEPLOY_ID --type=KUBERNETES

echo "... project remove.."
# get the project id
PROJECT_ID=`photon -n project list | grep k8s-project | cut -f1`
echo $PROJECT_ID

# remove project
photon -n project delete $PROJECT_ID

echo "... ticket remove.."
# get the resource ticket id
TICKET_ID=`photon resource-ticket list | grep k8s-gold-ticket | cut -d' ' -f1`
echo $TICKET_ID

#remove the resource ticket
photon -n resource-ticket delete $TICKET_ID
echo "... tenant remove.."

# get the tenant id
TENANT_ID=`photon -n tenant list | grep k8sEng | cut -f1`
echo $TENANT_ID

# remove the tenant
photon -n tenant delete $TENANT_ID

echo "... network remove.."
# remove the network
NETWORK_ID=`photon network list | grep "dev-network" | cut -d\ -f1`
photon -n network delete $NETWORK_ID

echo "... image remove.."
# remove the image
IMAGE_ID=`photon image list | grep photon-kubernetes-vm | cut -d\ -f1`
echo $IMAGE_ID
photon -n image delete $IMAGE_ID

echo "... flavor remove.."
# delete disk flavour
DISK_FLAVOR=`photon flavor list | grep "vsan-disk" | cut -d\ -f1`
echo $DISK_FLAVOR
photon -n flavor delete $DISK_FLAVOR

# delete vm flavor
VM_FLAVOR=`photon flavor list | grep "cluster-tiny-vm" | cut -d\ -f1`
echo $VM_FLAVOR
photon -n flavor delete $VM_FLAVOR

echo "cleanup done"

Once again, you can run through all of these steps manually if you wish, but the script approach may save you some time.

The post Deploy Kubernetes manually on Photon Controller v1.1 and vSAN appeared first on CormacHogan.com.


Storage Challenges with Cloud Native Apps [video]

$
0
0

Thanks to my friends over at VMUG Italia, my recorded presentation on Storage Challenges with Cloud Native Apps is now available. This was delivered at the VMUG UserCon event held in Milan, Italy, and which took place on November 15th. In this session I go through various container related projects that are underway at VMware (docker volume driver, vSphere Integrated Containers, Admiral, Harbor and Photon Platform), as well as how we are providing persistent storage for containers deployed on these products. Hope you enjoy it.

The post Storage Challenges with Cloud Native Apps [video] appeared first on CormacHogan.com.

vSphere Integrated Containers is GA

$
0
0

Regular readers will know about vSphere Integrated Containers (VIC for short), as I have written a number of articles around my experiences with this new VMware product. Although  announced with vSphere 6.5, VIC did not GA at the same time. However, VIC v0.8 is now generally available for vSphere 6.5.

In a nutshell, VIC allows you to deploy “containers as VMs”, not “containers in VMs”. This provides a significant number of advantages to a vSphere admin, as a “container host” (typically a VM where containers run) is a black box to vSphere admins, as you have no idea around resources consumption or networking requirements of the containers running in that VM. VIC addresses this by giving a vSphere admin full visibility into containers from a resource, network and security perspective – essentially the container appears as a VM. This basically means that all those day 2 workflows that you have in place for VMs (backups, auditing, etc) can now also be applied to containers.

Now VIC is more than just the VIC engine. There are other extensions such as Harbor and Admiral that are included with VIC, for storing container images and orchestration of container deployments. I won’t describe them in detail here as I have already written about them on this blog, and my good pal Massimo has a great VIC GA launch article here explaining how this all fits together.

I do think that this approach to “containers as VMs” is resonating with many people in the container space. This quote from Kelsey Hightower is one such example:

Huge congrats to the VIC team on this achievement. Having spent some time with that team during my recent take-3, I know how hard they have worked to make this possible.

The post vSphere Integrated Containers is GA appeared first on CormacHogan.com.

Storage for containers with VMware? You got it!

$
0
0

Last week during a visit to VMware headquarters in Palo Alto, I had the opportunity to catch up with our engineering team who are responsible for developing storage solutions for Docker and Kubernetes running on vSphere. I have written about our Docker volume driver for vSphere and Kubernetes on vSphere already, but it’s been a while since I caught up with the team, and obviously more and more enhancements are being added all the time. I thought it might be useful to share the improvements with you here. There also seems to be some concerns raised about the availability of reliable, scalable, and persistent storage for containers. I’ll show you how VMware are solving this.

Let’s begin with the Docker volume driver for vSphere, which has since been renamed to vSphere Docker Volume Service. This service is integrated with the Docker Volume Plugin framework. Docker users are now able consume vSphere Storage (vSAN, VMFS, NFS) for stateful containers using Docker. VMs can run Docker and this service to create volumes as VMDKs on vSphere datastores. In a recent techtarget article that discusses what enterprises need before adopting containers, a lack of storage features, available to VMs, but unavailable to containers was quoted as a major blocker. Well, with the vSphere Docker Volume Service, this is no longer an obstacle. Since the docker volume is deployed as a VMDK on the datastore, vSphere treats it like any other VMDK. The most recent release of this service also includes some multi-tenancy improvements, which allows multiple users to create docker volumes on shared vSphere storage. Docker hosts (e.g. virtual machines) can be assigned privileges (e.g. create, read, write) on a per datastore basis, and resource consumption limits (such as maximum volume size) can also be specified. At present multi-tenancy is only available from within the same ESXi host, but plans are afoot to provide multi-tenancy across multiple ESXi hosts at the vCenter server level. There is an excellent set of demos and associated documentation on github.

From a Kubernetes (K8S) perspective, the previous time I wrote about it we were using the older “kube-up/kube-down” mechanism to deploy a K8S cluster running on vSphere. While it was still relatively quick to deploy, the mechanism could be problematic at the best of times. So much so that a new mechanism called “Kubernetes-Anywhere” was created, and the older “kube-up” mechanism has now been deprecated. Our team has included support for “Kubernetes-Anywhere” for simpler, more intuitive deployments of Kubernetes on vSphere. Included with this is the vSphere Cloud Provider for Kubernetes.  Kubernetes users, just like docker users with our docker volume service, are now able to deploy on vSphere and consume vSphere Storage (vSAN, VMFS, NFS) with the vSphere Cloud Provider. The provider supports Persistent Volumes and Storage Classes (e.g. thin, thick, eagerzeroed thick) on vSphere storage. Many of the storage features available to VMs are now available in Kubernetes when deployed on vSphere storage.

VMware has been doing storage for many years now.  Fiber Channel, iSCSI and NFS have been available on ESXi for a long time. Many more storage enhancements continue to be added. More recently we have introduced VVols (Virtual Volumes), which led to a great talk from HPE at VMworld last year on how the granularity of VVols and policy driven storage is ideal for container storage. Even our very own vSAN product provides an exceptional level of performance and availability for container storage, allowing users to associate a storage policy with a container for dynamic volume creation, rather than having to carve out volumes in advance. You can consider vSAN as HCI for Containers, which can be scaled up (with more storage) or scaled out (with more hosts). vSAN is a proven storage solution, having been GA for 3 years and with over 7,000 or so customers. A container volume created on vSAN is immediately highly available, and can tolerate multiple failures in the hyperconverged infrastructure (HCI) on which it is deployed. With vSAN, enterprise grade features such as policy based management, QOS, and data reliability are all available at container volume granularity. VMware has “virtualized” container volumes, allowing any vSphere Storage to be consumed using Docker or K8S.

On another note, Docker recently acquired Infinit, a storage startup. Containers may not require persistence, but their volume almost certainly do. In the techtarget article, one of the observations made by Mark Davis, ClusterHQ’s former CEO (creators of flocker), was as follows: “I don’t believe that anyone, and I don’t care how brilliant you are, can build an enterprise-grade reliable scalable distributed file system with half a dozen people in a couple of years,” Davis said. “That’s not a criticism of them, it’s just that’s how long it takes.” I personally don’t know how good or robust the Infinit technology is, but I’ve seen first hand how much hard work and effort goes into getting a reliable and stable storage product to market.  I read that Docker plan to open source the Infinit technology sometime in 2017. But the point I want to make in this post is that there is no need to wait. VMware, through the vSphere Docker Volume Server and the vSphere Cloud Provider for Kubernetes, enabled your containers to consume enterprise-grade, reliable, scalable vSphere storage right now!

Lastly, I have some questions for my readers. Are many of you using containers? Do you run them in VMs on vSphere? Do you use persistent storage? How do you consume this persistent storage? Is there anything we can add to the above functionality to make your life easier? We’d love to hear from you.

The post Storage for containers with VMware? You got it! appeared first on CormacHogan.com.

Kubernetes on vSphere with kubernetes-anywhere

$
0
0

I already described how you can get started with Kubernetes natively on vSphere using the kube-up/kube-down mechanism. This was pretty straight-forward, but not ideal as it was not very reliable or easy to follow. Since writing that piece, Kubernetes have moved on to a new deployment mechanism called kubernetes-anywhere. In this post, I will show you how to deploy Kubernetes onto a vSphere environment with a vSAN datastore, using the kubernetes-anywhere utility. All of this is done from a Photon OS VM. Now in my previous example, I used the Photon OS OVA, which is a trimmed down version  of the OS. In this example, I have deployed my Photon OS VM using the full ISO image, meaning that all of the tooling I might need (git, awk, etc) are already included. This just saves me a little time. If you want to use the cut-down distribution, check out how to add the additional tooling to the OS with tdnf in my previous post. Now, I have broken up this deployment into a number of distinct parts, but in a nutshell, the steps can be summarized as follows:

  1. Setup guest from where deployment will be done, e.g. Photon OS distro
  2. Download OVA for K8S
  3. Download “kubernetes-anywhere”
  4. Create build environment
  5. Make configuration file for deploying K8S on vSphere
  6. Deploy K8S on vSphere
  7. Get access to the K8S dashboard

Let’s look at these steps in more detail. If you do not need all of this detail, there is an excellent write-up on how to get started with K8S on vSphere found here.

Part 1: Deploy a Photon OS VM with full ISO image

There were only a few things I needed to do with the full ISO image. One was to give it more disk space, for cloning and building. I allocated a 100GB VMDK during VM creation. The next thing I did was to login on the console and enable root logins over SSH, and the final item was to enable and start docker. That’s it. Of course, you can also use many other distros if you wish, but I’m getting to like Photon OS for this sort of testing.


Part 2: Download Photon OS image for VMs to be used by Kubernetes

You can download the OVA from here, or you can deploy it directly from the vSphere Web Client:

Make sure it is on the same vSphere environment where you plan to run K8S. This OVA is another Photon OS image, and will be used to deploy master and node VMs to run Kubernetes. Do not change the name, and do not power it on.


Part 3: git clone kubernetes-anywhere

Login in to your Photon OS VM, and run a git clone of kubernetes-anywhere.

root@photon [ ~ ]# git clone https://github.com/kubernetes/kubernetes-anywhere
 Cloning into 'kubernetes-anywhere'...
 remote: Counting objects: 4092, done.
 remote: Total 4092 (delta 0), reused 0 (delta 0), pack-reused 4092
 Receiving objects: 100% (4092/4092), 3.97 MiB | 642.00 KiB/s, done.
 Resolving deltas: 100% (2573/2573), done.
 Checking connectivity... done.


Part 4: make docker-dev

Now we build a new container environment for the deployment. This is why docker must be enabled and started on the Photon OS VM. This step takes a long time, and generates a lot of output. I’ve put a few snippets here, so you know what to expect. Although it takes a long time to complete the very first time it is run, it is only a few seconds subsequently to make new environments since the container images have all been downloaded.

root@photon [ ~ ]# cd kubernetes-anywhere
root@photon [ ~/kubernetes-anywhere ]# make docker-dev
docker build -t kubernetes-anywhere:v0.0.1 .
Sending build context to Docker daemon 205.3 kB
Step 1 : FROM mhart/alpine-node:6.4.0
6.4.0: Pulling from mhart/alpine-node
e110a4a17941: Pull complete
d6d25f5b0348: Pull complete
Digest: sha256:0a7f08961c8dfaf42910a5aa58549c840bb93fdafab5af3746c11f1cd4062bda
Status: Downloaded newer image for mhart/alpine-node:6.4.0
---> ecd37ad77c2b
Step 2 : RUN apk add --update bash
---> Running in f50126adb9b2
fetch http://dl-cdn.alpinelinux.org/alpine/v3.4/main/x86_64/APKINDEX.tar.gz
fetch http://dl-cdn.alpinelinux.org/alpine/v3.4/community/x86_64/APKINDEX.tar.gz
(1/5) Installing ncurses-terminfo-base (6.0-r7)
(2/5) Installing ncurses-terminfo (6.0-r7)
(3/5) Installing ncurses-libs (6.0-r7)
(4/5) Installing readline (6.3.008-r4)
(5/5) Installing bash (4.3.42-r5)
Executing bash-4.3.42-r5.post-install
Executing busybox-1.24.2-r9.trigger
OK: 14 MiB in 18 packages
---> f06561950212
Removing intermediate container f50126adb9b2
Step 3 : ADD ./util/docker-build.sh /opt/
---> f37f66f9fcfe
Removing intermediate container 1da43e7f98a1
Step 4 : RUN /opt/docker-build.sh
---> Running in c8b41a59eb47
fetch http://dl-cdn.alpinelinux.org/alpine/v3.4/main/x86_64/APKINDEX.tar.gz
+ apk add --update git build-base wget curl jq autoconf automake pkgconfig ncurses-dev libtool gperf flex bison ca-certificates
fetch http://dl-cdn.alpinelinux.org/alpine/v3.4/community/x86_64/APKINDEX.tar.gz
(1/38) Upgrading musl (1.1.14-r11 -> 1.1.14-r14).

81300K .......... .......... .......... .......... .......... 99%  203K 0s
81350K .........                                             100%  164M=3m21s
2017-02-15 13:35:14 (405 KB/s) - '/usr/local/bin/kubectl' saved [83312488/83312488]
+ chmod +x /usr/local/bin/kubectl
+ cd /tmp
+ git clone https://github.com/google/jsonnet.git
Cloning into 'jsonnet'..
.

Saving to: 'terraform_0.7.2_linux_amd64.zip'
     0K .......... .......... .......... .......... ..........  0%  987K 16s
.
2017-02-15 13:36:11 (8.28 MB/s) - 'terraform_0.7.2_linux_amd64.zip' saved [16332841/16332841]
+ wget https://releases.hashicorp.com/terraform/0.7.2/terraform_0.7.2_SHA256SUMS
--2017-02-15 13:36:11--  https://releases.hashicorp.com/terraform/0.7.2/terraform_0.7.2_SHA256SUMS
.
Removing intermediate container c3e8ad7bf718
Step 5 : WORKDIR /opt/kubernetes-anywhere
---> Running in 4d419a2d773f
---> 368033c43cdd
Removing intermediate container 4d419a2d773f
Step 6 : ADD . /opt/kubernetes-anywhere/
---> 6d16fcb2ed3d
Removing intermediate container eb77d6546eeb
Step 7 : CMD make
---> Running in c00e6d5d1c94
---> 32497ffce687
Removing intermediate container c00e6d5d1c94
Successfully built 32497ffce687
Starting Kuberetes Anywhere deployment shell in a container
docker run -it --rm --env="PS1=[container]:\w> " --net=host --volume="`pwd`:/opt/kubernetes-anywhere" kubernetes-anywhere:v0.0.1 /bin/bash
[container]:/opt/kubernetes-anywhere>


Part 5: make config – Configure the vSphere cloud provider for Kubernetes

This is where you tell “kubernetes-anywhere” that you are deploying against a vSphere environment, and this is where you will fill in the details for the vSphere environment. You will need the IP/FQDN of your vCenter server, plus credentials. You will also need datacenter name, cluster name and datastore name. As you can see from this setup, I an deploying onto a vSAN datastore. The other major difference from the defaults is the phase 2 installer container. Do not pick the default, but instead use the one that we have highlighted here. I have highlighted in red where you will need to change from the default, but obviously these are taken from my setup, so you will have to modify to match your own. In phase 3, the addons, Y (for Yes) is the default, so you can just hit return.

[container]:/opt/kubernetes-anywhere> make config

CONFIG_="." kconfig-conf Kconfig
*
* Kubernetes Minimal Turnup Configuration
*
*
* Phase 1: Cluster Resource Provisioning
*
number of nodes (phase1.num_nodes) [4]
cluster name (phase1.cluster_name) [kubernetes]
*
* cloud provider: gce, azure or vsphere
*
cloud provider: gce, azure or vsphere (phase1.cloud_provider) [vsphere]
  *
  * vSphere configuration
  *
  vCenter URL Ex: 10.192.10.30 or myvcenter.io (without https://) (phase1.vSphere.url) [vcsa-06.rainpole.com]
  vCenter port (phase1.vSphere.port) [443]
  vCenter username (phase1.vSphere.username) [administrator@vsphere.local]
  vCenter password (phase1.vSphere.password) [xxxxxxx]
  Does host use self-signed cert (phase1.vSphere.insecure) [true]
  Datacenter (phase1.vSphere.datacenter) [Datacenter]
  Datastore (phase1.vSphere.datastore) [vsanDatastore]
  Specify a valid Cluster, Host or Resource Pool in which to deploy Kubernetes VMs. (phase1.vSphere.resourcepool) [Cluster]
  Number of vCPUs for each VM (phase1.vSphere.vcpu) [1]
  Memory for VM (phase1.vSphere.memory) [2048]
  Name of the template VM imported from OVA (phase1.vSphere.template) [KubernetesAnywhereTemplatePhotonOS.ova]
  Flannel Network (phase1.vSphere.flannel_net) [172.1.0.0/16]
*
* Phase 2: Node Bootstrapping
*
installer container (phase2.installer_container) [docker.io/ashivani/k8s-ignition:v4]
docker registry (phase2.docker_registry) [gcr.io/google-containers]
kubernetes version (phase2.kubernetes_version) [v1.4.8]
bootstrap provider (phase2.provider) [ignition]
*
* Phase 3: Deploying Addons
*
Run the addon manager? (phase3.run_addons) [Y/n/?]
  Run kube-proxy? (phase3.kube_proxy) [Y/n/?]
  Run the dashboard? (phase3.dashboard) [Y/n/?]
  Run heapster? (phase3.heapster) [Y/n/?]
  Run kube-dns? (phase3.kube_dns) [Y/n/?]
#
# configuration written to .config
#
make: '.config' is up to date.
[container]:/opt/kubernetes-anywhere>


Part 6: make deploy – Roll out Kubernetes

This is the last step to get K8S deployed. This rolls out the master and node VMs for Kubernetes, and builds the framework. Again, I have included some snippets, but this does take a little time as well, especially the master (which I’ve seen take between 12min and 15min).

[container]:/opt/kubernetes-anywhere> make deploy
util/config_to_json .config > .config.json
make do WHAT=deploy-cluster
make[1]: Entering directory '/opt/kubernetes-anywhere'
( cd "phase1/$(jq -r '.phase1.cloud_provider' .config.json)"; ./do deploy-cluster )
.tmp/vSphere-kubernetes.tf
data.template_file.cloudprovider: Refreshing state...
tls_private_key.kubernetes-root: Creating...
 .
tls_private_key.kubernetes-admin: Creating...
 .
tls_private_key.kubernetes-node: Creating...
 .
vsphere_folder.cluster_folder: Creating...
  datacenter:    "" => "Datacenter"
  existing_path: "" => "<computed>"
  path:          "" => "kubernetes"
tls_private_key.kubernetes-master: Creating...
 .
vsphere_folder.cluster_folder: Creation complete
vsphere_virtual_machine.kubevm2: Creating...
  datacenter:                             "" => "Datacenter"
  disk.#:                                 "" => "1"
  disk.705700330.bootable:                "" => "true"
  disk.705700330.controller_type:         "" => "scsi"
  disk.705700330.datastore:               "" => "vsanDatastore"
  disk.705700330.iops:                    "" => ""
  disk.705700330.keep_on_remove:          "" => ""
  disk.705700330.key:                     "" => "<computed>"
  disk.705700330.name:                    "" => ""
  disk.705700330.size:                    "" => ""
  disk.705700330.template:                "" => "KubernetesAnywhereTemplatePhotonOS.ova"
  disk.705700330.type:                    "" => "thin"
  disk.705700330.uuid:                    "" => "<computed>"
  disk.705700330.vmdk:                    "" => ""
  domain:                                 "" => "vsphere.local"
  enable_disk_uuid:                       "" => "true"
  folder:                                 "" => "kubernetes"
  linked_clone:                           "" => "false"
  memory:                                 "" => "2048"
  memory_reservation:                     "" => "0"
  name:                                   "" => "node1"
  network_interface.#:                    "" => "1"
  network_interface.0.ip_address:         "" => "<computed>"
  network_interface.0.ipv4_address:       "" => "<computed>"
  network_interface.0.ipv4_gateway:       "" => "<computed>"
  network_interface.0.ipv4_prefix_length: "" => "<computed>"
  network_interface.0.ipv6_address:       "" => "<computed>"
  network_interface.0.ipv6_gateway:       "" => "<computed>"
  network_interface.0.ipv6_prefix_length: "" => "<computed>"
  network_interface.0.label:              "" => "VM Network"
  network_interface.0.mac_address:        "" => "<computed>"
  network_interface.0.subnet_mask:        "" => "<computed>"
  resource_pool:                          "" => "Cluster"
  skip_customization:                     "" => "true"
  time_zone:                              "" => "Etc/UTC"
  uuid:                                   "" => "<computed>"
  vcpu:                                   "" => "1"
vsphere_virtual_machine.kubevm4: Creating...
.
vsphere_virtual_machine.kubevm1: Creating...
.
vsphere_virtual_machine.kubevm5: Creating...
.
vsphere_virtual_machine.kubevm3: Creating...
.
tls_private_key.kubernetes-root: Creation complete
tls_self_signed_cert.kubernetes-root: Creating...
.
tls_self_signed_cert.kubernetes-root: Creation complete
tls_private_key.kubernetes-node: Creation complete
data.tls_cert_request.kubernetes-node: Refreshing state...
tls_private_key.kubernetes-master: Creation complete
tls_locally_signed_cert.kubernetes-node: Creating...
.
tls_locally_signed_cert.kubernetes-node: Creation complete
tls_private_key.kubernetes-admin: Creation complete
data.tls_cert_request.kubernetes-admin: Refreshing state...
tls_locally_signed_cert.kubernetes-admin: Creating...
.
tls_locally_signed_cert.kubernetes-admin: Creation complete
vsphere_virtual_machine.kubevm2: Still creating... (10s elapsed)
vsphere_virtual_machine.kubevm4: Still creating... (10s elapsed)
vsphere_virtual_machine.kubevm1: Still creating... (10s elapsed)
vsphere_virtual_machine.kubevm5: Still creating... (10s elapsed)
vsphere_virtual_machine.kubevm3: Still creating... (10s elapsed)
.
null_resource.master: Still creating... (14m0s elapsed)
null_resource.master (remote-exec):  96 75.8M   96 73.5M    0     0  94543      0  0:14:01  0:13:35  0:00:26  277k
null_resource.master (remote-exec):  97 75.8M   97 73.7M    0     0  94772      0  0:13:59  0:13:36  0:00:23  278k
null_resource.master (remote-exec):  97 75.8M   97 73.9M    0     0  94856      0  0:13:58  0:13:37  0:00:21  254k
null_resource.master (remote-exec):  97 75.8M   97 74.1M    0     0  94981      0  0:13:57  0:13:38  0:00:19  233k
null_resource.master (remote-exec):  97 75.8M   97 74.3M    0     0  95093      0  0:13:56  0:13:39  0:00:17  215k
null_resource.master (remote-exec):  98 75.8M   98 74.5M    0     0  95234      0  0:13:55  0:13:40  0:00:15  203k
null_resource.master (remote-exec):  98 75.8M   98 74.6M    0     0  95355      0  0:13:54  0:13:41  0:00:13  185k
null_resource.master (remote-exec):  98 75.8M   98 74.8M    0     0  95501      0  0:13:52  0:13:42  0:00:10  196k
null_resource.master (remote-exec):  98 75.8M   98 75.1M    0     0  95639      0  0:13:51  0:13:43  0:00:08  196k
null_resource.master (remote-exec):  99 75.8M   99 75.2M    0     0  95727      0  0:13:51  0:13:44  0:00:07  194k
null_resource.master: Still creating... (14m10s elapsed)
null_resource.master (remote-exec):  99 75.8M   99 75.3M    0     0  95782      0  0:13:50  0:13:45  0:00:05  181k
null_resource.master (remote-exec):  99 75.8M   99 75.5M    0     0  95844      0  0:13:50  0:13:46  0:00:04  170k
null_resource.master (remote-exec):  99 75.8M   99 75.6M    0     0  95903      0  0:13:49  0:13:47  0:00:02  157k
null_resource.master (remote-exec):  99 75.8M   99 75.8M    0     0  95969      0  0:13:48  0:13:48 --:--:--  148k
null_resource.master (remote-exec): 100 75.8M  100 75.8M    0     0  95991      0  0:13:48  0:13:48 --:--:--  141k
null_resource.master: Provisioning with 'local-exec'...
. 
Apply complete! Resources: 19 added, 0 changed, 0 destroyed.

The state of your infrastructure has been saved to the path
below. This state is required to modify and destroy your
infrastructure, so keep it safe. To inspect the complete state
use the `terraform show` command.

State path: ./.tmp/terraform.tfstate
make[1]: Leaving directory '/opt/kubernetes-anywhere'
KUBECONFIG="$(pwd)/phase1/$(jq -r '.phase1.cloud_provider' .config.json)/.tmp/kubeconfig.json" ./util/validate
Validation: Expected 5 healthy nodes; found 0. (10s elapsed)
Validation: Expected 5 healthy nodes; found 0. (20s elapsed)
Validation: Expected 5 healthy nodes; found 5. (30s elapsed)
Validation: Success!
KUBECONFIG="$(pwd)/phase1/$(jq -r '.phase1.cloud_provider' .config.json)/.tmp/kubeconfig.json" ./phase3/do deploy
+ case "${1:-}" in
+ deploy
+ gen
+ cd ./phase3
+ mkdir -p .tmp/
+ jsonnet --multi .tmp/ --tla-code-file cfg=../.config.json all.jsonnet
.tmp/dashboard-deployment.json
.tmp/dashboard-svc.json
.tmp/heapster-deployment.json
.tmp/heapster-svc.json
.tmp/kube-dns-deployment.json
.tmp/kube-dns-svc.json
.tmp/kube-proxy.json
+ mkdir -p /tmp/kubectl/
+ HOME=/tmp/kubectl
+ kubectl apply -f ./.tmp/
deployment "kubernetes-dashboard" created
service "kubernetes-dashboard" created
deployment "heapster-v1.2.0" created
service "heapster" created
replicationcontroller "kube-dns-v19" created
service "kube-dns" created
daemonset "kube-proxy" created
[container]:/opt/kubernetes-anywhere>

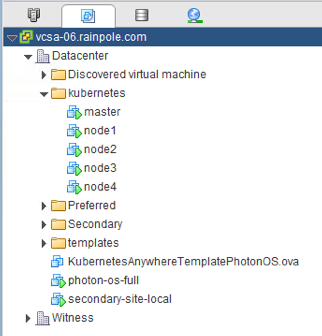
When this step completes, the master and nodes VMs should now be visible in the vSphere web client, in a folder called kubernetes:

Part 7 – Get access to the K8S dashboard

The kubectl commands will allow you to figure out which node and port are being used to run the dashboard. You can then open a browser and point to it. The first step is to download “kubectl”, and then point it at your K8S configuration.

[container]:/opt/kubernetes-anywhere> curl -LO https://storage.googleapis.com/kubernetes-release/release/v1.4.8/bin/linux/amd64/kubectl

[container]:/opt/kubernetes-anywhere> chmod u+x kubectl

[container]:/opt/kubernetes-anywhere> export KUBECONFIG=phase1/vsphere/.tmp/kubeconfig.json

[container]:/opt/kubernetes-anywhere> kubectl describe service kubernetes-dashboard --namespace=kube-system| grep -i NodePort 
 Type:            NodePort NodePort:        <unset>    31402/TCP

[container]:/opt/kubernetes-anywhere> kubectl get pods --namespace=kube-system| grep -i dashboard
 kubernetes-dashboard-1763797262-abexo   1/1       Running   0          13m

[container]:/opt/kubernetes-anywhere> kubectl describe pod kubernetes-dashboard-1763797262-abexo --namespace=kube-system| grep Node
 Node:        node4/10.27.51.132
 

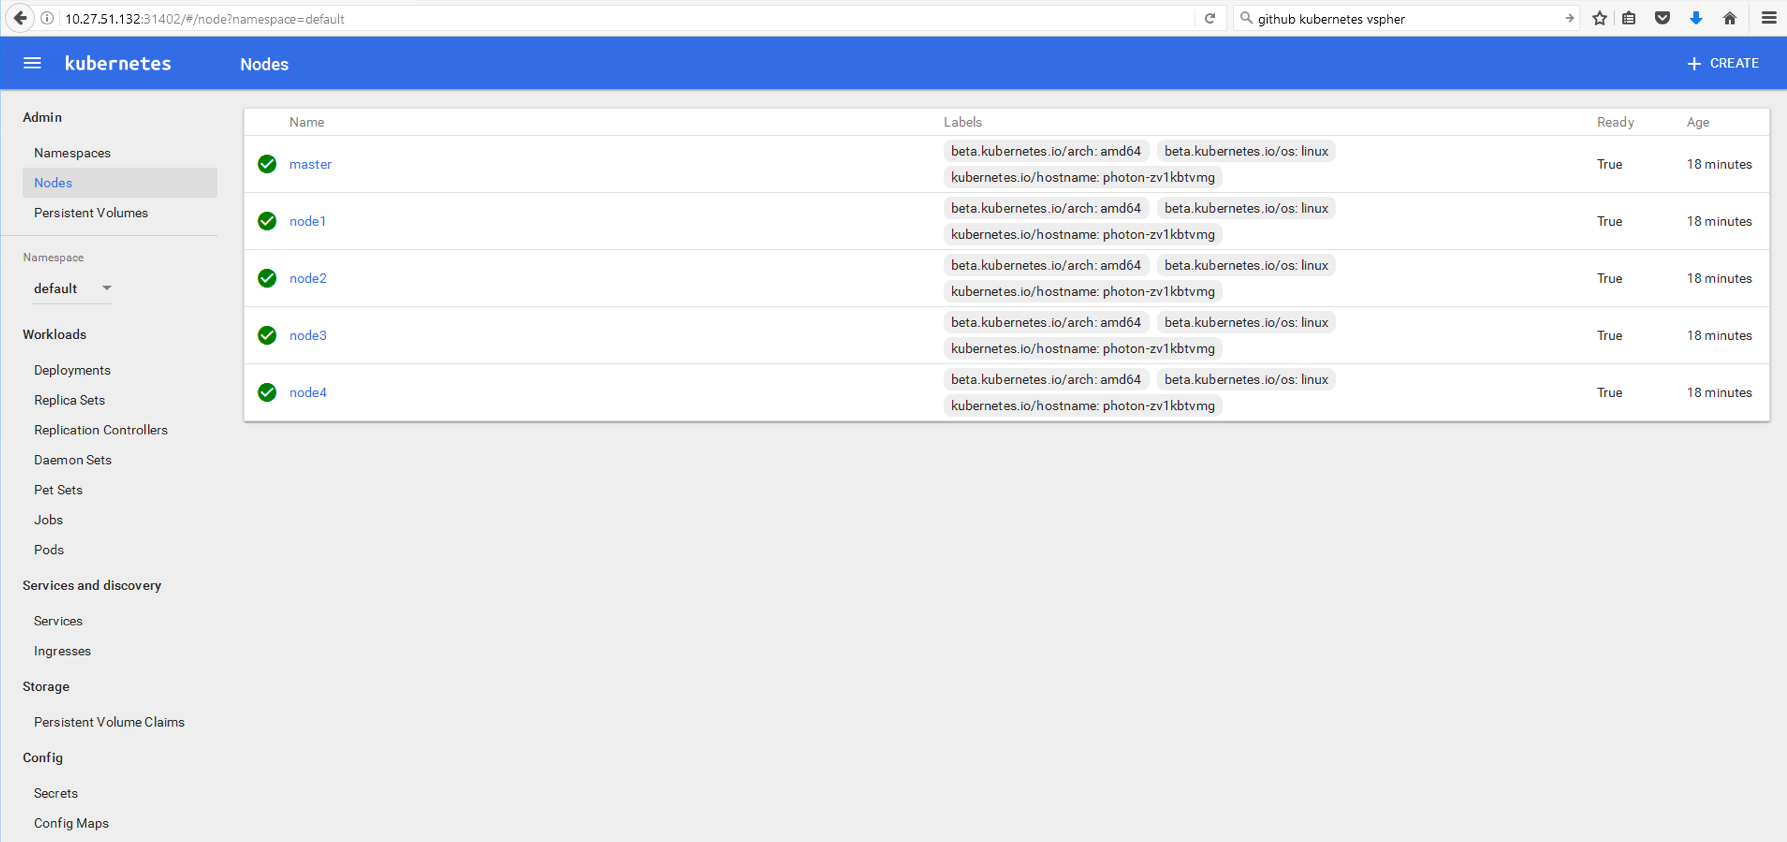
Now if I point my browser at http://10.27.51.132:31402, I can launch my K8S dashboard.

And there you have it – K8S deployed on vSphere with just a handful of steps. Very seamless. Kudos to our vSphere Cloud Provider team who worked very hard to make this happen.

The post Kubernetes on vSphere with kubernetes-anywhere appeared first on CormacHogan.com.

Photon Platform v1.1 /Photon Controller v1.1.1 is now GA

$
0
0

I spotted this announcement late on Friday afternoon (March 2nd). What is significant about this announcement is that this is the first ever Photon Platform/Controller release available on vmware.com. Previously you could only get it via Github. So what’s in this release? Well,  first of all there is now a single SKU which provides you with ESXi, NSX-T, vSAN for Photon Platform as well the core Photon Platform Control plane, which comprises Lightwave, Photon OS and Photon Controller. The binaries for Photon Controller have been bumped up to v1.1.1. Regular readers will be aware that I have written a number of articles around this product, which you can still find on my Cloud Native Apps page. I’ve also written an article on the integration with vSAN (including Lightwave for authentication), but this was written 3 months ago and some of the procedure may have changed since, so I’d urge you to refer to the official documentation for guidance.  Now, one piece of the vSphere management infrastructure not mentioned here is vCenter server, and that is the whole point. Photon Platform is geared toward very large infrastructures, which may require 100s or 1000s of ESXi hosts to deploy a particular cloud native app, something that vCenter is not able to manage currently. This is where Photon Platform comes in.

To recap, this is a list of what is included in this new release:

  • Install: Photon Platform now has a new installer with extensible & robust logging. This is very welcome. Troubleshooting was very difficult in the earlier versions.
  • Networking: NSX-T 1.1 aka Crosshairs integration.
  • Storage: vSAN for Photon Platform 1.1 integration.
  • Security: ESXi and vSAN now join the Lightwave domain for authentication. This is needed to validate who can run commands to add/remove vSAN to Photon Platform.


The Photon Controller v1.1.1 binaries can be accessed via GitHub and there is still lots of good information on the Photon Controller wiki. The full set of release notes for Photon Controller v1.1.1 are also available there, and you will find the quick start and user guides here. It should be noted that this release does not support ESXi 6.5 at this time.

If you are looking for a highly scalable, multi-tenanted control plane for cloud-native applications (environments where different sets of developers want/need their own development environments or indeed, some developers looking to develop on docker, others wanting to develop on Kubernetes), then this could be just what you are looking for.

The post Photon Platform v1.1 /Photon Controller v1.1.1 is now GA appeared first on CormacHogan.com.

My DockerCon 2017 Day #1

$
0
0

This is my very first DockerCon. It is also the first time that I’ve attended a conference purely as an attendee, and not have some responsibilities around breakout sessions, or customer meetings. Obviously I have an interest in much of the infrastructure side of things, so that is where I focused. This post is just some random musings about my first day at DockerCon17, and some things that I found interesting. I hope you do too.


Keynote

First up was Ben Golub, CEO of Docker. This was a sort of “state of the nation” address, where we got some updates on where things were with Docker on its 4th birthday. Currently there are 3300 contributors to the docker open source project (of which 42% are independent). There are also now 900K docker apps on docker hub, and finally we were told that Docker currently has 320 employees, of which 150 are engineers.

Next up was Solomon Hykes, Founder of Docker. Solomon was there to make some new announcements. First was multi-stage build, which enables you to reduce the size of your containers by separating the build environment from the run-time. Another feature was the ability to move an app from your local desktop to the cloud (in fact, I think was called “desktop to cloud“) with just a few clicks. But I guess one of the major announcements was LinuxKit which is a Linux subsystem which can run on any OS, and is aimed purely at running containers. To prove the point, one of the weekend project demonstrations showed how Kubernetes could be deployed on a MAC using LinuxKit.

There were some other announcements as well of course (I’m condensing Solomon’s 90 minute keynote in to a few short sentences here). However the other one that stood out was when John Gossman of Microsoft took to the stage and demonstrated how you can now run Linux containers on Windows with Hyper-V Isolation. Previously you could only run Windows containers, but with this new Hyper-V Isolation for Linux, you can run Linux containers now as well.


What’s new in Docker

This session was presented by Victor Vieux. Victor started with the new versioning convention. As of docker 1.13, the versioning changed to a new format, e.g. 17.03-ce where 1703 is in YYMM date format and “ce” means community edition. If you see “ee”, this means enterprise edition. There are in fact 3 editions now:

  • => edge is bleeding edge
  • => docker ce is a quarterly release, supported for 4 months
  • => docker ee is a quarterly release, supported for 12 months


Victor then delved into the new multi-build method announced in the keynote. One thing that was interesting were some of new commands for managing capacity/space. There is a new “docker system df” command to see how much disk space is being used, and if you need to clean up disk space, there is a new  “docker system prune” command which will clean up images and volumes that are no longer being used.

Another nice feature that I saw was topology or rack awareness for container applications. When you start your docker engine/daemon, you can associate a label with it. Then when you launch your service, use the follow option to specify rack awareness: “docker service createplacement-pref-add=rack“. This will ensure that containers are placed in different locations to avoid a single failure taking down the whole application.

The final piece that I thought was interesting was an update to the logging mechanism. You can now get logs at the service level using “docker service logs” which will display which node the log is coming from, while combining all the logs from the containers in that service into a single output.


Portworx

I had a brief chat with these guys at their booth, and I also found out that they presented at the Tech Field Day event that was being run here at DockerCon at the same time. Portworx are a storage start-up (since 2015) based out Los Altos, in CA, and they are focused on providing a solution to stateful containers. I went along to the their (very short) 20 minute breakout session. There, Goutham (Gou) Rao – Co-Founder and CTO of Portworx, gave us a very brief overview of the technology. In a nutshell, Portworx acts like a virtualized storage layer for containers. The hosts/clusters that are running your container applications are scanned at startup, and Portworx has the smarts to figure out things like zones and regions, as well as the characteristics of the available storage. It “fingerprints” the servers and places the storage into high:medium:low buckets based on the characteristics. The containers then consume the storage based on “storage class”, and this is then used for placement decisions on where to create the volume (e.g. local disk, SAN Lun, Cloud Storage). It also ensures that for availability, no two copies of the data are placed in the same location (if I remember correctly, 3 copies are created). And once more, if I understood correctly, the container is moved to where it will have data locality to the storage for best performance. Portworx also allows different policies for different applications (e.g. Cassandra can have one policy, PostgresSQL can have another). Resilience is achieved by maintaining multiple copies of the data, and performance is improved by having the data acknowledged when a quorum of devices acknowledge it. It can then be deemed acknowledged, while the remaining devices commit the block.

I’ll admit that I have a lot of questions still to ask about this solution. I guess the TFD recording is the best place to start. You can also learn more here.


Infinit

This is a company that Docker recently acquired. I went along to this session, thinking that there might be some example of where one might use Infinit for container volumes, but this session was purely aimed at discussing how Infinit could be used as a key-value store. The session was still interesting, and Julien Quintard (former CEO of Infinit) and Quentin Hocquet gave good overviews on how Infinit could be used as a superior KV-store. They highlighted a bunch of benefits of using Infinit KV-store over those found in etcd, Zookeeper, Consul and even Raft for maintaining consensus. The issue, as they see it, is that most of these KV stores work off of the master/worker scenario whereas Infinit work off of each node being equal, doing some master operations while still storing blocks of data. They also have this concept of block quorums where multiple nodes are trying to write to the same block, and where only the nodes that are in that group need to reach consensus about who succeeds, and who has to retry. This is unlike other models, where all managers need to reach consensus. They claim that this approach gives better security, better scalability and better performance. They also have this concept of mutable and immutable blocks. Mutable is obviously a block that is in a state of change, and can be written to (so require consensus when there is multiple nodes writing) but immutable blocks don’t need to worry about that; there is only ever one version and it is never updated. You can also keep this latter block type in cache forever since it never changes. The guys then went on to show us a demo of this in action. The guys said that the plan is to open source this in the next one or two months. My understanding is that this is not a direct replacement for the likes of  etcd, Zookeeper, Consul or Raft. I believe it works at a lower level, but possibly someone could take this open source and build another service to maintain cluster integrity and synchronization.

Unfortunately there was no discussion regarding using the Infinit storage platform to do container volumes, etc, although in fairness, they guys discussed what was in the session title. You can learn more here.

That’s it for my first day at DockerCon17. Tomorrow I’m hoping to spend some more time in the exhibition center, and see what else is happening in the container ecosystem.

The post My DockerCon 2017 Day #1 appeared first on CormacHogan.com.

My DockerCon 2017 Day #2

$
0
0

This is day #2 of DockerCon 2017. If you want to read my impressions of DockerCon 2017 Day #1, you can find it here. Today, as well as attending the keynote, some breakout sessions and visiting the expo, I wanted to highlight a couple of VMware announcements that were made in this space yesterday. First of all, we announce the release of vSphere Integrated Containers v1.1. The big-ticket item in VIC 1.1 is that the key items of VIC Engine are now merged into a single OVA appliance for ease of deployment. As well as that, we also released Photon Platform v1.2. The big-ticket item here, in my opinion, is support for Kubernetes v1.6. But there are a bunch of additional improvements other than those outlined here, so check out the links for more details. OK, back to DockerCon 2017 day #2.

Keynote

Let’s start with the keynote. I think I can sum this up by simply stating that this keynote was all about telling the audience that Docker is now ready for the enterprise. Ben Golub, Docker CEO, led this keynote and invited both Visa and MetLife up on stage to tell us about their docker journey and use cases. Pretty run-of-the-mill stuff, and pretty high level to be honest. The rest of the keynote was all about emphasizing Docker Enterprise Edition. We got demos on using docker in a secure supply chain, where the containers are inspected before being pushed to production. Docker scans the image layer by layer, and only if it passes the introspect is the image allowed to go live in production. One of the highlights of the demo was having a hybrid Windows/Linux application running on a hybrid Windows/Linux cluster. Judging by the crowd reaction, I’m guessing that this is something of a big deal in the container space. Ben went on to highlight that they now have a large collection of third-party software that has been certified for use in Docker Enterprise. This led onto the next part of the presentation where Oracle were invited on stage to announce the availability of Oracle software in the docker store. The Oracle guy announced that this is free for test&dev, but that customers would need to call Oracle if you want to go into production or want support. No detail on licensing was provided (no surprise there). A lot of noise on twitter about this, especially considering Oracle’s hard stance on running their software in VMs. The final demo of the session was migrating a “legacy” application to docker. This “legacy” application was two VMs, one running the online store (web server and LAMP stack I believe), and another VM with an Oracle database for the back-end.  They used image2docker, an open source tool, to convert the front-end VM to a container (and create a docker file). For the Oracle part, they just pulled a new Oracle container from the store. That was the demo. No detail on how to get the data from the “legacy” database into the container and nothing about how to persist the data, which could have been interesting. Oh! And nothing about how to license the Oracle instance either. Let’s move on.

[Update]: The keynote finished with an announcement around the Moby Project. I didn’t quite get what this was about initially, but after reading up on it after the keynote, and speaking to people more knowledgeable on the topic than I am, it seems that Docker are now separating Docker the Company/Product/Brand from Docker the Project. So from here on out, the Company/Product/Brand will continue to be known as Docker, and the Docker Project will be henceforth known as the Moby Project. The Moby project is for people who want to customize their own builds, or build their own container system or people who want to deep-dive into docker internals. Docker the product is recommended for people who want to put docker into production and get support. I’m guessing this is Docker (the company) figuring out how to start making revenue.

 Splunk

My first break-out was to go and see how Splunk worked with containers, and they had a customer from Germany (bild.de) co-present with them.  One thing of note is that Splunk can be called directly from the docker command, e.g. docker run –log-driver=splunk. Bild, the customer, gets about 20 million users per month, and they run absolutely everything in docker. All logs are ingested  into one cluster, but apart from hiding some sensitive data, 95% of the log data visible to everyone at Bild, so dashboards can be shared/customized among multiple teams/users. One nice thing is that Bild are able to compare performance on a daily basis and see if anything has degraded. Of course, they can also do generic stuff like alerting on certain log patterns, and create smart queries, e.g. don’t alert until you see X number of these errors over Y time-frame. Splunk for docker licensing is priced on GB/TB of data ingested per day.

Docker Volume Drivers/Service/Plugins

On a walk around the EXPO at DockerCon, I noticed a whole range of storage companies (as well as some HCI companies) in attendance. Everyone from StorageIO, Nimble, Nutanix, Hedvig, NetApp and DELL/EMC, to name a few. It seems that they all now have their own docker volume plugin, which will allow them to create docker volumes and enable docker containers to consume those volumes on their own storage array. I’m not really sure what differentiates them to be honest. I guess they can use some semantics that are special to their particular array in some way. Of course VMware also has our own docker volume plugin, so if you run containers in a VM on top of ESXi, you can use our plugin to create a docker volume on VMFS, NFS or vSAN storage. Those volumes can then be consumed by containers running in the VMs. (I just did a quick check on the docker store, and there are something like 15 plugins for volumes currently available).

Veritas hyper-scale for containers

This was another short break-out session that I attended. This seemed to be another sort of volume play, or at least storage play for docker containers, but this is the first company that I’ve seen start making moves towards addressing the problem of backing up data in containers. There are multiple issues here. The first is data locality – in other words, is the container residing with its storage, or is it on some other host/node? Do I need to transfer that data before I can back it up? Should I be implementing some sort of backup proxy solution instead? The other challenge is how do you consistently backup micro-services, where there could be a web of inter-dependencies to get the state? This is exponentially more challenging than traditional monolithic/VM backup. Veritas hyper-scale for containers stated that they always host the container’s compute and volumes on the same node for data locality and backup, but there are some considerations on how to do that, especially on failures and restarts. Veritas are just getting started on this journey, but here is a link to where you learn more about what they are doing. It’ll be interesting to follow their progress. BTW, this only had a beta announcement at DockerCon, so don’t expect to be able to pick it up straight away (unless you join the beta).

And that was the end of my conference. I must say, it wasn’t what I expected. There was a lot more infrastructure and operational focus than I expected. Certainly it had a good buzz. And next year, DockerCon is going to be held in the Moscone Center in downtown San Francisco, so I guess they are expecting to grow even more over the coming 12 months. I’m sure they will.

The post My DockerCon 2017 Day #2 appeared first on CormacHogan.com.


Getting started with VIC v1.1

$
0
0

VMware recently release vSphere Integrated Containers v1.1. I got an opportunity recently to give it a whirl. While I’ve done quite a bit of work with VIC in the past, a number of things have changed, especially in the command line. What I’ve decided to do in the post is highlight some of the new command line options that are necessary to deploy the VCH, the Virtual Container Host. Once the VCH is deployed, at that point you have the docker API endpoint to start deploying your “containers as VMs”. Before diving into that however, I do want to clarify one point that comes up quite a bit. VIC v1.1 is not using VM fork/instant clone. There are still some limitations to using instant clone, and the VIC team decided not to pursue this option just yet, as they wished to leverage the full set of vSphere core features. Thanks Massimo for the clarification. Now onto deploying my VCH with VIC v1.1.

First things first – VIC now comes as an OVA. Roll it out like any other OVA. Once deployed, you can point a web browser at the OVA and pull down the vic-machine components directly to deploy the VCH(s).

I have gone with deploying the VCH from a Windows environment using vic-machine. If you want to see the steps involved in getting a Windows environment ready for VIC, check out this post here from Cody over at the humble lab. Here is the help output to get us started.

C:\Users\chogan\Downloads\vic>vic-machine-windows.exe -h

NAME:
   vic-machine-windows.exe - Create and manage Virtual Container Hosts

USAGE:
   vic-machine-windows.exe [global options] command [command options] [arguments...]

VERSION:
   v1.1.0-9852-e974a51

COMMANDS:
     create   Deploy VCH
     delete   Delete VCH and associated resources
     ls       List VCHs
     inspect  Inspect VCH
     upgrade  Upgrade VCH to latest version
     version  Show VIC version information
     debug    Debug VCH
     update   Modify configuration
     help, h  Shows a list of commands or help for one command

GLOBAL OPTIONS:
   --help, -h     show help
   --version, -v  print the version

C:\Users\chogan\Downloads\vic>

Lets see if I can at least validate against my vSphere environment by trying to list any existing VCHs:

C:\Users\chogan\Downloads\vic>vic-machine-windows.exe ls --target vcsa-06.rainpole.com \
--user administrator@vsphere.local --password xxx

Apr 28 2017 12:38:04.402+01:00 INFO  ### Listing VCHs ####
Apr 28 2017 12:38:04.491+01:00 ERROR Failed to verify certificate for target=vcsa-06.rainpole.com \
(thumbprint=4B:A0:D1:84:92:DD:BD:38:07:E3:38:01:4B:0C:F1:14:E7:5D:5B:00)
Apr 28 2017 12:38:04.494+01:00 ERROR List cannot continue - failed to create validator: x509: \
certificate signed by unknown authority
Apr 28 2017 12:38:04.495+01:00 ERROR --------------------
Apr 28 2017 12:38:04.496+01:00 ERROR vic-machine-windows.exe ls failed: list failed

Well, that did not work. I need to include the thumbprint of the vCenter server in the command:

C:\Users\chogan\Downloads\vic>vic-machine-windows.exe ls --target vcsa-06.rainpole.com \
--user administrator@vsphere.local --password xxx --thumbprint \
4B:A0:D1:84:92:DD:BD:38:07:E3:38:01:4B:0C:F1:14:E7:5D:5B:00

Apr 28 2017 12:39:37.898+01:00 INFO  ### Listing VCHs ####
Apr 28 2017 12:39:38.109+01:00 INFO  Validating target

ID        PATH        NAME        VERSION        UPGRADE STATUS
Now the command is working, but I don’t have any existing VCHs. Let’s create one. There are a lot of options included in this command since we are providing not only VCH details, but also network details for the “containers as VMs” that we will deploy later on:
C:\Users\chogan\Downloads\vic>vic-machine-windows.exe create --target vcsa-06.rainpole.com \
--user administrator@vsphere.local --password xxxx --name corVCH01 \
--public-network "VM Network" --bridge-network BridgeDPG --bridge-network-range "192.168.100/16" \
--dns-server 10.27.51.252 --tls-cname=*.rainpole.com --no-tlsverify --compute-resource Cluster \
--thumbprint 4B:A0:D1:84:92:DD:BD:38:07:E3:38:01:4B:0C:F1:14:E7:5D:5B:00
Apr 28 2017 12:59:31.479+01:00 INFO  ### Installing VCH ####
Apr 28 2017 12:59:31.481+01:00 WARN  Using administrative user for VCH operation - use --ops-user to improve security (see -x for advanced help)
Apr 28 2017 12:59:31.483+01:00 ERROR Common Name must be provided when generating certificates for client authentication:
Apr 28 2017 12:59:31.485+01:00 INFO    --tls-cname=<FQDN or static IP> # for the appliance VM
Apr 28 2017 12:59:31.487+01:00 INFO    --tls-cname=<*.yourdomain.com>  # if DNS has entries in that form for DHCP addresses (less secure)
Apr 28 2017 12:59:31.492+01:00 INFO    --no-tlsverify                  # disables client authentication (anyone can connect to the VCH)
Apr 28 2017 12:59:31.493+01:00 INFO    --no-tls                        # disables TLS entirely
Apr 28 2017 12:59:31.494+01:00 INFO
Apr 28 2017 12:59:31.496+01:00 ERROR Create cannot continue: unable to generate certificates
Apr 28 2017 12:59:31.498+01:00 ERROR --------------------
Apr 28 2017 12:59:31.499+01:00 ERROR vic-machine-windows.exe create failed: provide Common Name for server certificate
Unfortunately, it seems it doesn’t like the TLS part of the command. It appears that this is a known issue. It seems that the TLS part of the command should be one of the first options specified in the command line. Let’s move it before some of the other arguments in the command:
C:\Users\chogan\Downloads\vic>vic-machine-windows.exe create --target vcsa-06.rainpole.com \
--user "administrator@vsphere.local" --password "xxx" --no-tlsverify --name corVCH01 \
--public-network "VM Network" --bridge-network BridgeDPG --bridge-network-range "192.168.100.0/16" \
--dns-server 10.27.51.252 --compute-resource Cluster \
--thumbprint 4B:A0:D1:84:92:DD:BD:38:07:E3:38:01:4B:0C:F1:14:E7:5D:5B:00
Apr 28 2017 13:05:45.623+01:00 INFO  ### Installing VCH ####
Apr 28 2017 13:05:45.625+01:00 WARN  Using administrative user for VCH operation - use --ops-user to improve security (see -x for advanced help)
Apr 28 2017 13:05:45.627+01:00 INFO  Generating self-signed certificate/key pair - private key in corVCH01\server-key.pem
Apr 28 2017 13:05:46.162+01:00 WARN  Configuring without TLS verify - certificate-based authentication disabled
Apr 28 2017 13:05:46.336+01:00 INFO  Validating supplied configuration
Apr 28 2017 13:05:46.432+01:00 INFO  Suggesting valid values for --image-store based on "*"
Apr 28 2017 13:05:46.438+01:00 INFO  Suggested values for --image-store:
Apr 28 2017 13:05:46.439+01:00 INFO    "vsanDatastore (1)"
Apr 28 2017 13:05:46.441+01:00 INFO    "isilion-nfs-01"
Apr 28 2017 13:05:46.463+01:00 INFO  vDS configuration OK on "BridgeDPG"
Apr 28 2017 13:05:46.464+01:00 ERROR Firewall check SKIPPED
Apr 28 2017 13:05:46.466+01:00 ERROR   datastore not set
Apr 28 2017 13:05:46.467+01:00 ERROR License check SKIPPED
Apr 28 2017 13:05:46.468+01:00 ERROR   datastore not set
Apr 28 2017 13:05:46.469+01:00 ERROR DRS check SKIPPED
Apr 28 2017 13:05:46.471+01:00 ERROR   datastore not set
Apr 28 2017 13:05:46.472+01:00 ERROR Compatibility check SKIPPED
Apr 28 2017 13:05:46.473+01:00 ERROR   datastore not set
Apr 28 2017 13:05:46.475+01:00 ERROR --------------------
Apr 28 2017 13:05:46.476+01:00 ERROR datastore empty
Apr 28 2017 13:05:46.477+01:00 ERROR Specified bridge network range is not large enough for the default bridge network size. --bridge-network-range must be /16 or larger network.
Apr 28 2017 13:05:46.479+01:00 ERROR Firewall check SKIPPED
Apr 28 2017 13:05:46.480+01:00 ERROR License check SKIPPED
Apr 28 2017 13:05:46.482+01:00 ERROR DRS check SKIPPED
Apr 28 2017 13:05:46.484+01:00 ERROR Compatibility check SKIPPED
Apr 28 2017 13:05:46.488+01:00 ERROR Create cannot continue: configuration validation failed
Apr 28 2017 13:05:46.490+01:00 ERROR --------------------
Apr 28 2017 13:05:46.491+01:00 ERROR vic-machine-windows.exe create failed: validation of configuration failed
The TLS issue now seems to be addressed, but it appears I omitted a required field, –image-store. This is where the container images will be stored, and it should be set to one of the available datastores in the vSphere environment. The output is even providing some recommended options, either vSAN or an NFS datastore. These are available to all hosts in the cluster.
C:\Users\chogan\Downloads\vic>vic-machine-windows.exe create --target vcsa-06.rainpole.com \
--user "administrator@vsphere.local" --password "xxx" --no-tlsverify --name corVCH01 \
--image-store isilion-nfs-01 --public-network "VM Network" --bridge-network BridgeDPG \
--bridge-network-range "192.168.100.0/16" --dns-server 10.27.51.252 --compute-resource Cluster \
--thumbprint 4B:A0:D1:84:92:DD:BD:38:07:E3:38:01:4B:0C:F1:14:E7:5D:5B:00
Apr 28 2017 13:09:17.732+01:00 INFO  ### Installing VCH ####
Apr 28 2017 13:09:17.736+01:00 WARN  Using administrative user for VCH operation - use --ops-user to improve security (see -x for advanced help)
Apr 28 2017 13:09:17.739+01:00 INFO  Loaded server certificate corVCH01\server-cert.pem
Apr 28 2017 13:09:17.741+01:00 WARN  Configuring without TLS verify - certificate-based authentication disabled
Apr 28 2017 13:09:17.914+01:00 INFO  Validating supplied configuration
Apr 28 2017 13:09:18.027+01:00 INFO  vDS configuration OK on "BridgeDPG"
Apr 28 2017 13:09:18.053+01:00 INFO  Firewall status: DISABLED on "/DC/host/Cluster/esxi-dell-i.rainpole.com"
Apr 28 2017 13:09:18.078+01:00 INFO  Firewall status: ENABLED on "/DC/host/Cluster/esxi-dell-j.rainpole.com"
Apr 28 2017 13:09:18.101+01:00 INFO  Firewall status: ENABLED on "/DC/host/Cluster/esxi-dell-k.rainpole.com"
Apr 28 2017 13:09:18.130+01:00 INFO  Firewall status: ENABLED on "/DC/host/Cluster/esxi-dell-l.rainpole.com"
Apr 28 2017 13:09:18.142+01:00 INFO  Firewall configuration OK on hosts:
Apr 28 2017 13:09:18.144+01:00 INFO     "/DC/host/Cluster/esxi-dell-i.rainpole.com"
Apr 28 2017 13:09:18.145+01:00 INFO     "/DC/host/Cluster/esxi-dell-j.rainpole.com"
Apr 28 2017 13:09:18.147+01:00 INFO     "/DC/host/Cluster/esxi-dell-k.rainpole.com"
Apr 28 2017 13:09:18.149+01:00 INFO     "/DC/host/Cluster/esxi-dell-l.rainpole.com"
Apr 28 2017 13:09:18.188+01:00 INFO  License check OK on hosts:
Apr 28 2017 13:09:18.190+01:00 INFO    "/DC/host/Cluster/esxi-dell-i.rainpole.com"
Apr 28 2017 13:09:18.191+01:00 INFO    "/DC/host/Cluster/esxi-dell-j.rainpole.com"
Apr 28 2017 13:09:18.192+01:00 INFO    "/DC/host/Cluster/esxi-dell-k.rainpole.com"
Apr 28 2017 13:09:18.194+01:00 INFO    "/DC/host/Cluster/esxi-dell-l.rainpole.com"
Apr 28 2017 13:09:18.205+01:00 INFO  DRS check OK on:
Apr 28 2017 13:09:18.206+01:00 INFO    "/DC/host/Cluster"
Apr 28 2017 13:09:18.234+01:00 INFO
Apr 28 2017 13:09:18.346+01:00 INFO  Creating virtual app "corVCH01"
Apr 28 2017 13:09:18.369+01:00 INFO  Creating appliance on target
Apr 28 2017 13:09:18.374+01:00 INFO  Network role "client" is sharing NIC with "public"
Apr 28 2017 13:09:18.375+01:00 INFO  Network role "management" is sharing NIC with "public"
Apr 28 2017 13:09:19.301+01:00 INFO  Uploading images for container
Apr 28 2017 13:09:19.307+01:00 INFO     "bootstrap.iso"
Apr 28 2017 13:09:19.309+01:00 INFO     "appliance.iso"
Apr 28 2017 13:09:25.346+01:00 INFO  Waiting for IP information
Apr 28 2017 13:09:42.869+01:00 INFO  Waiting for major appliance components to launch
Apr 28 2017 13:09:42.918+01:00 INFO  Obtained IP address for client interface: "10.27.51.38"
Apr 28 2017 13:09:42.921+01:00 INFO  Checking VCH connectivity with vSphere target
Apr 28 2017 13:10:42.946+01:00 WARN  Could not run VCH vSphere API target check due to ServerFaultCode: A general system error occurred: vix error codes = (3016, 0).
but the VCH may still function normally
Apr 28 2017 13:12:25.346+01:00 ERROR Connection failed with error: i/o timeout
Apr 28 2017 13:12:25.346+01:00 INFO  Docker API endpoint check failed: failed to connect to https://10.27.51.38:2376/info: i/o timeout
Apr 28 2017 13:12:25.347+01:00 INFO  Collecting e1ea92eb-ac80-4b33-88cc-831b35fd8bab vpxd.log
Apr 28 2017 13:12:25.418+01:00 INFO     API may be slow to start - try to connect to API after a few minutes:
Apr 28 2017 13:12:25.428+01:00 INFO             Run command: docker -H 10.27.51.38:2376 --tls info
Apr 28 2017 13:12:25.429+01:00 INFO             If command succeeds, VCH is started. If command fails, VCH failed to install - see documentation for troubleshooting.
Apr 28 2017 13:12:25.431+01:00 ERROR --------------------
Apr 28 2017 13:12:25.431+01:00 ERROR vic-machine-windows.exe create failed: Creating VCH exceeded time limit of 3m0s. Please increase the timeout using --timeout to accommodate for a busy vSphere target
I traced this to an issue with DNS. It seems this issue can arise if the VCH cannot resolve some of the vSphere entities (vCenter Server, ESXi). Since I was using DHCP for my VCH, I did not need to specify an IP address, subnet mask or DNS server. However this command includes a DNS server entry. So I simply removed the DNS reference, and ran the command without it (I also include an option to store any volumes created in a particular location highlighted with –volume-store):
C:\Users\chogan\Downloads\vic>vic-machine-windows.exe create --name corVCH01 --compute-resource Cluster \
--target vcsa-06.rainpole.com --user administrator@vsphere.local --password xxx \
--thumbprint 4B:A0:D1:84:92:DD:BD:38:07:E3:38:01:4B:0C:F1:14:E7:5D:5B:00 --no-tlsverify \
--image-store isilion-nfs-01 --public-network "VM Network" --bridge-network BridgeDPG \
--bridge-network-range "192.168.100.0/16" --volume-store "isilion-nfs-01/VIC:corvols"

Apr 28 2017 13:46:40.671+01:00 INFO  ### Installing VCH ####
Apr 28 2017 13:46:40.672+01:00 WARN  Using administrative user for VCH operation - use --ops-user to improve security (see -x for advanced help)
Apr 28 2017 13:46:40.697+01:00 INFO  Loaded server certificate corVCH01\server-cert.pem
Apr 28 2017 13:46:40.699+01:00 WARN  Configuring without TLS verify - certificate-based authentication disabled
Apr 28 2017 13:46:40.873+01:00 INFO  Validating supplied configuration
Apr 28 2017 13:46:40.991+01:00 INFO  vDS configuration OK on "BridgeDPG"
Apr 28 2017 13:46:41.018+01:00 INFO  Firewall status: DISABLED on "/DC/host/Cluster/esxi-dell-i.rainpole.com"
Apr 28 2017 13:46:41.044+01:00 INFO  Firewall status: ENABLED on "/DC/host/Cluster/esxi-dell-j.rainpole.com"
Apr 28 2017 13:46:41.071+01:00 INFO  Firewall status: ENABLED on "/DC/host/Cluster/esxi-dell-k.rainpole.com"
Apr 28 2017 13:46:41.097+01:00 INFO  Firewall status: ENABLED on "/DC/host/Cluster/esxi-dell-l.rainpole.com"
Apr 28 2017 13:46:41.109+01:00 INFO  Firewall configuration OK on hosts:
Apr 28 2017 13:46:41.111+01:00 INFO     "/DC/host/Cluster/esxi-dell-i.rainpole.com"
Apr 28 2017 13:46:41.112+01:00 INFO     "/DC/host/Cluster/esxi-dell-j.rainpole.com"
Apr 28 2017 13:46:41.113+01:00 INFO     "/DC/host/Cluster/esxi-dell-k.rainpole.com"
Apr 28 2017 13:46:41.115+01:00 INFO     "/DC/host/Cluster/esxi-dell-l.rainpole.com"
Apr 28 2017 13:46:41.331+01:00 INFO  License check OK on hosts:
Apr 28 2017 13:46:41.333+01:00 INFO    "/DC/host/Cluster/esxi-dell-i.rainpole.com"
Apr 28 2017 13:46:41.334+01:00 INFO    "/DC/host/Cluster/esxi-dell-j.rainpole.com"
Apr 28 2017 13:46:41.335+01:00 INFO    "/DC/host/Cluster/esxi-dell-k.rainpole.com"
Apr 28 2017 13:46:41.337+01:00 INFO    "/DC/host/Cluster/esxi-dell-l.rainpole.com"
Apr 28 2017 13:46:41.347+01:00 INFO  DRS check OK on:
Apr 28 2017 13:46:41.350+01:00 INFO    "/DC/host/Cluster"
Apr 28 2017 13:46:41.384+01:00 INFO
Apr 28 2017 13:46:41.493+01:00 INFO  Creating virtual app "corVCH01"
Apr 28 2017 13:46:41.521+01:00 INFO  Creating directory [isilion-nfs-01] VIC
Apr 28 2017 13:46:41.527+01:00 INFO  Datastore path is [isilion-nfs-01] VIC
Apr 28 2017 13:46:41.528+01:00 INFO  Creating appliance on target
Apr 28 2017 13:46:41.533+01:00 INFO  Network role "client" is sharing NIC with "public"
Apr 28 2017 13:46:41.537+01:00 INFO  Network role "management" is sharing NIC with "public"
Apr 28 2017 13:46:42.515+01:00 INFO  Uploading images for container
Apr 28 2017 13:46:42.517+01:00 INFO     "bootstrap.iso"
Apr 28 2017 13:46:42.518+01:00 INFO     "appliance.iso"
Apr 28 2017 13:46:48.425+01:00 INFO  Waiting for IP information
Apr 28 2017 13:47:03.785+01:00 INFO  Waiting for major appliance components to launch
Apr 28 2017 13:47:03.860+01:00 INFO  Obtained IP address for client interface: "10.27.51.41"
Apr 28 2017 13:47:03.862+01:00 INFO  Checking VCH connectivity with vSphere target
Apr 28 2017 13:47:03.935+01:00 INFO  vSphere API Test: https://vcsa-06.rainpole.com vSphere API target responds as expected
Apr 28 2017 13:47:08.483+01:00 INFO  Initialization of appliance successful
Apr 28 2017 13:47:08.484+01:00 INFO
Apr 28 2017 13:47:08.485+01:00 INFO  VCH Admin Portal:
Apr 28 2017 13:47:08.486+01:00 INFO  https://10.27.51.41:2378
Apr 28 2017 13:47:08.487+01:00 INFO
Apr 28 2017 13:47:08.489+01:00 INFO  Published ports can be reached at:
Apr 28 2017 13:47:08.490+01:00 INFO  10.27.51.41
Apr 28 2017 13:47:08.491+01:00 INFO
Apr 28 2017 13:47:08.492+01:00 INFO  Docker environment variables:
Apr 28 2017 13:47:08.493+01:00 INFO  DOCKER_HOST=10.27.51.41:2376
Apr 28 2017 13:47:08.499+01:00 INFO
Apr 28 2017 13:47:08.500+01:00 INFO  Environment saved in corVCH01/corVCH01.env
Apr 28 2017 13:47:08.502+01:00 INFO
Apr 28 2017 13:47:08.503+01:00 INFO  Connect to docker:
Apr 28 2017 13:47:08.504+01:00 INFO  docker -H 10.27.51.41:2376 --tls info
Apr 28 2017 13:47:08.506+01:00 INFO  Installer completed successfully
Success! I now have my docker endpoint, and I can provide this to my developers for the creations of “containers in VMs”. Let’s see if it works with a quick check/test:
C:\Users\chogan\Downloads\vic>docker -H 10.27.51.41:2376 --tls info
Containers: 0
Running: 0
Paused: 0
Stopped: 0
Images: 0
Server Version: v1.1.0-9852-e974a51
Storage Driver: vSphere Integrated Containers v1.1.0-9852-e974a51 Backend Engine
VolumeStores: corvols
vSphere Integrated Containers v1.1.0-9852-e974a51 Backend Engine: RUNNING
VCH CPU limit: 155936 MHz
VCH memory limit: 423.9 GiB
VCH CPU usage: 0 MHz
VCH memory usage: 5.028 GiB
VMware Product: VMware vCenter Server
VMware OS: linux-x64
VMware OS version: 6.5.0
Plugins:
Volume: vsphere
Network: bridge
Swarm: inactive
Operating System: linux-x64
OSType: linux-x64
Architecture: x86_64
CPUs: 155936
Total Memory: 423.9GiB
ID: vSphere Integrated Containers
Docker Root Dir:
Debug Mode (client): false
Debug Mode (server): false
Registry: registry-1.docker.io
Experimental: false
Live Restore Enabled: false

C:\Users\chogan\Downloads\vic>
 That all seems good. Let’s run my first container:
C:\Users\chogan\Downloads\vic>docker -H 10.27.51.41:2376 --tls run -it busybox
Unable to find image 'busybox:latest' locally
Pulling from library/busybox
7520415ce762: Pull complete
a3ed95caeb02: Pull complete
Digest: sha256:32f093055929dbc23dec4d03e09dfe971f5973a9ca5cf059cbfb644c206aa83f
Status: Downloaded newer image for library/busybox:latest
/ #
 Excellent. Now a few other things to point out with VIC 1.1. You might remember features like Admiral and Harbor which I discussed in the past. These are now completely embedded. Simply point your browser at the IP Address:8282 of the VIC OVA that you previously deployed, and you will get Admiral. This can be used for the orchestrated deployment of “Container as VM” templates. These templates can be retrieved from either docker hub or your own local registry for VIC, i.e. Harbor.
And to access harbor, simply click on the “Registry” field at the top of the navigation screen:
You can look back on my previous post on how to use admiral and harbor for orchestrated deployment and registry respectively. Let’s finish this post with one last command, which is the command I started with to list VCHs.
C:\Users\chogan\Downloads\vic>vic-machine-windows.exe ls --target vcsa-06.rainpole.com \
--user administrator@vsphere.local --password "xxx" \
--thumbprint 4B:A0:D1:84:92:DD:BD:38:07:E3:38:01:4B:0C:F1:14:E7:5D:5B:00
May  2 2017 11:13:09.002+01:00 INFO  ### Listing VCHs ####
May  2 2017 11:13:09.178+01:00 INFO  Validating target

ID           PATH                              NAME            VERSION                    UPGRADE STATUS
vm-36        /DC/host/Cluster/Resources        corVCH01        v1.1.0-9852-e974a51        Up to date

C:\Users\chogan\Downloads\vic>
Now my VCH is listed.
Again, I’m only touching the surface on what VIC can do for you. If you want to give your developers the ability to use containers, but wish to maintain visibility into container resources, networking, storage, CPU, memory, etc, then maybe VIC is what you need. I’ll try to some more work with VIC 1.1 over the coming weeks. Hopefully this is enough to get you started.

The post Getting started with VIC v1.1 appeared first on CormacHogan.com.

x509 error logging into harbor registry via VIC VCH

$
0
0

In my last post, I showed some of the new command line functionality associated with deploying out a new Virtual Container Host (VCH) with vSphere Integrated Containers (VIC). I also highlighted how VIC now includes both Admiral for container orchestration via templates and the harbor registry is used for storing docker images. Harbor hosts docker images and Admiral hosts templates. An Admiral template describes how docker images hosted on Harbor gets instantiated (Kudos again to Massimo for this explanation). In my last post, I showed how I finally managed to deploy my VCH. Now the idea was that I should be able to login to my harbor registry from my Windows docker client via the docker API endpoint provided by my VCH. However, on attempting this, I got the following error:

C:\Users\chogan\Downloads\vic> docker -H :2376 –tls login
Username: admin
Password:
Error response from daemon: Head https://<Harbor>:443/v2/: x509: certificate signed by unknown authority

It took a bit of time, and some help, but this is what we found to be the issue, and this is how I resolved it.

The root cause is that I was using a self-signed cert on Harbor and failed to let VCH trust that cert. So how do I make VCH trust the self-signed cert on Harbor? I found the answer in the Harbor registry documentation: we deploy a VCH and specify our [Harbor] CA cert via a –registry-ca parameter in vic-machine. Ah, so what I need to do is include this option in my vic-machine command and make sure the VCH trusts Harbor. Fine. So where do I get the Harbor CA cert? That is easy. Login to Harbor (aka VIC Registry), and under admin, there is an option to download the CA cert/Root cert:

This downloads a file called ca.crt. Once downloaded, you may now include the –registry-ca parameter in the vic-machine command used for building the VCH, and point it to the root certificate:

C:\Users\chogan\Downloads\vic> vic-machine-windows.exe create --name corVCH01 \
--compute-resource Cluster --target vcsa-06.rainpole.com \
--user administrator@vsphere.local --password XXX \
--thumbprint 4B:A0:D1:84:92:DD:BD:38:07:E3:38:01:4B:0C:F1:14:E7:5D:5B:00 \
--no-tlsverify --image-store isilion-nfs-01 --public-network "VM Network" \
--bridge-network BridgeDPG --bridge-network-range "192.168.100.0/16" \
--volume-store "isilion-nfs-01/VIC:corvols" --registry-ca="..\ca.crt"

May  4 2017 19:15:48.122+01:00 INFO  ### Installing VCH ####
May  4 2017 19:15:48.168+01:00 WARN  Using administrative user for VCH operation - use --ops-user to improve security (see -x for advanced help)
May  4 2017 19:15:48.175+01:00 INFO  Loaded server certificate corVCH01\server-cert.pem
May  4 2017 19:15:48.177+01:00 WARN  Configuring without TLS verify - certificate-based authentication disabled
May  4 2017 19:15:48.180+01:00 INFO  Loaded registry CA from ..\ca.crt
May  4 2017 19:15:48.413+01:00 INFO  Validating supplied configuration
May  4 2017 19:15:48.555+01:00 INFO  vDS configuration OK on "BridgeDPG"
May  4 2017 19:15:48.591+01:00 INFO  Firewall status: DISABLED on "/DC/host/Cluster/esxi-dell-i.rainpole.com"
May  4 2017 19:15:48.629+01:00 INFO  Firewall status: ENABLED on "/DC/host/Cluster/esxi-dell-j.rainpole.com"
May  4 2017 19:15:48.656+01:00 INFO  Firewall status: ENABLED on "/DC/host/Cluster/esxi-dell-k.rainpole.com"
May  4 2017 19:15:48.691+01:00 INFO  Firewall status: ENABLED on "/DC/host/Cluster/esxi-dell-l.rainpole.com"
May  4 2017 19:15:48.703+01:00 INFO  Firewall configuration OK on hosts:
May  4 2017 19:15:48.705+01:00 INFO     "/DC/host/Cluster/esxi-dell-i.rainpole.com"
May  4 2017 19:15:48.706+01:00 INFO     "/DC/host/Cluster/esxi-dell-j.rainpole.com"
May  4 2017 19:15:48.708+01:00 INFO     "/DC/host/Cluster/esxi-dell-k.rainpole.com"
May  4 2017 19:15:48.709+01:00 INFO     "/DC/host/Cluster/esxi-dell-l.rainpole.com"
May  4 2017 19:15:49.095+01:00 INFO  License check OK on hosts:
May  4 2017 19:15:49.096+01:00 INFO    "/DC/host/Cluster/esxi-dell-i.rainpole.com"
May  4 2017 19:15:49.099+01:00 INFO    "/DC/host/Cluster/esxi-dell-j.rainpole.com"
May  4 2017 19:15:49.100+01:00 INFO    "/DC/host/Cluster/esxi-dell-k.rainpole.com"
May  4 2017 19:15:49.102+01:00 INFO    "/DC/host/Cluster/esxi-dell-l.rainpole.com"
May  4 2017 19:15:49.118+01:00 INFO  DRS check OK on:
May  4 2017 19:15:49.121+01:00 INFO    "/DC/host/Cluster"
May  4 2017 19:15:49.160+01:00 INFO
May  4 2017 19:15:49.277+01:00 INFO  Creating virtual app "corVCH01"
May  4 2017 19:15:49.314+01:00 INFO  Creating directory [isilion-nfs-01] VIC
May  4 2017 19:15:49.326+01:00 INFO  Datastore path is [isilion-nfs-01] VIC
May  4 2017 19:15:49.329+01:00 INFO  Creating appliance on target
May  4 2017 19:15:49.342+01:00 INFO  Network role "management" is sharing NIC with "client"
May  4 2017 19:15:49.358+01:00 INFO  Network role "public" is sharing NIC with "client"
May  4 2017 19:15:50.221+01:00 INFO  Uploading images for container
May  4 2017 19:15:50.223+01:00 INFO     "bootstrap.iso"
May  4 2017 19:15:50.223+01:00 INFO     "appliance.iso"
May  4 2017 19:15:56.276+01:00 INFO  Waiting for IP information
May  4 2017 19:16:12.619+01:00 INFO  Waiting for major appliance components to launch
May  4 2017 19:16:12.675+01:00 INFO  Obtained IP address for client interface: "10.27.51.114"
May  4 2017 19:16:12.677+01:00 INFO  Checking VCH connectivity with vSphere target
May  4 2017 19:16:12.798+01:00 INFO  vSphere API Test: https://vcsa-06.rainpole.com vSphere API target responds as expected
May  4 2017 19:16:14.850+01:00 INFO  Initialization of appliance successful
May  4 2017 19:16:14.852+01:00 INFO
May  4 2017 19:16:14.855+01:00 INFO  VCH Admin Portal:
May  4 2017 19:16:14.858+01:00 INFO  https://10.27.51.114:2378
May  4 2017 19:16:14.860+01:00 INFO
May  4 2017 19:16:14.862+01:00 INFO  Published ports can be reached at:
May  4 2017 19:16:14.865+01:00 INFO  10.27.51.114
May  4 2017 19:16:14.866+01:00 INFO
May  4 2017 19:16:14.868+01:00 INFO  Docker environment variables:
May  4 2017 19:16:14.869+01:00 INFO  DOCKER_HOST=10.27.51.114:2376
May  4 2017 19:16:14.876+01:00 INFO
May  4 2017 19:16:14.878+01:00 INFO  Environment saved in corVCH01/corVCH01.env
May  4 2017 19:16:14.880+01:00 INFO
May  4 2017 19:16:14.881+01:00 INFO  Connect to docker:
May  4 2017 19:16:14.883+01:00 INFO  docker -H 10.27.51.114:2376 --tls info
May  4 2017 19:16:14.884+01:00 INFO  Installer completed successfully

This appears to have deployed successfully, and we now have the docker API endpoint. Let’s now see if this VCH now trust Harbor, and if we can log into the Harbor registry using that docker API endpoint:

C:\Users\chogan\Downloads\vic> docker -H 10.27.51.114:2376 --tls login 10.27.51.37 -u admin
Password:
Login Succeeded

C:\Users\chogan\Downloads\vic>

And to logout from the registry:

C:\Users\chogan\Downloads\vic>docker -H 10.27.51.114:2376 --tls logout 10.27.51.37
Removing login credentials for 10.27.51.37

Success! For steps on how to push and pull docker images to the Harbor registry, here is an earlier post on how to do just that.

The post x509 error logging into harbor registry via VIC VCH appeared first on CormacHogan.com.

Revisiting persistent storage with vSphere Integrated Containers

$
0
0

I’ve been getting back into doing a bit of testing with vSphere Integrated Containers 1.1 (VIC for short) in my lab. One of the things that I am very interested in revisiting is how to do persistence of data with VIC and “Containers as VMs”. I did some work on this in the past, but a lot has changed since I last looked at it (which was VIC v0.4.0). In this post, we’ll download a nginx web server image and start it up. We’ll look at how you can make changes to the web server while it is running, but how these are lost when the container is stopped. We will then create a volume, move the nginx web server files to our volume, and then restart the container, specifying our volume as the source for the web server files.

Let’s begin with a straight forward nginx deployment. In this example, I am going to launch it in interactive mode, and drop into the bash shell so we can look around. If you want to know more about getting started with VIC v1.1 and deploying the Virtual Container Host (VCH) with the docker endpoint, check out this post here. At this point, my VCH is already deployed, so I’m just going to continue with deploying the nginx container:

E:\vic> docker -H 10.27.51.39:2376 --tls run -it -p 80:80 nginx /bin/bash
Unable to find image 'nginx:latest' locally
Pulling from library/nginx
36a46ebd5019: Pull complete
a3ed95caeb02: Pull complete
57168433389f: Pull complete
332ec8285c50: Pull complete
Digest: sha256:c15f1fb8fd55c60c72f940a76da76a5fccce2fefa0dd9b17967b9e40b0355316
Status: Downloaded newer image for library/nginx:latest

root@92ff66b88fdf:/#

OK – now we are in the container. At this point the web server is not running.  We can start the web server as follows:

root@92ff66b88fdf:/# service nginx start
Now if I point a browser to the IP address of the VCH (the mapping is container port 80 to VCH port 80), I will connect to the nginx landing page:
I will also start to see the following messages in the container, which also show the mapping of the nginx container network/port to the VCH network/port:
192.168.0.1 - - [12/May/2017:11:11:40 +0000] "GET / HTTP/1.1" 200 612 "-" "Mozilla/5.0 (Windows NT 10.0; WOW64; rv:53.0) Gecko/20100101 Firefox/53.0" "-"
2017/05/12 11:11:40 [error] 230#230: *1 open() "/usr/share/nginx/html/favicon.ico" failed (2: No such file or directory), client: 192.168.0.1, server: localhost, request: "GET /favicon.ico HTTP/1.1", host: "10.27.51.39"
192.168.0.1 - - [12/May/2017:11:11:40 +0000] "GET /favicon.ico HTTP/1.1" 404 169 "-" "Mozilla/5.0 (Windows NT 10.0; WOW64; rv:53.0) Gecko/20100101 Firefox/53.0" "-"
The next step is to make some changes to the nginx landing page. These can be found under /usr/share/nginx/html/.
root@92ff66b88fdf:/# service nginx stop
root@92ff66b88fdf:/# cd /usr/share/nginx/html/
root@92ff66b88fdf:/usr/share/nginx/html# ls
50x.html  index.html
Let’s make some changes to the index.html file. Instead of the “Welcome to nginx!”, let’s make it more personal. I’ll make the changes to a new file, and then overwrite the original index.html landing page.
root@92ff66b88fdf:/usr/share/nginx/html# sed -e 's/Welcome to nginx/Welcome to Cormacs nginx/' \
index.html >> new_index.html
root@92ff66b88fdf:/usr/share/nginx/html# mv new_index.html index.html
root@92ff66b88fdf:/usr/share/nginx/html# service nginx start
Now when I connect my browser to the VCH, I see the following (apologies for the poor grammar):
But here is the point, once I exit this container, my changes are lost. If I stop and start this application, I go back to the default landing page for nginx. So how can I used persistent volumes to make this change permanent?
The answer is to create a docker volume, mount it to the nginx container and copy the landing files with the necessary changes to this mount point. On every subsequent nginx mount, we can point the nginx web server to use this new volume for its landing files. The first step is to create the volume, and then start the nginx web server, mount the volume to some other directory within the container (in this example /usr/share/nginx2) and finally copy the files over. Regarding the volume create command, the driver is called vSphere, and to specify a location and name, you need to include the –opt option. The volume store corvols also needs to be specified when the VCH is created (see the getting start post referenced earlier). The volume itself is called corvol1. All of these commands are run using a docker client, pointing to the VCH as shown here:
E:\vic> docker -H 10.27.51.39:2376 --tls volume create -d vsphere --opt VolumeStore=corvols \
--name corvol1
corvol1

E:\vic> docker -H 10.27.51.39:2376 --tls run -v corvol1:/usr/share/nginx2/ -it -p 80:80 \
nginx /bin/bash
root@bdf1271cdf35:/#

root@bdf1271cdf35:/# df
Filesystem                          1K-blocks   Used Available Use% Mounted on
devtmpfs                               994524      0    994524   0% /dev
tmpfs                                 1026528      0   1026528   0% /dev/shm
tmpfs                                 1026528      0   1026528   0% /sys/fs/cgroup
/dev/sda                              7743120 149716   7177020   3% /
tmpfs                                   65536   8316     57220  13% /.tether
/dev/disk/by-label/759d5820c83641f7    999320   1284    929224   1% /usr/share/nginx2
At this point, we have started the nginx container, and mounted a new volume to /usr/share/nginx2. Now we can copy over the nginx landing files to our mounted volume, and make any changes needed to these files to personalize them. Once done, we can exit the container.
root@bdf1271cdf35:# cd /usr/share/nginx
root@bdf1271cdf35:/usr/share/nginx# cp -r html/ ../nginx2
root@bdf1271cdf35:/usr/share/nginx# cd ..
root@bdf1271cdf35:/usr/share# ls nginx2/html/
50x.html  index.html
root@bdf1271cdf35:/usr/share# cd nginx2/html
root@bdf1271cdf35:/usr/share/nginx2/html# sed -e 's/Welcome to nginx/Welcome to Cormacs nginx/' \
index.html >> new_index.html
root@bdf1271cdf35:/usr/share/nginx2/html# mv new_index.html index.html
root@bdf1271cdf35:/usr/share/nginx2/html# cd
root@bdf1271cdf35:~# exit
Let’s start a new container with the nginx image once again. Without the volume, we simply end up with the default nginx landing page as before:
E:\vic> docker -H 10.27.51.39:2376 --tls run -d -p 80:80 nginx
6696d5aed9b92022cde8becd41170346573c581f493f246014dfe925144e8316
However if we launch using our new volume, which has persisted our customized landing pages, and mount that to where nginx expects to find it landing pages (/usr/share/nginx), we launch nginx with the modified landing page:
E:\vic> docker -H 10.27.51.39:2376 --tls run -v corvol1:/usr/share/nginx/ -d -p 80:80 nginx
d8c49c1846f2566270fe0a78006adc58c5a9caa3dd3faf1b4bde3349cf6e9210
And now we have the new modified landing pages rather than the default ones from nginx. That’s basically it. Hopefully this example will give you a pretty good idea on how you can used persistent volumes with VIC v1.1.

The post Revisiting persistent storage with vSphere Integrated Containers appeared first on CormacHogan.com.

Image management with VIC and Harbor

$
0
0

In this post, I wanted to play a little more with our registry product (Harbor) and how it integrated with vSphere Integrated Containers (VIC). The workflow that I am going to show you in this post is using Docker on MAC to pull an image from the docker hub, do whatever I need to do with that image/application, and then push out the updated version to my private Harbor registry. From my Harbor registry I am then going to pull that image down and run it on my production VCH (Virtual Container Host). The VCH provides my docker API endpoint in VIC.

I’ll begin with getting my MAC setup with Docker. Now I already have Docker installed in my MAC – Docker Community Edition version 17.03.1-ce-mac12 (17661) – so I first of all verified that I could login to the Harbor registry from my MAC. Immediately I hit this issue:

Cormacs-MacBook-Pro-8:.docker cormachogan$ docker login 10.27.51.37 -u chogan
Password:
Error response from daemon: Get https://10.27.51.37/v1/users/: x509: certificate signed by unknown authority
Cormacs-MacBook-Pro-8:.docker cormachogan$

Ah – the good old x509 certificate issue. You might remember that I hit the same thing when try to login to Harbor via my VCH docker endpoint. I wrote about it here, and the solution was to include the CA cert from Harbor when I created my VCH. So how do I deal with it here? This time, the solution is to include the option –insecure-registry when starting the docker daemon on my MAC. However, Docker on MAC have another way of dealing with it. Simply click on the docker icon, select preferences:

Now add the IP address of the insecure registry under the Daemon option (which in my case is Harbor with self-signed certs):

Once Docker had restarted, I tried to see if I could now login to the Harbor registry from my MAC.

Cormacs-MacBook-Pro-8:.docker cormachogan$
Cormacs-MacBook-Pro-8:.docker cormachogan$ docker login 10.27.51.37 -u chogan
Password:
Login Succeeded
Cormacs-MacBook-Pro-8:.docker cormachogan>

Excellent. Now I can push up whatever image that I have been working, and now push it into production on my Virtual Container Host. I’m just going to use a simple nginx image. First I’ll pull it down from docker hub, tag it and then push it out to Harbor. I won’t make any changes, but imagine that you have made some modifications specific to your requirements. I have pushed it to a project called cormac-proj, which is basically the repository that I am going to use for this nginx image on Harbor.

Cormacs-MacBook-Pro-8:.docker cormachogan$ docker pull nginx
Using default tag: latest
latest: Pulling from library/nginx
ff3d52d8f55f: Pull complete
b05436c68d6a: Pull complete
961dd3f5d836: Pull complete
Digest: sha256:12d30ce421ad530494d588f87b2328ddc3cae666e77ea1ae5ac3a6661e52cde6
Status: Downloaded newer image for nginx:latest

Cormacs-MacBook-Pro-8:.docker cormachogan$ docker images
REPOSITORY          TAG                 IMAGE ID            CREATED             SIZE
nginx               latest              3448f27c273f        5 days ago          109 MB
busybox             latest              00f017a8c2a6        2 months ago        1.11 MB
neo4j               latest              794246f48249        7 months ago        377 MB
hello-world         latest              c54a2cc56cbb        10 months ago       1.85 kB

Cormacs-MacBook-Pro-8:.docker cormachogan$ docker tag 3448f27c273f cormac-nginx:latest

Cormacs-MacBook-Pro-8:.docker cormachogan$ docker tag cormac-nginx:latest \
10.27.51.37/cormac-proj/cormac-nginx:latest

Cormacs-MacBook-Pro-8:.docker cormachogan$ docker push 10.27.51.37/cormac-proj/cormac-nginx:latest
The push refers to a repository [10.27.51.37/cormac-proj/cormac-nginx]
08e6bf75740d: Pushed
f12c15fc56f1: Pushed
8781ec54ba04: Pushed
latest: digest: sha256:12d30ce421ad530494d588f87b2328ddc3cae666e77ea1ae5ac3a6661e52cde6 size: 948
Cormacs-MacBook-Pro-8:.docker cormachogan$

Let’s now use the UI of Harbor to see this image in my repository:

Cool – looks like it is there. OK. So I’m now ready to put this into production with VIC. Let’s do that next. I will use a Windows docker client to do my VIC related stuff (as I’m making a distinction between the developer on the MAC and my VIC administrator with a Windows desktop). Of course, you could also use a MAC to manage VIC if you wish – all the necessary vic-machine components are available for that distro too.

E:\vic> docker -H 10.27.51.36:2376 --tls images
REPOSITORY          TAG                 IMAGE ID            CREATED             SIZE

E:\vic> docker -H 10.27.51.36:2376 --tls pull \
10.27.51.37/cormac-proj/cormac-nginx:latest
Pulling from cormac-proj/cormac-nginx
ff3d52d8f55f: Pull complete
a3ed95caeb02: Pull complete
b05436c68d6a: Pull complete
961dd3f5d836: Pull complete
Digest: sha256:12d30ce421ad530494d588f87b2328ddc3cae666e77ea1ae5ac3a6661e52cde6
Status: Downloaded newer image for cormac-proj/cormac-nginx:latest

E:\vic> docker -H 10.27.51.36:2376 --tls run -d -p 80:80 \
10.27.51.37/cormac-proj/cormac-nginx
16c3188f42ab7a30c6d3a04e328c952c08c1a226c39acb20c271ccb1567aad1d

E:\vic> docker -H 10.27.51.36:2376 --tls ps
CONTAINER ID IMAGE COMMAND CREATED STATUS PORTS NAMES
16c3188f42ab 10.27.51.37/cormac-proj/cormac-nginx "nginx -g daemon off;" 
About a minute ago Up 22 seconds 10.27.51.36:80->80/tcp jovial_nightingale

E:\vic>

Looks good – we were able to launch our nginx image that we pulled down from Harbor. The proof is in the pudding as the say, so lets point to port 80 on the VCH (10.27.51.36) and see if we get an nginx landing page (in the docker run command we requested that the container port 80 with nginx map to port 80 on the VCH for access):

Success! One thing I need to highlight is that VIC does not support the use of docker push via the VCH docker API endpoint in VIC. If I try to do a push via the VCH, I will get the following:

E:\vic> docker -H 10.27.51.28:2376 --tls push 10.27.51.37/cormac-nginx:latest
 Error response from daemon: vSphere Integrated Containers does not yet implement image.PushImage

I spoke about this to my good pal Massimo once more, and he explained that right now, the best place to position VIC would be at the end of a manual or automated development process where the app just gets deployed (in production). So like I demonstrated here, the dev/test/QA cycle would be done in environments outside of VCH (such as Docker running on MAC for example) and then moved to VIC for production. However, that is not to say that the VIC team are not looking at this as a future use case. Stay tuned!

The post Image management with VIC and Harbor appeared first on CormacHogan.com.

A closer look at Portworx

$
0
0

Last month I had the opportunity to attend DockerCon17. One of the break-out sessions that I attended was from a company called Portworx. Portworx provide a solution for stateful docker container storage, which is what caught my interest. There are lots of companies who have already created docker volume plugins for their existing storage solutions, including VMware. However Portworx seem to be approaching this a bit differently, and are providing a layer of abstraction from the underlying host storage. So you might be using cloud (e.g. EBS from AWS), or SAN or NAS or indeed you might only have local storage available – by deploying Portworx on top, it figures out the underlying storage capabilities, groups them into storage classes and then allows them to be consumed as docker volumes by the containers that are run by your scheduler of choice (Kubernetes, Mesos, Docker Swarm, etc). To paraphrase Portworx themselves, while docker provides a cloud agnostic compute experience for developers, Portworx want to provide a cloud agnostic storage experience for developers. The presentation at DockerCon17 was quite short on time, so I reached out to Portworx directly to see if I could learn some more about how it all tied together.

After reaching out, last week I was given a briefing by Michael Ferranti of Portworx. I started off by asking if this solution could work with vSphere. Michael stated that it absolutely does, and that they already have customers running this solution on vSphere, and other customers are evaluating it on vSphere. Their product is a pure software product, is installed as a set of containers which takes the host’s storage, aggregates it and make it available to applications in containers. Now, host in this context is a container hosts, where the docker daemon would run. So for physical, this host would be some Linux distribution running directly on bare-metal. For virtualized environments, this would be a VM running a Linux Guest OS. I clarified with Michael on how this would look like on vSphere. Essentially, you would have a number of ESXi hosts with some storage (SAN, NAS, local, vSAN), and then create one or more VMs per ESXi (running a Linux Guest OS), and the VMs would have the physical storage presented as VMDKs or Virtual Machine disks. In each VM, one would then run the docker daemon and deploy Portworx. Portworx would be deployed in the VMs (let’s now refer to them as container hosts), starting with the first container host. Further installs of Portworx “nodes” would then take place in the other container hosts, forming a much large cluster. As storage is discovered on the  container hosts, it is “virtualized” by Portworx, aggregated or pooled together, and made available to all of the container hosts. Portworx requires a minimum of 3 container hosts, which implies that if you want host level availability on vSphere, one would also required 3 x ESXi hosts minimum, one for each container host. However it was also made clear that as well as storage nodes, Portworx also supports the concept of storage-less (or compute only) nodes.

The installation of Portworx is done with a simple “docker run” command (with some options), and storage is identified by providing an option to one or more storage devices (e.g. /dev/sdX). As each drive is added to the aggregate, it is bench-marked and identified as high, medium or low-class of service. Once the Portworx cluster is formed, docker volumes can then be created against the aggregate, or you can use Portworx’s own CLI called pxctl. The sorts of things one would specify on the command line are maximum size, IOPS requirement, the file system type (e.g. EXT4 or XFS) and availability levels, which is essentially how many copies of the volume to make in the cluster.  Of course, the availability level will depend on the number of container hosts available. Portworx also have a UI interface called Lighthouse for management and monitoring. The file system type in theory could be any file system supported by the OS, but for the moment Portworx are supporting EXT4 and XFS. Michael also said that the user can create a “RAW” (unformatted volume), and then format it with any filesystem supported by the Linux distro running in the container host.

To make the volumes available to all container hosts, Portworx has its own docker volume plugin. Now what you see on the container hosts are Portworx virtual volumes. This means that should an application have one of its containers fail/restart on another host in the cluster, the same volume is visible on this new container host. An interesting aspect to this is data locality. Portworx always try to keep the application container and its volumes on the same container hosts. Portworx place labels on hosts so that the scheduler places the container on the correct host. There is no notion of moving the data to a particular container host, or moving application container to the data. This is left up to the scheduler. Of course, this isn’t always possible so there is a notion of a shared volume which can be mounted to multiple container hosts, similar to NFS style semantics (but it is not NFS).

One question I had is how do you determine availability when multiple container hosts are deployed in the same hypervizor? There are ways of doing this, tagging being one of them. They can also figure out Rack Awareness. How they do this depends on if it is cloud or on-prem? Michael used Cassandra as an example. In the cloud, Portworx automatically handles placement by querying a REST API endpoint on the cloud providers for zone & region information associated with each host. Then, with this understanding of your datacenter topology, Portworx can automatically place your partitions across fault domains, providing extra resilience against failures even before employing replication. Therefore, when deployed in something like EBS, Portworx can determine which availability zone they are deployed in. With on-prem, Portworx can also influence scheduling decisions by reading the topology defined in a “yaml” file like cassandra-topology.properties.

I asked about Data Services next. Portworx can of course leverage the data services of the underlying physical storage, but there have a few of their own as well. All volumes are thin provisioned. They have snapshot capabilities which can be scheduled to do full container volume snapshots, or simply snapshot the differences for backup. If I understood correctly, these snapshots could be redirected to an S3 store, even on a public cloud. Portworx  call this CloudSnap. They can also grow volumes on-the-fly, and the container consuming the volume will automatically see the new size. There is also an encryption features, and Portworx supports leading KMS systems like Hashicorp Valut, AWS KMS and Docker Secrets, so different users can encrypt data with their own unique key. This is for data in flight as well as data at rest. The encryption is container-centric, meaning that three different containers would have three different keys. Michael also mentioned that they do have deduplication, but this is not available to the primary data copy. However it is available for the replica copies. Finally, there is a cloning feature, and volumes can be cloned to with a new read-write volume or a new read-only volume.

So now that you have Portworx running, what are the next steps? Well, typically you would now run a scheduler/cluster/framework on top, such as Docker Swarm, Kubernetes or Mesosphere. What makes it interesting is that now that Portworx has placed the different storage in “buckets” of low, medium and high, a feature like Kubernetes storage classes can be used to orchestrate the creation of volumes based on an application’s storage requirements. Now you can run different container applications on different storage classes. But what this means is that since the underlying storage is abstracted away, the dev-ops teams who are deploying applications should not have to worry about provisioning it – they simply request the class of storage they want. And the storage required by applications within containers can be provisioned alongside the application by the scheduler. This applies no matter if it is deployed in the cloud or on-prem.

From an operational perspective, if a drive on the container hosts fails, Portworx marks it as dead, and depending on the available resources and the availability factor, a new copy of the data is instantiated. The administrator would then either remediate or remove the bad drive – this workflow is done via the Portworx CLI. Similarly, if a Portworx container (responsible for providing the Portworx virtual devices on a container host) fails, the expectation is that the application – or specifically, the OS running the application – in a container will be able to hold off the I/O until a new Portworx container can be spun up. Under the cover, Portworx use RAFT for cluster consensus, Gossip for the control path (so nodes know what is going on in the cluster) and ZeroMQ for storage replication.

Portworx are betting on containers becoming mainstream. If this does happen, then these guys will be well positioned to provide a storage solution for  containers. If you wish to try it out, pop over to https://docs.portworx.com/. This has instructions on how to install Portworx with all the popular schedulers. If I read the terms and conditions correctly, you can set up a 3-node cluster without a license. Thanks to Michael and Jake for taking time out of their schedule to give me this briefing.

The post A closer look at Portworx appeared first on CormacHogan.com.

Photon Platform revisited – checking out v1.2

$
0
0

Its been a while since I had a chance to look at our Photon Platform product. Version 1.2 launched last month, with a bunch of new features. You can read about those here. I really just wanted to have a look at what changed from a deployment perspective. I’d heard that the whole process has now become more stream-lined, with the Photon Installer OVA being able to deploy the Photon Controller(s), push the necessary agents to the ESXi hosts, deploy the Lightwave authentication appliance as well as the load-balancer appliance that sits in front of the Photon Controllers. And all of this can be done from a single YAML file on the Photon Installer using a new deployment tool. Sounds cool – let’s see how I got on.

Before you begin

In my setup, I had 4 ESXi hosts running vSphere 6.5. You need vSphere 6.5 for Photon Platform v1.2. However note that Photon Platform only supports ESXi versions up to 6.5EP1 (Path ESXi650-201701001). The patch’s build number is 4887370.

If you plan to deploy vSAN, you will need an unused cache device and a capacity device on 3 out of 4 of the hosts.

From a network perspective, you will need static IP addresses for the following appliances:

  • Photon Controller
  • Lightwave Appliance
  • Load Balancer Appliance
  • vSAN Management Server (if deploying vSAN)


The wiki on GitHub for Photon Controller also has some really good information that is worth reviewing before starting out.

Step 1 – Deploy the Photon Installer

You can start by downloading the Photon Installer OVA from GitHub. Then it is a simple deploy of the OVA. Once it is deployed, the easiest thing to do would be to SSH to the installer for the next steps.

Step 2 – Configure the YAML configuration file

The YAML file is made up of 4 distinct parts (there may be others for NSX and vSAN, but these are not included here). There is the compute section where the ESXi hosts are defined, then there is the Lightwave appliance section, then the photon controller and finally the load balancer. There is a sample YAML file shipped with the Photon Controller. This can be found in /opt/vmware/photon/controller/share/config and is called pc-config.yaml. Let’s look at each part of the file, which I have updated for my environment:

Compute

compute:
  hypervisors:
    esxi-1:
      hostname: "esxi-dell-e.rainpole.com"
      ipaddress: "10.27.51.5"
      allowed-datastores: "isilion-nfs-01"
      dns: "10.27.51.35"
      credential:
        username: "root"
        password: "xxx"
    esxi-2:
      hostname: "esxi-dell-f.rainpole.com"
      ipaddress: "10.27.51.6"
      allowed-datastores: "isilion-nfs-01"
      dns: "10.27.51.35"
      credential:
        username: "root"
        password: "xxx"
    esxi-3:
      hostname: "esxi-dell-g.rainpole.com"
      ipaddress: "10.27.51.7"
      allowed-datastores: "isilion-nfs-01"
      dns: "10.27.51.35"
      credential:
        username: "root"
        password: "xxx"
    esxi-4:
      hostname: "esxi-dell-h.rainpole.com"
      ipaddress: "10.27.51.8"
      allowed-datastores: "isilion-nfs-01"
      dns: "10.27.51.35"
      credential:
        username: "root"
        password: "xxx"

The only thing to point out here is that the DNS entry points to the Lightwave server. It does not point to any other DNS that you may have configured. Let’s look at the Lightwave appliance next:

Lightwave

lightwave:
  domain: "rainpole.local"
  credential:
    username: "Administrator"
    password: "xxx"
  controllers:
    lightwave-1:
      site: "cork"
      appliance:
        hostref: "esxi-1"
        datastore: "isilion-nfs-01"
        memoryMb: 2048
        cpus: 2
        enable-ssh-root-login: false
        credential:
          username: "root"
          password: "xxx"
        network-config:
          type: "static"
          hostname: "lightwave.rainpole.local"
          ipaddress: "10.27.51.35"
          network: "NAT=VM Network"
          dns: "10.27.51.35"
          ntp: "10.133.60.176"
          netmask: "255.255.255.0"
          gateway: "10.27.51.254"

Again, nothing too much to say about this. My domain is rainpole.local, I provided an administrator password for the domain, and a root password for the appliance itself. This appliance will be deployed to the host with esxi-1 reference (as will the rest of my appliances). Note that the DNS entry is the same as the Lightwave appliance IP address. The next part is for the Photon controller:

Photon Controller

photon:
  imagestore:
    img-store-1:
      datastore: "isilion-nfs-01"
      enableimagestoreforvms: "true"
  cloud:
    hostref-1: "esxi-2"
    hostref-2: "esxi-3"
    hostref-3: "esxi-4"
  administrator-group: "rainpole.local\\CloudAdministrators"
  controllers:
    photonctlr:
      appliance:
        hostref: "esxi-1"
        datastore: "isilion-nfs-01"
        memoryMb: 2048
        cpus: 2
        enable-ssh-root-login: false
        credential:
          username: "root"
          password: "xxx"
        network-config:
          type: "static"
          hostname: "photonctlr.rainpole.local"
          ipaddress: "10.27.51.30"
          network: "NAT=VM Network"
          netmask: "255.255.255.0"
          dns: "10.27.51.35"
          ntp: "10.133.60.176"
          gateway: "10.27.51.254"

OK, in this stanza, I specify that hosts esxi-2, 3 and 4 are my cloud hosts. These are the ones that will be used for deploying my container frameworks, etc. I’ve already used esxi-1 for the lightwave appliance, and I will use it once again for hosting the photon controller. The rest of the entries are straight-forward I think. Let’s look at the final appliance, the load balancer.

Load Balancer

loadBalancer:
  pploadbalancer:
    appliance:
        hostref: "esxi-1"
        datastore: "isilion-nfs-01"
        memoryMb: 2048
        cpus: 2
        enable-ssh-root-login: false
        credential:
          username: "root"
          password: "xxx"
        network-config:
          type: "static"
          hostname: "pploadbalancer.rainpole.local"
          ipaddress: "10.27.51.68"
          network: "NAT=VM Network"
          netmask: "255.255.255.0"
          dns: "10.27.51.35"
          ntp: "10.133.60.176"
          gateway: "10.27.51.254"

Once more, this is very similar to the previous appliances. As before, it is deployed on the first ESXi host. With the YAML file configured, we can now move onto deployment.

Step 3: Deployment with photon-setup

Now this is something new. There is a new photon-setup commands. The nice thing about this is that you can deploy individual components (photon controller, lightwave server) or the whole platform in one go. I used this to make sure individual appliances would deploy successfully before embarking on a complete platform deployment, which I found very useful. Here are the options:

# ../../bin/photon-setup
Usage: photon-setup <component> <command> {arguments}

Component:
    platform:      Photon Platform including multiple components
    lightwave:     Lightwave
    controller:    Photon Controller Cluster
    agent:         Photon Controller Agent
    vsan:          Photon VSAN Manager
    load-balancer: Load balancer
    help:          Help
Command:
    install:   Install components
    help:      Help about component
Run 'photon-setup <component> help' to find commands per component
So you can test the deployment of the controller on its own, the lightwave appliance on its own, and the load-balancer on its own, or you can select the platform option to roll them all out (as well as push the agents out to the ESXi hosts). The output is very long, so I will just include the photon controller example here:
root@photon-installer [ /opt/vmware/photon/controller/share/config ]# ../../\
bin/photon-setup controller install -config /opt/vmware/photon/controller/\
share/config/pc-config.yaml
Using configuration at /opt/vmware/photon/controller/share/config/pc-config.yaml
INFO: Parsing Lightwave Configuration
INFO: Parsing Credentials
INFO: Lightwave Credentials parsed successfully
INFO: Parsing Lightwave Controller Config
INFO: Parsing appliance
INFO: Parsing Credentials
INFO: Appliance Credentials parsed successfully
INFO: Parsing Network Config
INFO: Appliance network config parsed successfully
INFO: Appliance config parsed successfully
INFO: Lightwave Controller parsed successfully
INFO: Lightwave Controller config parsed successfully
INFO: Lightwave Section parsed successfully
INFO: Parsing Photon Controller Configuration
INFO: Parsing Photon Controller Image Store
INFO: Image Store parsed successfully
INFO: Managed hosts parsed successfully
INFO: Parsing Photon Controller Config
INFO: Parsing appliance
INFO: Parsing Credentials
INFO: Appliance Credentials parsed successfully
INFO: Parsing Network Config
INFO: Appliance network config parsed successfully
INFO: Photon Controllers parsed successfully
INFO: Photon section parsed successfully
INFO: Parsing Compute Configuration
INFO: Parsing Compute Config
INFO: Parsing Credentials
INFO: Compute Config parsed successfully
INFO: NSX CNI config is not provided. NSX CNI is disabled
2017-05-23 08:10:23 INFO  Info: Installing the Photon Controller Cluster
2017-05-23 08:10:23 INFO  Info: Photon Controller peer node at IP address [10.27.51.30]
2017-05-23 08:10:23 INFO  Info: 1 Photon Controller was specified in the configuration
2017-05-23 08:10:23 INFO  Start [Task: Photon Controller Installation]
2017-05-23 08:10:23 INFO  Info [Task: Photon Controller Installation] : \
Deploying and powering on the Photon Controller VM on ESXi host: 10.27.51.5
2017-05-23 08:10:23 INFO  Info: Deploying and powering on the Photon Controller VM \
on ESXi host: 10.27.51.5
2017-05-23 08:10:23 INFO  Info [Task: Photon Controller Installation] : Starting \
appliance deployment
2017-05-23 08:10:32 INFO  Progress [Task: Photon Controller Installation]: 20%
2017-05-23 08:10:35 INFO  Progress [Task: Photon Controller Installation]: 40%
2017-05-23 08:10:39 INFO  Progress [Task: Photon Controller Installation]: 60%
2017-05-23 08:10:42 INFO  Progress [Task: Photon Controller Installation]: 80%
2017-05-23 08:10:45 INFO  Progress [Task: Photon Controller Installation]: 0%
2017-05-23 08:10:45 INFO  Stop [Task: Photon Controller Installation]
2017-05-23 08:10:45 INFO  Info: Getting OIDC Tokens from Lightwave to make API Calls
2017-05-23 08:10:47 INFO  Info: Waiting for Photon Controller to be ready
2017-05-23 08:11:13 INFO  Info: Using Image Store - isilion-nfs-01
2017-05-23 08:11:14 INFO  Info: Setting new security group(s): [rainpole.local\Administrators,\
 rainpole.local\CloudAdministrators]
COMPLETE: Install Process has completed Successfully.

For a full platform deployment, I would simply change the controller keyword in the command line to platform, and rerun the command.

Step 4. Verifying successful deployments

There are a number of ways to validate that the deployment has been successful, other than a successful run of the photon-setup command. The easiest ways are to check if the UI of the Photon Controller is accessible via the load balancer, and that you can login to the UI of the Lightwave server. Let’s begin with the Photon Controller. Point a browser to https://<ip-of-load-balancer>:4343. You should see something like this:


And if you login, using the admin credential provided in the YAML file, you should see the Photon Controller dashboard:

There is not much to see here yet, as we haven’t built any projects tenants, nor have we deployed any orchestration frameworks such as Kubernetes. The dashboard becomes much more interesting once we have done that.

There is another way of verifying that everything is working and that is to use the photon controller CLI. The landing page referenced in the getting started part of this post has all the necessary builds of photon controller CLI for different OS. In my case, I downloaded the Windows version. Using that “photon” command, I can point to this photon platform deployment, and verify I can login with my Lightwave credentials:

C:\Users\chogan>photon target set -c https://10.27.51.68:443
API target set to 'https://10.27.51.68:443'

C:\Users\chogan>photon target login --username administrator@rainpole.local \
--password xxx
Login successful

C:\Users\chogan>photon system status
Overall status: READY

Component Status
PHOTON_CONTROLLER READY

C:\Users\chogan>photon deployment list-hosts
ID State IP Tags
091f5715-fcaf-4029-a015-b93231cd190f READY 10.27.51.6 CLOUD
c2847a86-e957-499f-bd97-da8a575bbdb2 READY 10.27.51.8 CLOUD
faec361e-9c65-4a4c-a25f-601d7498ddb8 READY 10.27.51.7 CLOUD

Total: 3

C:\Users\chogan>

Step 5 – Troubleshooting

  1. Watch out for typos in the YAML file. I made a few.
  2. The DNS entries pointing to the LW server was another mistake I made. If you don’t get this right, the controller deployment times out trying to resolve. Fortunately, someone else hit this, and the solution was provided here.
  3. The final thing that I am very happy with is the fact that there now some really good logging for the deployments. This was something I struggled with in earlier versions of Photon Platform – and it is great to see it vastly improved in version 1.2. I was monitoring/tailing the /var/log/photon-installer.log whilst doing most of this work.

Step 6 – Next steps

My next steps will be to revisit the deployment of the VSAN Management Server and the setting up of VSAN for use as another datastore for Photon Platform. After that, I’ll come back and deploy Kubernetes v1.6 which is now supported on Photon Platform v1.2. Watch this space.

The post Photon Platform revisited – checking out v1.2 appeared first on CormacHogan.com.

Deploying vSAN with Photon Platform v1.2

$
0
0

This is a bit of a long post, but there is a lot to cover. In a previous post, I walked through the deployment of Photon Platform v1.2, which included the Photon Installer, followed by the Photon Controller, Load-Balancer and Lightwave appliances. If you’ve read the previous post, you will have read that Photon Platform v1.2 include the OVAs for these components within the Photon Installer appliance. So no additional download steps are necessary. However, because vSAN is not included, it will have to be downloaded separately from MyVMware. The other very important point is that Photon Platform is not currently supported with vSAN 6.6. Therefore you must ensure VMware ESXi 6.5, Patch 201701001 (ESXi650-201701001) is the highest version running on the ESXi hosts. The patch’s build number is 4887370. One reason for this is that vSAN 6.6 has moved from using multicast to using unicast, which in turn uses vCenter for cluster membership tracking. Of course, there is no vCenter in Photon Platform so a way of handling vSAN over unicast membership is something that needs to be implemented before we can support it.

Now, I have already blogged about how to deploy vSAN with Photon Platform 1.1. However, some things have changed with Photon Platform 1.2. With that in mind, let’s go through the deployment process of vSAN with Photon Platform version 1.2. As before, I have 4 ESXi hosts available. 1 of these will be dedicated for management and the other 3 will be cloud hosts for running container schedulers/frameworks. These 3 hosts will also participate in my vSAN cluster.


Step 1 – Deploy the Photon Installer

This has already been covered in a previous post. It is a simple OVA deploy. Place it on the management ESXi server. I used the HTML5 client of the ESXi host to deploy it.


Step 2 – Deploy the Lightwave Appliance

In the last blog on PP 1.2, I showed how there is a new deployment method called “photon-setup“. It takes as an argument a YAML file, with various blocks of information for Photon Controller, Load-Balancer and Lightwave. Refer back to the previous post to see a sample YAML config for Lightwave. As we need Lightwave to authenticate the vSAN Manager Appliance against (more on this later), we can just deploy out the Lightwave appliance for now. Lightwave is essentially the photon platform authentication service. The following command will just pickup the Lightwave part of the YAML file and deploy it.

root@photon-installer [ /opt/vmware/photon/controller/share/config ]# ../../\
bin/photon-setup lightwave install -config /opt/vmware/photon/controller/share\
/config/pc-config.yaml
Using configuration at /opt/vmware/photon/controller/share/config/pc-config.yaml
INFO: Parsing Lightwave Configuration
INFO: Parsing Credentials
INFO: Lightwave Credentials parsed successfully
INFO: Parsing Lightwave Controller Config
INFO: Parsing appliance
INFO: Parsing Credentials
INFO: Appliance Credentials parsed successfully
INFO: Parsing Network Config
INFO: Appliance network config parsed successfully
INFO: Appliance config parsed successfully
INFO: Lightwave Controller parsed successfully
INFO: Lightwave Controller config parsed successfully
INFO: Lightwave Section parsed successfully
INFO: Parsing Photon Controller Configuration
INFO: Parsing Photon Controller Image Store
INFO: Image Store parsed successfully
INFO: Managed hosts parsed successfully
INFO: Parsing Photon Controller Config
INFO: Parsing appliance
INFO: Parsing Credentials
INFO: Appliance Credentials parsed successfully
INFO: Parsing Network Config
INFO: Appliance network config parsed successfully
INFO: Photon Controllers parsed successfully
INFO: Photon section parsed successfully
INFO: Parsing Compute Configuration
INFO: Parsing Compute Config
INFO: Parsing Credentials
INFO: Compute Config parsed successfully
INFO: Parsing vSAN Configuration
INFO: Parsing vSAN manager Config
INFO: Parsing appliance
INFO: Parsing Credentials
INFO: Appliance Credentials parsed successfully
INFO: Parsing Network Config
INFO: Appliance network config parsed successfully
INFO: vSAN manager config parsed successfully
INFO: Parsing LoadBalancer Configuration
INFO: Parsing LoadBalancer Config
INFO: Parsing appliance
INFO: Parsing Credentials
INFO: Appliance Credentials parsed successfully
INFO: Parsing Network Config
INFO: Appliance network config parsed successfully
INFO: LoadBalancer Config parsed successfully
INFO: NSX CNI config is not provided. NSX CNI is disabled
Installing Lightwave instance at 10.27.51.35
2017-05-25 09:05:14 INFO Info: Lightwave does not exist at the specified IP address. Deploying new Lightwave OVA
2017-05-25 09:05:14 INFO Start [Task: Lightwave Installation]
2017-05-25 09:05:14 INFO Info [Task: Lightwave Installation] : Deploying and powering on the Lightwave VM on ESXi host: 10.27.51.5
2017-05-25 09:05:14 INFO Info: Deploying and powering on the Lightwave VM on ES Xi host: 10.27.51.5
2017-05-25 09:05:14 INFO Info [Task: Lightwave Installation] : Starting appliance deployment
2017-05-25 09:05:25 INFO Progress [Task: Lightwave Installation]: 20%
2017-05-25 09:05:27 INFO Progress [Task: Lightwave Installation]: 40%
2017-05-25 09:05:29 INFO Progress [Task: Lightwave Installation]: 60%
2017-05-25 09:05:40 INFO Progress [Task: Lightwave Installation]: 80%
2017-05-25 09:05:43 INFO Progress [Task: Lightwave Installation]: 0%
2017-05-25 09:05:44 INFO Stop [Task: Lightwave Installation]
2017-05-25 09:06:24 INFO Info: Lightwave already exists. Skipping deployment of lightwave.
COMPLETE: Install Process has completed Successfully.

We can then verify that it deployed successfully by pointing a browser at https://<ip-of-lightwave>. Add the Lightwave domain name (which you provided as part of the YAML file) and then provide login credentials (also specified in YAML) and verify you can login. If you can, we can move to the next steps.

Step 3 – Create a vSAN user and vSAN group in Lightwave

This is where you create the user that you will use to authenticate your RVC session when you create the vSAN cluster. In a previous post, I showed how to do this from the CLI. In this post, I will do it via the UI. Once logged into Lightwave, there are 3 steps:

  1. Create a VSANAdmin group
  2. Create a vsanadmin user
  3. Add the vsanadmin user as a member of the VSANAdmin group

This should be very intuitive to do, and when complete, you can view the user and group membership. It should look similar to the following:

vsanadmin user

vsanadmin user is a member of the VSANAdmin group


Step 4 – Deploy the vSAN Manager Appliance

Caveat: There seems to be the ability to include a vSAN stanza in the YAML file, and this is include in the sample YAML on the Photon Controller appliance. But then the photon-setup looks in “/var/opt/vmware/photon/controller/appliances/vsan.ova-dir/vsan.ovf.bak” on the photon installer for the OVA, and there is none. One could possibly move the vSAN OVA to this location, but I could find no documented guidance on how to do this. Therefore I reverted to doing a normal OVA deploy via the H5 client on my management host. I covered this in the previous post also. The only important part to this is the ‘Additional Settings’ step. I’ve included a sample here:

A few things to point out here. The DNS should be the Lightwave server that you deployed in step 2. The Lightwave Domain is the name specified in the YAML file. Administrator Group (VSANAdmins) is the group you created in Step 3 (bit of a gotcha here – I’ll discuss it in more detail in step 5). Hostname (last field) actually refers to the name of this vSAN Management appliance that you are deploying, although it seems to be located with Lightwave information.

Once the appliance is deployed, open an SSH session to it and login as root.


Step 5 – Verify credentials by launching RVC

Now we come to the proof of the pudding – can we authenticate using the credentials above, and build our vSAN cluster using RVC, the Ruby vSphere Console.

Warning: I found an issue with the credentials. It seems that those provided via the OVA in step 4 are not being persisted correctly in the config file on the vSAN Manager. Fortunately, it is easy to address. You simply stop the vSAN service on the vSAN Management appliance, edit the config file to set the correct administratorgroup, then restart the service. Here are the steps:

root@vsan-mgmt-srvr [ ~ ]# grep administratorgroup /etc/vmware-vsan-health/config.conf
administratorgroup = rainpole.local\Administrators

root@vsan-mgmt-srvr [ ~ ]# systemctl stop vmware-vsan.service

root@vsan-mgmt-srvr [ ~ ]# vi /etc/vmware-vsan-health/config.conf

root@vsan-mgmt-srvr [ ~ ]# grep administratorgroup /etc/vmware-vsan-health/config.conf
administratorgroup = rainpole.local\VSANAdmins

root@vsan-mgmt-srvr [ ~ ]# systemctl start vmware-vsan.service

After making those changes, you can now see if your RVC session with authenticate using the “vsanadmin” user which is a member of the VSANAdmins group created back in step 3.

root@vsan-mgmt-srvr [ ~ ]# rvc vsanadmin@rainpole.local@vsan-mgmt-srvr\
.rainpole.local:8006
Install the "ffi" gem for better tab completion.
password:
0 /
1 vsan-mgmt-srvr.rainpole.local/
>

Success! OK, now we are ready to create a vSAN cluster, but first we need to setup the network on each of the 3 ESXi hosts that will participate in the vSAN cluster.


Step 6 – Setup the vSAN network on each ESXi host

The following are the commands used to create a vSAN portgroup, add a VMkernel interface, and tag it for vSAN traffic. These are run on the ESXi hosts and would have to be repeated on each host. Note that I used DHCP for the vSAN network. You might want to use a static IP. And of course, you could very easily script this with something like PowerCLI.

[root@esxi-dell-f:~] esxcli network vswitch standard list
[root@esxi-dell-f:~] esxcli network vswitch standard portgroup add -p vsan -v vSwitch0
[root@esxi-dell-f:~] esxcli network vswitch standard portgroup set --vlan-id 51 -p vsan
[root@esxi-dell-f:~] esxcli network ip interface add -p vsan -i vmk1
[root@esxi-dell-f:~] esxcli network ip interface ipv4 set -t dhcp -i vmk1
[root@esxi-dell-f:~] esxcli network ip interface tag add -t vSAN -i vmk1
[root@esxi-dell-f:~] esxcfg-vmknic -l
Interface  Port Group/DVPort/Opaque Network        IP Family IP Address                              Netmask         Broadcast       MAC Address       MTU     TSO MSS   Enabled Type                NetStack
vmk0       Management Network                      IPv4      10.27.51.6                              255.255.255.0   10.27.51.255    24:6e:96:2f:52:75 1500    65535     true    STATIC              defaultTcpipStack
vmk0       Management Network                      IPv6      fe80::266e:96ff:fe2f:5275               64                              24:6e:96:2f:52:75 1500    65535     true    STATIC, PREFERRED   defaultTcpipStack
vmk1       vsan                                    IPv4      10.27.51.34                             255.255.255.0   10.27.51.255    00:50:56:6e:b7:dc 1500    65535     true    DHCP                defaultTcpipStack
vmk1       vsan                                    IPv6      fe80::250:56ff:fe6e:b7dc                64                              00:50:56:6e:b7:dc 1500    65535     true    STATIC, PREFERRED   defaultTcpipStack
[root@esxi-dell-f:~]


Step 7 – Create the vSAN cluster via RVC

OK – the vSAN network is configured on the 3 x ESXi hosts that are going to participate in my vSAN cluster. Return to the vSAN Management Appliance, and the RVC session. These are the commands that are run to create a cluster, and add the hosts to the cluster. I also set the cluster to automatically claim disk for vSAN.

root@vsan-mgmt-srvr [ /etc/vmware-vsan-health ]# rvc \
vsanadmin@rainpole.local@vsan-mgmt-srvr.rainpole.local:8006
Install the "ffi" gem for better tab completion.
password:
0 /
1 vsan-mgmt-srvr.rainpole.local/
> cd 1
/vsan-mgmt-srvr.rainpole.local> ls
0 Global (datacenter)
/vsan-mgmt-srvr.rainpole.local> cd 0
/vsan-mgmt-srvr.rainpole.local/Global> ls
0 vms [vmFolder-datacenter-1]/
1 datastores [datastoreFolder-datacenter-1]/
2 networks [networkFolder-datacenter-1]/
3 computers [hostFolder-datacenter-1]/
/vsan-mgmt-srvr.rainpole.local/Global> cd 3
/vsan-mgmt-srvr.rainpole.local/Global/computers> ls
/vsan-mgmt-srvr.rainpole.local/Global/computers> cluster.create pp-vsan
/vsan-mgmt-srvr.rainpole.local/Global/computers> ls
0 pp-vsan (cluster): cpu 0 GHz, memory 0 GB
/vsan-mgmt-srvr.rainpole.local/Global/computers> vsan.cluster_change_autoclaim 0 -e
: success
No host specified to query, stop current operation.
/vsan-mgmt-srvr.rainpole.local/Global/computers> cluster.add_host 0 \
10.27.51.6 10.27.51.7 10.27.51.8 -u root -p xxxx
: success
: success
: success
/vsan-mgmt-srvr.rainpole.local/Global/computers> ls
0 pp-vsan (cluster): cpu 0 GHz, memory 0 GB

Looks like it worked. All 3 x ESXi hosts have been successfully added to my cluster. Let’s now run a few additional RVC commands to make sure the vSAN cluster is formed and the vSAN health check is happy.

/vsan-mgmt-srvr.rainpole.local/Global/computers> vsan.cluster_info 0
2017-05-25 11:03:45 +0000: Fetching host info from 10.27.51.6 (may take a moment) ...
2017-05-25 11:03:45 +0000: Fetching host info from 10.27.51.7 (may take a moment) ...
2017-05-25 11:03:45 +0000: Fetching host info from 10.27.51.8 (may take a moment) ...
Host: 10.27.51.6
  Product: VMware ESXi 6.5.0 build-4887370
  vSAN enabled: yes
  Cluster info:
    Cluster role: master
    Cluster UUID: 07fdaefe-a579-4048-ba95-df1f7ed3ba2f
    Node UUID: 5926907e-8562-24c1-2766-246e962f5270
    Member UUIDs: ["5926907e-8562-24c1-2766-246e962f5270", "592693fd-f919-1aee-9ae4-246e962f4850", "59269241-1af4-bed2-5978-246e962c2408"] (3)
  Node evacuated: no
  Storage info:
    Auto claim: no
    Disk Mappings:
      SSD: Local ATA Disk (naa.55cd2e404c31f9ec) - 186 GB, v2
      MD: Local ATA Disk (naa.500a07510f86d6b3) - 745 GB, v2
      SSD: Local Pliant Disk (naa.5001e82002664b00) - 186 GB, v2
      MD: Local ATA Disk (naa.500a07510f86d686) - 745 GB, v2
  FaultDomainInfo:
    Not configured
  NetworkInfo:
    Adapter: vmk1 (10.27.51.53)

Host: 10.27.51.7
  Product: VMware ESXi 6.5.0 build-4887370
  vSAN enabled: yes
  Cluster info:
    Cluster role: backup
    Cluster UUID: 07fdaefe-a579-4048-ba95-df1f7ed3ba2f
    Node UUID: 592693fd-f919-1aee-9ae4-246e962f4850
    Member UUIDs: ["5926907e-8562-24c1-2766-246e962f5270", "592693fd-f919-1aee-9ae4-246e962f4850", "59269241-1af4-bed2-5978-246e962c2408"] (3)
  Node evacuated: no
  Storage info:
    Auto claim: no
    Disk Mappings:
      SSD: Local Pliant Disk (naa.5001e82002675164) - 186 GB, v2
      MD: Local ATA Disk (naa.500a07510f86d693) - 745 GB, v2
      SSD: Local ATA Disk (naa.55cd2e404c31ef84) - 186 GB, v2
      MD: Local ATA Disk (naa.500a07510f86d69d) - 745 GB, v2
  FaultDomainInfo:
    Not configured
  NetworkInfo:
    Adapter: vmk1 (10.27.51.54)

Host: 10.27.51.8
  Product: VMware ESXi 6.5.0 build-4887370
  vSAN enabled: yes
  Cluster info:
    Cluster role: agent
    Cluster UUID: 07fdaefe-a579-4048-ba95-df1f7ed3ba2f
    Node UUID: 59269241-1af4-bed2-5978-246e962c2408
    Member UUIDs: ["5926907e-8562-24c1-2766-246e962f5270", "592693fd-f919-1aee-9ae4-246e962f4850", "59269241-1af4-bed2-5978-246e962c2408"] (3)
  Node evacuated: no
  Storage info:
    Auto claim: no
    Disk Mappings:
      SSD: Local ATA Disk (naa.55cd2e404c31f898) - 186 GB, v2
      MD: Local ATA Disk (naa.500a07510f86d6bd) - 745 GB, v2
      SSD: Local Pliant Disk (naa.5001e8200264426c) - 186 GB, v2
      MD: Local ATA Disk (naa.500a07510f86d6bf) - 745 GB, v2
  FaultDomainInfo:
    Not configured
  NetworkInfo:
    Adapter: vmk1 (10.27.51.55)

No Fault Domains configured in this cluster
/vsan-mgmt-srvr.rainpole.local/Global/computers>
This looks good. The Member UUIDs show 3 members in our cluster. vSAN is enabled, and each host has claimed storage. It is also a good idea to run the health check from RVC, and look to make sure nothing is broken before continuing.
/vsan-mgmt-srvr.rainpole.local/Global/computers> vsan.health.health_summary 0
Overall health: yellow (Cluster health issue)
+------------------------------------------------------+---------+
| Health check                                         | Result  |
+------------------------------------------------------+---------+
| Cluster                                              | Warning |
|   ESXi vSAN Health service installation              | Passed  |
|   vSAN Health Service up-to-date                     | Passed  |
|   Advanced vSAN configuration in sync                | Passed  |
|   vSAN CLOMD liveness                                | Passed  |
|   vSAN Disk Balance                                  | Passed  |
|   Resync operations throttling                       | Passed  |
|   vSAN cluster configuration consistency             | Warning |
|   Time is synchronized across hosts and VC           | Passed  |
|   vSphere cluster members match vSAN cluster members | Passed  |
+------------------------------------------------------+---------+
| Hardware compatibility                               | Warning |
|   vSAN HCL DB up-to-date                             | Warning |
|   vSAN HCL DB Auto Update                            | Passed  |
|   SCSI controller is VMware certified                | Passed  |
|   Controller is VMware certified for ESXi release    | Passed  |
|   Controller driver is VMware certified              | Passed  |
+------------------------------------------------------+---------+
| Network                                              | Passed  |
|   Hosts disconnected from VC                         | Passed  |
|   Hosts with connectivity issues                     | Passed  |
|   vSAN cluster partition                             | Passed  |
|   All hosts have a vSAN vmknic configured            | Passed  |
|   All hosts have matching subnets                    | Passed  |
|   vSAN: Basic (unicast) connectivity check           | Passed  |
|   vSAN: MTU check (ping with large packet size)      | Passed  |
|   vMotion: Basic (unicast) connectivity check        | Passed  |
|   vMotion: MTU check (ping with large packet size)   | Passed  |
|   Network latency check                              | Passed  |
|   Multicast assessment based on other checks         | Passed  |
|   All hosts have matching multicast settings         | Passed  |
+------------------------------------------------------+---------+
| Physical disk                                        | Passed  |
|   Overall disks health                               | Passed  |
|   Metadata health                                    | Passed  |
|   Disk capacity                                      | Passed  |
|   Software state health                              | Passed  |
|   Congestion                                         | Passed  |
|   Component limit health                             | Passed  |
|   Component metadata health                          | Passed  |
|   Memory pools (heaps)                               | Passed  |
|   Memory pools (slabs)                               | Passed  |
+------------------------------------------------------+---------+
| Data                                                 | Passed  |
|   vSAN object health                                 | Passed  |
+------------------------------------------------------+---------+
| Limits                                               | Passed  |
|   Current cluster situation                          | Passed  |
|   After 1 additional host failure                    | Passed  |
|   Host component limit                               | Passed  |
+------------------------------------------------------+---------+
| Online health (Disabled)                             | skipped |
|   Customer experience improvement program (CEIP)     | skipped |
+------------------------------------------------------+---------+

Details about any failed test below ...

Cluster - vSAN cluster configuration consistency: yellow
  +------------+------+--------------------------------------------------------------+----------------+
  | Host       | Disk | Issue                                                        | Recommendation |
  +------------+------+--------------------------------------------------------------+----------------+
  | 10.27.51.6 |      | Invalid request (Correct version of vSAN Health installed?). |                |
  | 10.27.51.7 |      | Invalid request (Correct version of vSAN Health installed?). |                |
  | 10.27.51.8 |      | Invalid request (Correct version of vSAN Health installed?). |                |
  +------------+------+--------------------------------------------------------------+----------------+

Hardware compatibility - vSAN HCL DB up-to-date: yellow

  +--------------------------------+---------------------+
  | Entity                         | Time in UTC         |
  +--------------------------------+---------------------+
  | Current time                   | 2017-05-25 11:08:22 |
  | Local HCL DB copy last updated | 2017-02-23 13:28:22 |
  +--------------------------------+---------------------+

[[1.964084003, "initial connect"],
[7.352502473, "cluster-health"],
[0.011859728, "table-render"]]
/vsan-mgmt-srvr.rainpole.local/Global/computers>

OK some issue with HCL DB file (it is out of date and I should update it) and something about consistency. Not sure what the latter one is at this point (still investigating), but overall it seems to be OK. Great, I can now go ahead and deploy the remainder of the Photon Platform components (load balancer, photon controller, agents for ESXi hosts.

Step 8: Deploy Photon Platform

First of all, I am going to make some modifications to my YAML file to ensure that the vSAN datastore is added. To do this, just make sure that the vSAN datastore is added to the list of allowed-datastores, e.g. allowed-datastores: “isilion-nfs-01, vSANDatastore”. Don’t worry if you do not get the spelling right – you can always modify the name of the datastore later on to match what is in the YAML, and Photon Platform will automatically detect it.

Now we pop back onto the photon installer and rerun the photon-setup command seen already, but this time for the platform. Since the Lightwave appliance is already deployed, that part will be skipped. I have included the whole of the output for completeness.

root@photon-installer [ /opt/vmware/photon/controller/share/config ]# ../../\
bin/photon-setup platform install -config /opt/vmware/photon/controller/share/config/pc-config.yaml
Using configuration at /opt/vmware/photon/controller/share/config/pc-config.yaml
INFO: Parsing Lightwave Configuration
INFO: Parsing Credentials
INFO: Lightwave Credentials parsed successfully
INFO: Parsing Lightwave Controller Config
INFO: Parsing appliance
INFO: Parsing Credentials
INFO: Appliance Credentials parsed successfully
INFO: Parsing Network Config
INFO: Appliance network config parsed successfully
INFO: Appliance config parsed successfully
INFO: Lightwave Controller parsed successfully
INFO: Lightwave Controller config parsed successfully
INFO: Lightwave Section parsed successfully
INFO: Parsing Photon Controller Configuration
INFO: Parsing Photon Controller Image Store
INFO: Image Store parsed successfully
INFO: Managed hosts parsed successfully
INFO: Parsing Photon Controller Config
INFO: Parsing appliance
INFO: Parsing Credentials
INFO: Appliance Credentials parsed successfully
INFO: Parsing Network Config
INFO: Appliance network config parsed successfully
INFO: Photon Controllers parsed successfully
INFO: Photon section parsed successfully
INFO: Parsing Compute Configuration
INFO: Parsing Compute Config
INFO: Parsing Credentials
INFO: Compute Config parsed successfully
INFO: Parsing LoadBalancer Configuration
INFO: Parsing LoadBalancer Config
INFO: Parsing appliance
INFO: Parsing Credentials
INFO: Appliance Credentials parsed successfully
INFO: Parsing Network Config
INFO: Appliance network config parsed successfully
INFO: LoadBalancer Config parsed successfully
INFO: NSX CNI config is not provided. NSX CNI is disabled
Validating configuration
Validating compute configuration
2017-05-25 09:48:05 INFO  Executing the command esxcli system version get | grep Version | awk '{print $2 }' on hypervisor with ip '10.27.51.5'
2017-05-25 09:48:06 INFO  Executing the command esxcli system version get | grep Build | awk '{print $2 }' on hypervisor with ip '10.27.51.5'
2017-05-25 09:48:08 INFO  Executing the command esxcli system version get | grep Version | awk '{print $2 }' on hypervisor with ip '10.27.51.6'
2017-05-25 09:48:09 INFO  Executing the command esxcli system version get | grep Build | awk '{print $2 }' on hypervisor with ip '10.27.51.6'
2017-05-25 09:48:10 INFO  Executing the command esxcli system version get | grep Version | awk '{print $2 }' on hypervisor with ip '10.27.51.7'
2017-05-25 09:48:11 INFO  Executing the command esxcli system version get | grep Build | awk '{print $2 }' on hypervisor with ip '10.27.51.7'
2017-05-25 09:48:12 INFO  Executing the command esxcli system version get | grep Version | awk '{print $2 }' on hypervisor with ip '10.27.51.8'
2017-05-25 09:48:13 INFO  Executing the command esxcli system version get | grep Build | awk '{print $2 }' on hypervisor with ip '10.27.51.8'
Validating identity configuration
Validating photon configuration
2017-05-25 09:48:15 INFO  Installing Lightwave
2017-05-25 09:48:15 INFO  Install Lightwave Controller at lightwave-1
2017-05-25 09:48:16 INFO  Info: Lightwave already exists. Skipping deployment of lightwave.
2017-05-25 09:48:16 INFO  COMPLETE: Install Lightwave Controller
2017-05-25 09:48:16 INFO  Installing Photon Controller Cluster
2017-05-25 09:48:16 INFO  Info: Installing the Photon Controller Cluster
2017-05-25 09:48:16 INFO  Info: Photon Controller peer node at IP address [10.27.51.30]
2017-05-25 09:48:16 INFO  Info: 1 Photon Controller was specified in the configuration
2017-05-25 09:48:16 INFO  Start [Task: Photon Controller Installation]
2017-05-25 09:48:16 INFO  Info [Task: Photon Controller Installation] : Deploying and powering on the Photon Controller VM on ESXi host: 10.27.51.5
2017-05-25 09:48:16 INFO  Info: Deploying and powering on the Photon Controller VM on ESXi host: 10.27.51.5
2017-05-25 09:48:16 INFO  Info [Task: Photon Controller Installation] : Starting appliance deployment
2017-05-25 09:48:24 INFO  Progress [Task: Photon Controller Installation]: 20%
2017-05-25 09:48:27 INFO  Progress [Task: Photon Controller Installation]: 40%
2017-05-25 09:48:30 INFO  Progress [Task: Photon Controller Installation]: 60%
2017-05-25 09:48:33 INFO  Progress [Task: Photon Controller Installation]: 80%
2017-05-25 09:48:36 INFO  Progress [Task: Photon Controller Installation]: 0%
2017-05-25 09:48:36 INFO  Stop [Task: Photon Controller Installation]
2017-05-25 09:48:36 INFO  Info: Getting OIDC Tokens from Lightwave to make API Calls
2017-05-25 09:48:37 INFO  Info: Waiting for Photon Controller to be ready
2017-05-25 09:49:03 INFO  Info: Using Image Store - isilion-nfs-01, vSANDatastore
2017-05-25 09:49:04 INFO  Info: Setting new security group(s): [rainpole.local\Administrators, rainpole.local\CloudAdministrators]
2017-05-25 09:49:05 INFO  COMPLETE: Install Photon Controller Cluster
2017-05-25 09:49:05 INFO  Installing Load Balancer
2017-05-25 09:49:05 INFO  Start [Task: Load Balancer Installation]
2017-05-25 09:49:05 INFO  Info [Task: Load Balancer Installation] : Deploying and powering on the HAProxy VM on ESXi host: 10.27.51.5
2017-05-25 09:49:05 INFO  Info: Deploying and powering on the HAProxy VM on ESXi host: 10.27.51.5
2017-05-25 09:49:05 INFO  Info [Task: Load Balancer Installation] : Starting appliance deployment
2017-05-25 09:49:15 INFO  Progress [Task: Load Balancer Installation]: 20%
2017-05-25 09:49:17 INFO  Progress [Task: Load Balancer Installation]: 40%
2017-05-25 09:49:18 INFO  Progress [Task: Load Balancer Installation]: 60%
2017-05-25 09:49:20 INFO  Progress [Task: Load Balancer Installation]: 80%
2017-05-25 09:49:22 INFO  Progress [Task: Load Balancer Installation]: 0%
2017-05-25 09:49:22 INFO  Stop [Task: Load Balancer Installation]
2017-05-25 09:49:22 INFO  COMPLETE: Install Load Balancer
2017-05-25 09:49:22 INFO  Preparing Managed Host esxi-2 to be managed by Photon Controller
2017-05-25 09:49:22 INFO  Registering Managed Host esxi-2 with Photon Controller
The allowed datastore is {"ALLOWED_DATASTORES":"isilion-nfs-01, vSANDatastore"}2017-05-25 09:49:29 INFO  COMPLETE: Registration of Managed Host
2017-05-25 09:49:29 INFO  Installing Photon Agent on Managed Host esxi-2
2017-05-25 09:49:29 INFO  Start [Task: Hypervisor preparation]
2017-05-25 09:49:29 INFO  Info: Found Lightwave VIB at /var/opt/vmware/photon/agent/vibs/VMware-lightwave-esx-1.0.0-5075989.vib
2017-05-25 09:49:29 INFO  Info: Found Photon Agent VIB at /var/opt/vmware/photon/agent/vibs/photon-controller-agent-v1.1.1-319facd.vib
2017-05-25 09:49:29 INFO  Info: Found Envoy VIB at /var/opt/vmware/photon/agent/vibs/vmware-envoy-latest.vib
2017-05-25 09:49:29 INFO  Info [Task: Hypervisor preparation] : Establishing SCP session to host 10.27.51.6
2017-05-25 09:49:29 INFO  Info [Task: Hypervisor preparation] : Skipping Syslog configuration on host 10.27.51.6
2017-05-25 09:49:29 INFO  Info [Task: Hypervisor preparation] : Copying VIBs to host 10.27.51.6
2017-05-25 09:49:29 INFO  Info: Copying file /var/opt/vmware/photon/agent/vibs/vmware-envoy-latest.vib to remote location /tmp/vmware-envoy-latest.vib
2017-05-25 09:49:30 INFO  Info: Copying file /var/opt/vmware/photon/agent/vibs/photon-controller-agent-v1.1.1-319facd.vib to remote location /tmp/photon-controller-agent-v1.1.1-319facd.vib
2017-05-25 09:49:30 INFO  Info: Copying file /var/opt/vmware/photon/agent/vibs/VMware-lightwave-esx-1.0.0-5075989.vib to remote location /tmp/VMware-lightwave-esx-1.0.0-5075989.vib
2017-05-25 09:49:30 INFO  Info [Task: Hypervisor preparation] : Installing Photon Agent on host 10.27.51.6
2017-05-25 09:49:30 INFO  Info: Leaving the domain in case the ESX host was already added
2017-05-25 09:49:30 INFO  Executing the command /usr/lib/vmware/vmwafd/bin/domainjoin leave --force on hypervisor with ip '10.27.51.6'
2017-05-25 09:49:31 INFO  Executing the command /etc/init.d/unconfigure-lightwave stop remove on hypervisor with ip '10.27.51.6'
2017-05-25 09:49:32 INFO  Info: Unconfiguring Lightwave on the ESX host
2017-05-25 09:49:32 INFO  Info: Uninstalling old Photon VIBS from remote system
2017-05-25 09:49:32 INFO  Executing the command /usr/bin/esxcli software vib remove -f -n lightwave-esx -n photon-controller-agent -n envoy
on hypervisor with ip '10.27.51.6'
2017-05-25 09:49:35 INFO  Info: Installing Photon VIBS on remote system
2017-05-25 09:49:35 INFO  Executing the command /usr/bin/esxcli software vib install -f -v /tmp/photon-controller-agent-v1.1.1-319facd.vib -v /tmp/vmware-envoy-latest.vib -v /tmp/VMware-lightwave-esx-1.0.0-5075989.vib
on hypervisor with ip '10.27.51.6'
2017-05-25 09:50:37 INFO  Info [Task: Hypervisor preparation] : Joining host 10.27.51.6 to Lightwave domain
2017-05-25 09:50:37 INFO  Info: Attempting to join the ESX host to Lightwave
2017-05-25 09:50:37 INFO  Executing the command /usr/lib/vmware/ic-deploy/bin/configure-lightwave.py 10.27.51.35 rainpole.local 'VxRail!23' 1 10.27.51.6 'VxRail!23' on hypervisor with ip '10.27.51.6'
2017-05-25 09:50:49 INFO  Info: Restart Photon Controller Agent
2017-05-25 09:50:49 INFO  Executing the command /etc/init.d/photon-controller-agent restart on hypervisor with ip '10.27.51.6'
2017-05-25 09:50:50 INFO  Info [Task: Hypervisor preparation] : Removing VIBs from host 10.27.51.6
2017-05-25 09:50:50 INFO  Info: Removing Photon VIBS from remote system
2017-05-25 09:50:50 INFO  Executing the command /bin/rm -f /tmp/photon-controller-agent-v1.1.1-319facd.vib -v /tmp/vmware-envoy-latest.vib -v /tmp/VMware-lightwave-esx-1.0.0-5075989.vib on hypervisor with ip '10.27.51.6'
2017-05-25 09:50:51 INFO  Stop [Task: Hypervisor preparation]
2017-05-25 09:50:51 INFO  COMPLETE: Install Photon Agent
2017-05-25 09:50:51 INFO  Provisioning the host to change its state to READY
2017-05-25 09:50:59 INFO  COMPLETE: Provision Managed Host
2017-05-25 09:50:59 INFO  Preparing Managed Host esxi-3 to be managed by Photon Controller
2017-05-25 09:50:59 INFO  Registering Managed Host esxi-3 with Photon Controller
The allowed datastore is {"ALLOWED_DATASTORES":"isilion-nfs-01, vSANDatastore"}2017-05-25 09:51:06 INFO  COMPLETE: Registration of Managed Host
2017-05-25 09:51:06 INFO  Installing Photon Agent on Managed Host esxi-3
2017-05-25 09:51:06 INFO  Start [Task: Hypervisor preparation]
2017-05-25 09:51:06 INFO  Info: Found Lightwave VIB at /var/opt/vmware/photon/agent/vibs/VMware-lightwave-esx-1.0.0-5075989.vib
2017-05-25 09:51:06 INFO  Info: Found Photon Agent VIB at /var/opt/vmware/photon/agent/vibs/photon-controller-agent-v1.1.1-319facd.vib
2017-05-25 09:51:06 INFO  Info: Found Envoy VIB at /var/opt/vmware/photon/agent/vibs/vmware-envoy-latest.vib
2017-05-25 09:51:06 INFO  Info [Task: Hypervisor preparation] : Establishing SCP session to host 10.27.51.7
2017-05-25 09:51:06 INFO  Info [Task: Hypervisor preparation] : Skipping Syslog configuration on host 10.27.51.7
2017-05-25 09:51:06 INFO  Info [Task: Hypervisor preparation] : Copying VIBs to host 10.27.51.7
2017-05-25 09:51:06 INFO  Info: Copying file /var/opt/vmware/photon/agent/vibs/vmware-envoy-latest.vib to remote location /tmp/vmware-envoy-latest.vib
2017-05-25 09:51:06 INFO  Info: Copying file /var/opt/vmware/photon/agent/vibs/photon-controller-agent-v1.1.1-319facd.vib to remote location /tmp/photon-controller-agent-v1.1.1-319facd.vib
2017-05-25 09:51:06 INFO  Info: Copying file /var/opt/vmware/photon/agent/vibs/VMware-lightwave-esx-1.0.0-5075989.vib to remote location /tmp/VMware-lightwave-esx-1.0.0-5075989.vib
2017-05-25 09:51:06 INFO  Info [Task: Hypervisor preparation] : Installing Photon Agent on host 10.27.51.7
2017-05-25 09:51:06 INFO  Info: Leaving the domain in case the ESX host was already added
2017-05-25 09:51:06 INFO  Executing the command /usr/lib/vmware/vmwafd/bin/domainjoin leave --force on hypervisor with ip '10.27.51.7'
2017-05-25 09:51:08 INFO  Executing the command /etc/init.d/unconfigure-lightwave stop remove on hypervisor with ip '10.27.51.7'
2017-05-25 09:51:09 INFO  Info: Unconfiguring Lightwave on the ESX host
2017-05-25 09:51:09 INFO  Info: Uninstalling old Photon VIBS from remote system
2017-05-25 09:51:09 INFO  Executing the command /usr/bin/esxcli software vib remove -f -n lightwave-esx -n photon-controller-agent -n envoy
on hypervisor with ip '10.27.51.7'
2017-05-25 09:51:12 INFO  Info: Installing Photon VIBS on remote system
2017-05-25 09:51:12 INFO  Executing the command /usr/bin/esxcli software vib install -f -v /tmp/photon-controller-agent-v1.1.1-319facd.vib -v /tmp/vmware-envoy-latest.vib -v /tmp/VMware-lightwave-esx-1.0.0-5075989.vib
on hypervisor with ip '10.27.51.7'
2017-05-25 09:52:13 INFO  Info [Task: Hypervisor preparation] : Joining host 10.27.51.7 to Lightwave domain
2017-05-25 09:52:13 INFO  Info: Attempting to join the ESX host to Lightwave
2017-05-25 09:52:13 INFO  Executing the command /usr/lib/vmware/ic-deploy/bin/configure-lightwave.py 10.27.51.35 rainpole.local 'VxRail!23' 1 10.27.51.7 'VxRail!23' on hypervisor with ip '10.27.51.7'
2017-05-25 09:52:23 INFO  Info: Restart Photon Controller Agent
2017-05-25 09:52:23 INFO  Executing the command /etc/init.d/photon-controller-agent restart on hypervisor with ip '10.27.51.7'
2017-05-25 09:52:24 INFO  Info [Task: Hypervisor preparation] : Removing VIBs from host 10.27.51.7
2017-05-25 09:52:24 INFO  Info: Removing Photon VIBS from remote system
2017-05-25 09:52:24 INFO  Executing the command /bin/rm -f /tmp/photon-controller-agent-v1.1.1-319facd.vib -v /tmp/vmware-envoy-latest.vib -v /tmp/VMware-lightwave-esx-1.0.0-5075989.vib on hypervisor with ip '10.27.51.7'
2017-05-25 09:52:26 INFO  Stop [Task: Hypervisor preparation]
2017-05-25 09:52:26 INFO  COMPLETE: Install Photon Agent
2017-05-25 09:52:26 INFO  Provisioning the host to change its state to READY
2017-05-25 09:52:34 INFO  COMPLETE: Provision Managed Host
2017-05-25 09:52:34 INFO  Preparing Managed Host esxi-4 to be managed by Photon Controller
2017-05-25 09:52:34 INFO  Registering Managed Host esxi-4 with Photon Controller
The allowed datastore is {"ALLOWED_DATASTORES":"isilion-nfs-01, vSANDatastore"}2017-05-25 09:52:36 INFO  COMPLETE: Registration of Managed Host
2017-05-25 09:52:36 INFO  Installing Photon Agent on Managed Host esxi-4
2017-05-25 09:52:36 INFO  Start [Task: Hypervisor preparation]
2017-05-25 09:52:36 INFO  Info: Found Lightwave VIB at /var/opt/vmware/photon/agent/vibs/VMware-lightwave-esx-1.0.0-5075989.vib
2017-05-25 09:52:36 INFO  Info: Found Photon Agent VIB at /var/opt/vmware/photon/agent/vibs/photon-controller-agent-v1.1.1-319facd.vib
2017-05-25 09:52:36 INFO  Info: Found Envoy VIB at /var/opt/vmware/photon/agent/vibs/vmware-envoy-latest.vib
2017-05-25 09:52:36 INFO  Info [Task: Hypervisor preparation] : Establishing SCP session to host 10.27.51.8
2017-05-25 09:52:36 INFO  Info [Task: Hypervisor preparation] : Skipping Syslog configuration on host 10.27.51.8
2017-05-25 09:52:36 INFO  Info [Task: Hypervisor preparation] : Copying VIBs to host 10.27.51.8
2017-05-25 09:52:36 INFO  Info: Copying file /var/opt/vmware/photon/agent/vibs/vmware-envoy-latest.vib to remote location /tmp/vmware-envoy-latest.vib
2017-05-25 09:52:37 INFO  Info: Copying file /var/opt/vmware/photon/agent/vibs/photon-controller-agent-v1.1.1-319facd.vib to remote location /tmp/photon-controller-agent-v1.1.1-319facd.vib
2017-05-25 09:52:37 INFO  Info: Copying file /var/opt/vmware/photon/agent/vibs/VMware-lightwave-esx-1.0.0-5075989.vib to remote location /tmp/VMware-lightwave-esx-1.0.0-5075989.vib
2017-05-25 09:52:37 INFO  Info [Task: Hypervisor preparation] : Installing Photon Agent on host 10.27.51.8
2017-05-25 09:52:37 INFO  Info: Leaving the domain in case the ESX host was already added
2017-05-25 09:52:37 INFO  Executing the command /usr/lib/vmware/vmwafd/bin/domainjoin leave --force on hypervisor with ip '10.27.51.8'
2017-05-25 09:52:38 INFO  Executing the command /etc/init.d/unconfigure-lightwave stop remove on hypervisor with ip '10.27.51.8'
2017-05-25 09:52:39 INFO  Info: Unconfiguring Lightwave on the ESX host
2017-05-25 09:52:39 INFO  Info: Uninstalling old Photon VIBS from remote system
2017-05-25 09:52:39 INFO  Executing the command /usr/bin/esxcli software vib remove -f -n lightwave-esx -n photon-controller-agent -n envoy
on hypervisor with ip '10.27.51.8'
2017-05-25 09:52:42 INFO  Info: Installing Photon VIBS on remote system
2017-05-25 09:52:42 INFO  Executing the command /usr/bin/esxcli software vib install -f -v /tmp/photon-controller-agent-v1.1.1-319facd.vib -v /tmp/vmware-envoy-latest.vib -v /tmp/VMware-lightwave-esx-1.0.0-5075989.vib
on hypervisor with ip '10.27.51.8'
2017-05-25 09:53:42 INFO  Info [Task: Hypervisor preparation] : Joining host 10.27.51.8 to Lightwave domain
2017-05-25 09:53:42 INFO  Info: Attempting to join the ESX host to Lightwave
2017-05-25 09:53:42 INFO  Executing the command /usr/lib/vmware/ic-deploy/bin/configure-lightwave.py 10.27.51.35 rainpole.local 'VxRail!23' 1 10.27.51.8 'VxRail!23' on hypervisor with ip '10.27.51.8'
2017-05-25 09:53:52 INFO  Info: Restart Photon Controller Agent
2017-05-25 09:53:52 INFO  Executing the command /etc/init.d/photon-controller-agent restart on hypervisor with ip '10.27.51.8'
2017-05-25 09:53:54 INFO  Info [Task: Hypervisor preparation] : Removing VIBs from host 10.27.51.8
2017-05-25 09:53:54 INFO  Info: Removing Photon VIBS from remote system
2017-05-25 09:53:54 INFO  Executing the command /bin/rm -f /tmp/photon-controller-agent-v1.1.1-319facd.vib -v /tmp/vmware-envoy-latest.vib -v /tmp/VMware-lightwave-esx-1.0.0-5075989.vib on hypervisor with ip '10.27.51.8'
2017-05-25 09:53:55 INFO  Stop [Task: Hypervisor preparation]
2017-05-25 09:53:55 INFO  COMPLETE: Install Photon Agent
2017-05-25 09:53:55 INFO  Provisioning the host to change its state to READY
2017-05-25 09:54:03 INFO  COMPLETE: Provision Managed Host
COMPLETE: Install Process has completed Successfully.
root@photon-installer [ /opt/vmware/photon/controller/share/config ]#

Step 9: Does Photon Platform see both datastores

The deployment has completed successfully. The final step in all of this is to make sure that I can see the vSAN datastore (and the NFS datastore) from Photon Platform. First off, I can use the UI to determine this. Point a browser at https://<ip-address-of-load-balancer>:4343, login with lightwave administrator credentials and see if both datastores are present.

OK – this looks pretty promising. But can we verify that one of these is vSAN? Yes we can. From the “tools” icon is the top right hand corner of the Photon Platform UI, select the option to open the API browser. This gives us a Swagger interface to Photon Platform. One of the API calls allows you to “Get datastores”. Here is the output from my setup:

That looks good, doesn’t it? I can see both the NFS datastore and my vSAN datastore. Cool! Now I’m ready to deploy an scheduler/orchestration framework. Kubernetes 1.6 is now supported, so I think I’ll give that a go soon.

Summary

Things to look out for:

  • Make sure the ESXi version is supported. If you try to use a version that support vSAN 6.6, you’ll have problems because we cannot handle membership using unicast without vCenter at this point in time.
  • The issue with the vSAN manager OVA credentials highlighted in step 5 caught me out. Be aware of that one.
  • If you misspell the name of the vSAN datastore, it won’t show up in Photon Platform. However you can always change it to what is in the YAML file, and Photon Platform will pick this up once they match (within 15 minutes I believe). This does work, as I had to do exactly that.
  • Although the vSAN RVC health check command reported some inconsistency in the output, it does not appear to have any effect on the overall functionality. We’re still looking into that one.


Thanks for reading this far. Hope you find it a useful reference.

The post Deploying vSAN with Photon Platform v1.2 appeared first on CormacHogan.com.


Deploy Kubernetes on Photon Platform 1.2 and VSAN

$
0
0

To complete my series of posts on Photon Platform version 1.2, my next step is to deploy Kubernetes (version 1.6) and use my vSAN datastore as the storage destination. The previous posts covered the new Photon Platform v1.2 deployment model, and I also covered how to setup vSAN and make the datastore available to the cloud hosts in Photon Platform v1.2. This final step will use the photon controller CLI (mostly) for creating the tenant, project,  image, and all the other steps that are required for deploying K8S on vSAN via PPv1.2. I’m very much going to include a warts-n-all approach to this deployment, as there was a lot of trial and error. A few things have changes with the new v1.2, especially with the use of quotas, which replaces the old resource ticket. The nice thing about quotas is that they can be adjusted on the fly, but they take a bit of getting used to.

What you need:

  1. Photon Platform v1.2 should already be deployed.
  2. You need 3 static ip addresses for Kubernetes (K8S) VMs, a master ip, a load-balancer ip and an ip address for etcd.
  3. The network on which K8S VMs is deployed needs DHCP for the worker VMs.
  4. You need photon controller CLI installed on your desktop/laptop to run photon CLI commands.


Why not use the UI?

Yes – you can certainly do this, and I showed how to deploy Kubernetes-As-A-Service with Photon Platform version 1.1. Unfortunately there seems to be an issue with the UI in Photon Platform 1.2, where the DNS, gateway and netmask are lost on the Summary tab, so does not complete. I fed this back to the team, and I’m sure it’ll be addressed soon, so in the meantime, the CLI is the way forward (for most of what I need to do).


Step 1 – Get photon controller CLI and K8S image

You can get these from the usual place on GitHub. Deploy it to your desktop, as we will use this CLI to complete the deployment of K8S.


Step 2 – Set the target and login

Using the photon controller CLI (I am using the Mac version), set the target to your Photon Platform Load Balancer, and login. Use https/port 443 as shown here:

Cormacs-MacBook-Pro-8:bin cormachogan$ photon target set -c https://10.27.51.68:443

API target set to 'https://10.27.51.68:443'

Cormacs-MacBook-Pro-8:bin cormachogan$ photon target login
User name (username@tenant): administrator@rainpole.local
Password:
Login successful
Step 3 – Upload the K8S image to PPV1.2
The assumption is that the K8S OVA has been downloaded locally from step 1. I’ll now push it up to PP using the following command, and check it afterwards.
Cormacs-MacBook-Pro-8:bin cormachogan$ photon image create PP1.2/kubernetes-1.6.0-pc-1.2.1-77a6d82.ova \
-n kube1 -i EAGER
Project ID (ENTER to create infrastructure image):
CREATE_IMAGE completed for 'image' entity 91a1bed4-1b54-4c9e-82cd-392ae3f1ae9b
Cormacs-MacBook-Pro-8:bin cormachogan$ photon image list
ID                                    Name   State  Size(Byte)   Replication_type  ReplicationProgress  SeedingProgress  Scope
91a1bed4-1b54-4c9e-82cd-392ae3f1ae9b  kube1  READY  41943040096  EAGER             50%                  50%              infrastructure
Total: 1


Step 4 – Tag the image for K8S

I tried to do this via the photon controller CLI, but it wouldn’t work for me.

Cormacs-MacBook-Pro-8:bin cormachogan$ photon deployment enable-cluster-type
2017/05/25 13:45:19 Error: photon: { HTTP status: '404', code: 'NotFound', message: '', data: 'map[]’ }

I’ve also provided feedback to the team on this. It looks like a known issue which will be addressed in the next update of photon controller CLI. Eventually, to unblock myself, I just logged onto the Photon Platform UI, and marked the image for Kubernetes that way. This is pretty easy to do; just select the image, then actions followed by “Use as Kubernetes image”.

Step 5 – Create a network for the VMs that will run the K8S scheduler/orchestration framework

This next step is needed so that the VMs that run the various K8S containers (master, etcd, local-balancer and workers) can all communicate. We’re basically creating a network for the VMs to use. I simply leveraged the default VM network in this example (which also has DHCP, as some of the K8S worker VMs pick up IPs from DHCP). This network is specified when we are ready to deploy the K8S ‘service’.

Cormacs-MacBook-Pro-8:bin cormachogan$ photon subnet create --name vm-network --portgroups 'VM Network'
Subnet Description: k8s-network
CREATE_NETWORK completed for 'network' entity 94660bdd-d1e1-45b5-8e80-8d737915d751                 

Cormacs-MacBook-Pro-8:bin cormachogan$ photon subnet set-default 94660bdd-d1e1-45b5-8e80-8d737915d751
Are you sure [y/n]? y
SET_DEFAULT_NETWORK completed for 'network' entity 94660bdd-d1e1-45b5-8e80-8d737915d751            

Cormacs-MacBook-Pro-8:bin cormachogan$ photon subnet list
ID                                    Name        Kind    Description  PrivateIpCidr  ReservedIps  State  IsDefault  PortGroups
94660bdd-d1e1-45b5-8e80-8d737915d751  vm-network  subnet  k8s-network                 map[]        READY  true       [VM Network]
Cormacs-MacBook-Pro-8:bin cormachogan$ 


Step 6 – Create a “flavour” for the K8S VMs

This step simply defines the resources that go to make up the VMs that are deployed to run the K8S containers. I’ve made it quite small, 1 CPU and 2GB memory. This will also be used at the command line when deploying K8S later on.

Cormacs-MacBook-Pro-8:bin cormachogan$ photon flavor create --name \
cluster-small -k vm --cost 'vm 1 COUNT, vm.cpu 1 COUNT, vm.memory 2 GB'
Creating flavor: 'cluster-small', Kind: 'vm'

Please make sure limits below are correct: 
1: vm, 1, COUNT
2: vm.cpu, 1, COUNT
3: vm.memory, 2, GB
Are you sure [y/n]? y
CREATE_FLAVOR completed for 'vm' entity 898322d6-2d9d-4a84-9f41-f0f9adf76cb1                       
Cormacs-MacBook-Pro-8:bin cormachogan$


Step 7 – Tenant, Project and fun with Quotas

In this step, I create the tenant, the project and then select some quotas (resources).  I said I would show the “warts and all” approach, so here you will see the various errors I get when I don’t get the quota settings quite right. When you create the tenant and project, you can use the –limits option to specify a quota, or you can use the ‘quota update‘ to modify the resources afterwards. I will show an update example later. Let’s create the tenant with some quota. I will set the tenant to have 100 VMs, 1TB memory and 500 CPUs. I will then create a project to consume part of those VM CPU and Memory resources. There could be multiple projects in a tenant, but in this setup, there is only one. I will then set the tenant and project context to point to these.

Cormacs-MacBook-Pro-8:bin cormachogan$ photon tenant quota set plato --limits\
 'vm.count 100 COUNT, vm.memory 1000 GB, vm.cpu 500 COUNT'

Tenant name: plato
Please make sure limits below are correct:
1: vm.count, 100, COUNT
2: vm.memory, 1000, GB
3: vm.cpu, 500, COUNT
Are you sure [y/n]? y
RESET_QUOTA completed for 'tenant' entity ebdd8cd4-515d-4f71-8ce1-a7e9cb318dba 

Cormacs-MacBook-Pro-8:bin cormachogan$ photon tenant quota show plato
    Limits:
      vm.count   100   COUNT
      vm.cpu     500   COUNT
      vm.memory  1000  GB
    Usage:
      vm.count   0   COUNT
      vm.cpu     0   COUNT
      vm.memory  0   GB

Cormacs-MacBook-Pro-8:bin cormachogan$ photon project create plato-prjt \
--tenant plato --limits 'vm.memory 100 GB, vm.cpu 50 COUNT, vm.count 10 COUNT

Tenant name: plato
Creating project name: plato-prjt

Please make sure limits below are correct:
1: vm.memory, 100, GB
2: vm.cpu, 50, COUNT
3: vm.count, 10, COUNT
Are you sure [y/n]? y
CREATE_PROJECT completed for 'project' entity 7592c6f4-07f5-450f-83d7-267af1acd48e                 
Cormacs-MacBook-Pro-8:bin cormachogan$ 

Cormacs-MacBook-Pro-8:bin cormachogan$ photon tenant quota show plato
    Limits:
      vm.count   100   COUNT
      vm.cpu     500   COUNT
      vm.memory  1000  GB
    Usage:
      vm.cpu     50   COUNT
      vm.memory  100  GB
      vm.count   10   COUNT
Cormacs-MacBook-Pro-8:bin cormachogan$ 

Cormacs-MacBook-Pro-8:bin cormachogan$ photon tenant set plato
Tenant set to ‘plato’

Cormacs-MacBook-Pro-8:bin cormachogan$ photon project set plato-prjt
Project set to 'plato-prjt'
Cormacs-MacBook-Pro-8:bin cormachogan$ 


Now, what I did not include here is anything related to disk resources. Let’s do that next. I’ll add persistent disks and ephemeral disks to the tenant and its project. See if you can spot my not so deliberate mistake:


Cormacs-MacBook-Pro-8:bin cormachogan$ photon tenant quota update plato \
--limits 'persistent-disk 100 COUNT, persistent-disk.capacity 200 GB'

Tenant name: plato
Please make sure limits below are correct:
1: persistent-disk, 100, COUNT
2: persistent-disk.capacity, 200, GB
Are you sure [y/n]? y
UPDATE_QUOTA completed for 'tenant' entity ebdd8cd4-515d-4f71-8ce1-a7e9cb318dba                    

Cormacs-MacBook-Pro-8:bin cormachogan$ photon tenant quota update plato \
--limits 'ephereral-disk 100 COUNT, ephereral-disk.capacity 200 GB'

Tenant name: plato
Please make sure limits below are correct:
1: ephereral-disk, 100, COUNT
2: ephereral-disk.capacity, 200, GB
Are you sure [y/n]? y
UPDATE_QUOTA completed for 'tenant' entity ebdd8cd4-515d-4f71-8ce1-a7e9cb318dba                    

Cormacs-MacBook-Pro-8:bin cormachogan$ photon project quota update \
--limits 'persistent-disk 100 COUNT, persistent-disk.capacity 200 GB, \
ephereral-disk 100 COUNT, ephereral-disk.capacity 200 GB' 7592c6f4-07f5-450f-83d7-267af1acd48e

Project Id: 7592c6f4-07f5-450f-83d7-267af1acd48e
Please make sure limits below are correct:
1: persistent-disk, 100, COUNT
2: persistent-disk.capacity, 200, GB
3: ephereral-disk, 100, COUNT
4: ephereral-disk.capacity, 200, GB
Are you sure [y/n]? y
UPDATE_QUOTA completed for 'project' entity 7592c6f4-07f5-450f-83d7-267af1acd48e                   
Cormacs-MacBook-Pro-8:bin cormachogan$


Step 8 –  Let’s deploy some Kubernetes

OK – I thought this would be more interesting if I tried some trial and error stuff here. I didn’t spend too much time worrying about whether I got the quotas right, and so on. I simply decided to try various options and see how it erred out. Feel free to skip down to Take #5 if you’re not interested in this approach.

Take #1: Most of this command be straight-forward I think. The only thing that might be confusing is the -d “vsan-disk”. I’ll come back to that shortly. However it looks like we’ve failed due to a lack of resources. Note that the command line is picking up the default tenant, project and network. We are specifing the vm_flavor created earlier though. Most of the rest of the command is taken up with the ip addresses of the K8S master, etcd and load-balancer.

Cormacs-MacBook-Pro-8:bin cormachogan$ photon service create -n kube-socrates -k KUBERNETES --master-ip 10.27.51.208 \
--etcd1 10.27.51.209 --load-balancer-ip 10.27.51.210 --container-network 10.2.0.0/16 --dns 10.27.51.35 \
--gateway 10.27.51.254 --netmask 255.255.255.0 -c 2 --vm_flavor cluster-small --ssh-key ~/.ssh/id_rsa.pub -d vsan-disk
Kubernetes master 2 static IP address (leave blank for none):
etcd server 2 static IP address (leave blank for none):

Creating service: kube-socrates (KUBERNETES)
  Disk flavor: vsan-disk
  Worker count: 5

Are you sure [y/n]? y
2017/05/25 14:37:26 Error: photon: Task 'd75ca8b9-8a09-48bf-8e94-4718702c9a73' is in error state: \
{@step=={"sequence"=>"1","state"=>"ERROR","errors"=>[photon: { HTTP status: '0', code: 'InternalError', \
message: 'Failed to rollout KubernetesEtcd. Error: MultiException[java.lang.IllegalStateException: \
VmProvisionTaskService failed with error com.vmware.photon.controller.api.frontend.exceptions.external.QuotaException: \
Not enough quota: Current Limit: vm, 0.0, COUNT, desiredUsage vm, 1.0, COUNTQuotaException{limit.key=vm, limit.value=0.0, \
limit.unit=COUNT, usage.key=vm, usage.value=0.0, usage.unit=COUNT, newUsage.key=vm, newUsage.value=1.0, newUsage.unit=COUNT}. \
/photon/servicesmanager/vm-provision-tasks/48ef339d5505951ddff41]', data: 'map[]' }],"warnings"=>[],"operation"=>"\
CREATE_KUBERNETES_SERVICE_SETUP_ETCD","startedTime"=>"1495719439272","queuedTime"=>"1495719439232","endTime"=>"1495719444273","options"=>map[]}}
API Errors: [photon: { HTTP status: '0', code: 'InternalError', message: 'Failed to rollout KubernetesEtcd. Error: \
MultiException[java.lang.IllegalStateException: VmProvisionTaskService failed with error com.vmware.photon.controller.\
api.frontend.exceptions.external.QuotaException: Not enough quota: Current Limit: vm, 0.0, COUNT, desiredUsage vm, 1.0, \
COUNTQuotaException{limit.key=vm, limit.value=0.0, limit.unit=COUNT, usage.key=vm, usage.value=0.0, usage.unit=COUNT, \
newUsage.key=vm, newUsage.value=1.0, newUsage.unit=COUNT}. /photon/servicesmanager/vm-provision-tasks/48ef339d5505951ddff41]', data: 'map[]' }]
Cormacs-MacBook-Pro-8:bin cormachogan>


I’ve hit my first error. The description is pretty good though. The issue here is that I never defined a quota for VM. Let’s address that:

Cormacs-MacBook-Pro-8:bin cormachogan$ photon tenant quota update plato \
--limits 'vm 100 COUNT'

Tenant name: plato
Please make sure limits below are correct:
1: vm, 100, COUNT
Are you sure [y/n]? y
UPDATE_QUOTA completed for 'tenant' entity ebdd8cd4-515d-4f71-8ce1-a7e9cb318dba                    
Cormacs-MacBook-Pro-8:bin cormachogan$ photon tenant quota show plato
    Limits:
      ephereral-disk.capacity   200        GB
      persistent-disk           100        COUNT
      ephemeral-disk            200        COUNT
      persistent-disk.capacity  200        GB
      ephereral-disk            100        COUNT
      vm.count                  100        COUNT
      vm.cpu                    500        COUNT
      vm.memory                 1000       GB
      ephemeral-disk.capacity   1.024e+06  MB
      vm                        100        COUNT
    Usage:
      ephereral-disk.capacity   200  GB
      persistent-disk           100  COUNT
      vm                        0    COUNT
      ephemeral-disk            0    COUNT
      persistent-disk.capacity  200  GB
      ephereral-disk            100  COUNT
      vm.count                  10   COUNT
      vm.cpu                    50   COUNT
      vm.memory                 100  GB
      ephemeral-disk.capacity   0    MB

Cormacs-MacBook-Pro-8:bin cormachogan$ photon project quota update \
--limits 'vm 100 COUNT' 7592c6f4-07f5-450f-83d7-267af1acd48e

Project Id: 7592c6f4-07f5-450f-83d7-267af1acd48e
Please make sure limits below are correct:
1: vm, 100, COUNT
Are you sure [y/n]? y
UPDATE_QUOTA completed for 'project' entity 7592c6f4-07f5-450f-83d7-267af1acd48e


Take #2: With that issue addressed, let’s try once more.

Cormacs-MacBook-Pro-8:bin cormachogan$ photon service create -n kube-socrates -k KUBERNETES --master-ip 10.27.51.208 \
--etcd1 10.27.51.209 --load-balancer-ip 10.27.51.210 --container-network 10.2.0.0/16 --dns 10.27.51.252 \
--gateway 10.27.51.254 --netmask 255.255.255.0 -c 5 --vm_flavor cluster-small --ssh-key ~/.ssh/id_rsa.pub -d vsan-disk
Kubernetes master 2 static IP address (leave blank for none):
etcd server 2 static IP address (leave blank for none):

Creating service: kube-socrates (KUBERNETES)
  Disk flavor: vsan-disk
  Worker count: 5

Are you sure [y/n]? y
2017/05/25 15:42:24 Error: photon: Task 'f79cfd7f-03f0-4112-b156-15939891ddcb' is in error state: \
{@step=={"sequence"=>"1","state"=>"ERROR","errors"=>[photon: { HTTP status: '0', code: 'InternalError', \
message: 'Failed to rollout KubernetesEtcd. Error: MultiException[java.lang.IllegalStateException: \
VmProvisionTaskService failed with error com.vmware.photon.controller.api.frontend.exceptions.external.\
FlavorNotFoundException: Flavor vsan-disk is not found for kind ephemeral-disk. /photon/servicesmanager/\
vm-provision-tasks/48ef339d5505a3a2cf5b0]', data: 'map[]' }],"warnings"=>[],"operation"=>"\
CREATE_KUBERNETES_SERVICE_SETUP_ETCD","startedTime"=>"1495723336805","queuedTime"=>"1495723336795",\
"endTime"=>"1495723341806","options"=>map[]}}
API Errors: [photon: { HTTP status: '0', code: 'InternalError', message: 'Failed to rollout KubernetesEtcd. \
Error: MultiException[java.lang.IllegalStateException: VmProvisionTaskService \
failed with error com.vmware.photon.controller.api.frontend.exceptions.external.FlavorNotFoundException: \
Flavor vsan-disk is not found for kind ephemeral-disk. /photon/servicesmanager/vm-provision-tasks/48ef339d5505a3a2cf5b0]', \
data: 'map[]' }]


Ah – so this is a problem with the vsan-disk option. I actually need to make a flavor for this so that it places the VMs on vSAN storage.  Here is how we do that:

Cormacs-MacBook-Pro-8:bin cormachogan$ photon -n flavor create --name "vsan-disk" \
--kind "ephemeral-disk" --cost "storage.VSAN 1.0 COUNT"
167951af-8bfa-4746-b58f-810157dc4bf8

Cormacs-MacBook-Pro-8:bin cormachogan$ photon -n flavor list
167951af-8bfa-4746-b58f-810157dc4bf8 vsan-disk ephemeral-disk storage.VSAN:1:COUNT
 898322d6-2d9d-4a84-9f41-f0f9adf76cb1 cluster-small vm vm:1:COUNT,vm.cpu:1:COUNT,vm.memory:2:GB
service-flavor-1 service-master-vm vm vm.count:1:COUNT,vm.cpu:4:COUNT,vm.memory:8:GB
service-flavor-2 service-other-vm vm vm.count:1:COUNT,vm.cpu:1:COUNT,vm.memory:4:GB
service-flavor-3 service-vm-disk ephemeral-disk ephemeral-disk:1:COUNT
service-flavor-4 service-generic-persistent-disk persistent-disk persistent-disk:1:COUNT
service-flavor-5 service-local-vmfs-persistent-disk persistent-disk storage.LOCAL_VMFS:1:COUNT
service-flavor-6 service-shared-vmfs-persistent-disk persistent-disk storage.SHARED_VMFS:1:COUNT
service-flavor-7 service-vsan-persistent-disk persistent-disk storage.VSAN:1:COUNT
service-flavor-8 service-nfs-persistent-disk persistent-disk storage.NFS:1:COUNT
Cormacs-MacBook-Pro-8:bin cormachogan$


Take #3: Let’s try again.

Cormacs-MacBook-Pro-8:bin cormachogan$ photon service create -n kube-socrates -k KUBERNETES --master-ip 10.27.51.208 \
--etcd1 10.27.51.209 --load-balancer-ip 10.27.51.210 --container-network 10.2.0.0/16 --dns 10.27.51.252 \
--gateway 10.27.51.254 --netmask 255.255.255.0 -c 5 --vm_flavor cluster-small --ssh-key ~/.ssh/id_rsa.pub -d vsan-disk
Kubernetes master 2 static IP address (leave blank for none):

 etcd server 2 static IP address (leave blank for none):

Creating service: kube-socrates (KUBERNETES)
 Disk flavor: vsan-disk
 Worker count: 5

Are you sure [y/n]? y
 2017/05/25 15:47:01 Error: photon: Task 'e0eff9c7-9f41-4d1d-b92d-3b5e854da717' is in error state: {@step=={"sequence"=>"1",\
"state"=>"ERROR","errors"=>[photon: { HTTP status: '0', code: 'InternalError', message: 'Failed to rollout KubernetesEtcd. \
Error: MultiException[java.lang.IllegalStateException: VmProvisionTaskService failed with error com.vmware.photon.controller.\
api.frontend.exceptions.external.QuotaException: Not enough quota: Current Limit: storage.VSAN, 0.0, COUNT, desiredUsage storage.VSAN, 1.0, \
COUNTQuotaException{limit.key=storage.VSAN, limit.value=0.0, limit.unit=COUNT, usage.key=storage.VSAN, usage.value=0.0, usage.unit=COUNT, \
newUsage.key=storage.VSAN, newUsage.value=1.0, newUsage.unit=COUNT}. /photon/servicesmanager/vm-provision-tasks/48ef339d5505a4aad7272]', \
data: 'map[]' }],"warnings"=>[],"operation"=>"CREATE_KUBERNETES_SERVICE_SETUP_ETCD","startedTime"=>"1495723613645","queuedTime"=>"1495723613626",\
"endTime"=>"1495723618649","options"=>map[]}}
 API Errors: [photon: { HTTP status: '0', code: 'InternalError', message: 'Failed to rollout KubernetesEtcd. Error: MultiException\
[java.lang.IllegalStateException: VmProvisionTaskService failed with error com.vmware.photon.controller.api.frontend.exceptions.external.\
QuotaException: Not enough quota: Current Limit: storage.VSAN, 0.0, COUNT, desiredUsage storage.VSAN, 1.0, COUNTQuotaException\
{limit.key=storage.VSAN, limit.value=0.0, limit.unit=COUNT, usage.key=storage.VSAN, usage.value=0.0, usage.unit=COUNT, newUsage.key=storage.VSAN, \
newUsage.value=1.0, newUsage.unit=COUNT}. /photon/servicesmanager/vm-provision-tasks/48ef339d5505a4aad7272]', data: 'map[]' }]


Another quota issue, this time against the newly created vsan-disk. Let’s just bump up the count (and capacity while I am at it).

Cormacs-MacBook-Pro-8:bin cormachogan$ photon project quota update --limits 'storage.VSAN 100 COUNT, \
storage.VSAN.capacity 1000 GB' 7592c6f4-07f5-450f-83d7-267af1acd48e

Project Id: 7592c6f4-07f5-450f-83d7-267af1acd48e
Please make sure limits below are correct:
1: storage.VSAN, 100, COUNT
2: storage.VSAN.capacity, 1000, GB
Are you sure [y/n]? y
UPDATE_QUOTA completed for 'project' entity 7592c6f4-07f5-450f-83d7-267af1acd48e                   
Cormacs-MacBook-Pro-8:bin cormachogan$


Take #4. Once more into the breach:

Cormacs-MacBook-Pro-8:bin cormachogan$ photon service create -n kube-socrates -k KUBERNETES --master-ip 10.27.51.208 \
 --etcd1 10.27.51.209 --load-balancer-ip 10.27.51.210 --container-network 10.2.0.0/16 --dns 10.27.51.252 \
 --gateway 10.27.51.254 --netmask 255.255.255.0 -c 5 --vm_flavor cluster-small --ssh-key ~/.ssh/id_rsa.pub -d vsan-disk
 Kubernetes master 2 static IP address (leave blank for none):
 etcd server 2 static IP address (leave blank for none):

Creating service: kube-socrates (KUBERNETES)
   Disk flavor: vsan-disk
   Worker count: 5

Are you sure [y/n]? y
 2017/05/25 15:50:32 Error: photon: Task '1ac181b3-fc07-4313-8fbe-d1900d8de01c' is in error state: {@step=={"sequence"=>"1","state"=>\
 "ERROR","errors"=>[photon: { HTTP status: '0', code: 'InternalError', message: 'Failed to rollout KubernetesEtcd. Error: MultiException\
 [java.lang.IllegalStateException: VmProvisionTaskService failed with error com.vmware.photon.controller.\api.frontend.exceptions.external\
 .QuotaException: Not enough quota: Current Limit: ephemeral-disk.capacity, 0.0, GB, desiredUsage ephemeral-disk.capacity, 39.0, GB\
 QuotaException{limit.key=ephemeral-disk.capacity, limit.value=0.0, limit.unit=GB, usage.key=ephemeral-disk.capacity, usage.value=0.0, \
 usage.unit=GB, newUsage.key=ephemeral-disk.capacity, newUsage.value=39.0, newUsage.unit=GB}. /photon/servicesmanager/vm-provision-tasks/\
 48ef339d5505a573b312a]', data: 'map[]' }],"warnings"=>[],"operation"=>"CREATE_KUBERNETES_SERVICE_SETUP_ETCD","startedTime"=>"1495723824262",\
 "queuedTime"=>"1495723824251","endTime"=>"1495723829263","options"=>map[]}}
 API Errors: [photon: { HTTP status: '0', code: 'InternalError', message: 'Failed to rollout KubernetesEtcd. Error: MultiException\
 [java.lang.IllegalStateException: VmProvisionTaskService failed with error com.vmware.photon.controller.api.frontend.exceptions.external.\
 QuotaException: Not enough quota: Current Limit: ephemeral-disk.capacity, 0.0, GB, desiredUsage ephemeral-disk.capacity, 39.0, GBQuotaException\
 {limit.key=ephemeral-disk.capacity, limit.value=0.0, limit.unit=GB, usage.key=ephemeral-disk.capacity, usage.value=0.0, usage.unit=GB, \
 newUsage.key=ephemeral-disk.capacity, newUsage.value=39.0, newUsage.unit=GB}. /photon/servicesmanager/vm-provision-tasks/48ef339d5505a573b312a]', data: 'map[]' }]

OK – this is going back to my deliberate mistake in step 7 – I typo’ed ephereral instead of ephemeral so I actually don’t have any ephemeral disk capacity. And my vSAN storage has been marked as kind “ephemeral”. Let’s now fix that one up:

Cormacs-MacBook-Pro-8:bin cormachogan$ photon tenant quota update plato --limits 'ephemeral-disk.capacity 200 GB'

Tenant name: plato
Please make sure limits below are correct:
1: ephemeral-disk.capacity, 200, GB
Are you sure [y/n]? y
UPDATE_QUOTA completed for 'tenant' entity ebdd8cd4-515d-4f71-8ce1-a7e9cb318dba                    


Cormacs-MacBook-Pro-8:bin cormachogan$ photon project quota update --limits 'ephemeral-disk.capacity 200 GB' \
7592c6f4-07f5-450f-83d7-267af1acd48e

Project Id: 7592c6f4-07f5-450f-83d7-267af1acd48e
Please make sure limits below are correct:
1: ephemeral-disk.capacity, 200, GB
Are you sure [y/n]? y
UPDATE_QUOTA completed for 'project' entity 7592c6f4-07f5-450f-83d7-267af1acd48e                   
Cormacs-MacBook-Pro-8:bin cormachogan$


Take #5 – Now it should work, right?

Cormacs-MacBook-Pro-8:.kube cormachogan$ photon service create -n kube-socrates -k KUBERNETES --master-ip 10.27.51.208 \
--etcd1 10.27.51.209 --load-balancer-ip 10.27.51.210 --container-network 10.2.0.0/16 --dns 10.27.51.252 \
--gateway 10.27.51.254 --netmask 255.255.255.0 -c 2 --vm_flavor cluster-small --ssh-key ~/.ssh/id_rsa.pub -d vsan-disk
Kubernetes master 2 static IP address (leave blank for none):
etcd server 2 static IP address (leave blank for none):

Creating service: kube-socrates (KUBERNETES)
  Disk flavor: vsan-disk
  Worker count: 2

Are you sure [y/n]? y
CREATE_SERVICE completed for 'service' entity 6be5ce48-81ff-4682-a5de-1066fb3fa316                 
Note: the service has been created with minimal resources. You can use the service now.
A background task is running to gradually expand the service to its target capacity.
You can run 'service show ' to see the state of the service.
Cormacs-MacBook-Pro-8:.kube cormachogan$

Success!

Right, let’s monitor the deployment while the Kubernets workers are getting deployed. We should see it go from ‘Maintenance’ to “Ready’:

Cormacs-MacBook-Pro-8:.kube cormachogan$ photon service list
ID                                    Name           Type        State        Worker Count
6be5ce48-81ff-4682-a5de-1066fb3fa316  kube-socrates  KUBERNETES  MAINTENANCE  2

Total: 1
MAINTENANCE: 1

Cormacs-MacBook-Pro-8:.kube cormachogan$ photon service list
ID                                    Name           Type        State  Worker Count
6be5ce48-81ff-4682-a5de-1066fb3fa316  kube-socrates  KUBERNETES  READY  2

Total: 1
READY: 1

Step 9: Check out the Photon Platform Dashboard

The Photon Platform dashboard can now be used to look at the new cluster and the running VMs. Here are some screenshots from my setup. the first is the Tenant > Project > Cluster view where you can see the Kubernetes service, and the second is the Tenant > Project > VMs view where you can see the VMs that we deployed to get K8S up and running:

Step 10: Login to K8S

With Kubernetes now deployed, we can login to the main dashboard to make sure everything is working. Just point a browser at https://<ip-of-k8s-load-balancer:6443, and login with the credentials admin/admin. If everything is working, the Admin view should look something like this:

Summary

OK, there were a couple of hiccups. The issue with the UI missing network information, and the photon CLI command issue with ‘enable-cluster-type’. Both of these issues have been fed back to the team. Also, quotas take a little getting used to, but once you are familiar with them, they are far more flexible than the older ‘resource-ticket’. And if I took a little more time to learn about them, I would have had so much trial and error. Having said all that, it is still relatively straight-forward to deploy K8S onto a vSAN datastore via Photon Platform v1.2, even using the CLI approach.

The post Deploy Kubernetes on Photon Platform 1.2 and VSAN appeared first on CormacHogan.com.

Fun with Kubernetes on Photon Platform v1.2

$
0
0

In this post, I’m simply going to show you a few useful tips and tricks to see the power of Kubernetes on Photon Platform v1.2. For someone who is well versed in Kubernetes, there won’t be anything ground-breaking for you in this post. However, if you are new to K8s as I am (K8s is short hand for Kubernetes), and are looking to roll out some containerized apps after you have Kubernetes running on Photon Platform, some of these might be of interest. If you are new to K8s, you might like to review some of the terminology used from this older blog post.

1. Adding additional K8S workers/nodes

If you’ve been following my previous posts, you’ll know that I original deployed my K8s cluster/service with a single worker or node. A K8s worker or node on Photon Platform is essentially a VM that can run containers. To scale out the number of workers associated with a K8s cluster, open a browser to the Photon Platform UI, select tenant, project and cluster (service) that you wish to scale out. Here, you will find a resize button. Now you can bump the number of workers up to a higher value. In this example, I am bumping it up to 3. This has the effect of deploying additional worker virtual machines on Photon Platform.
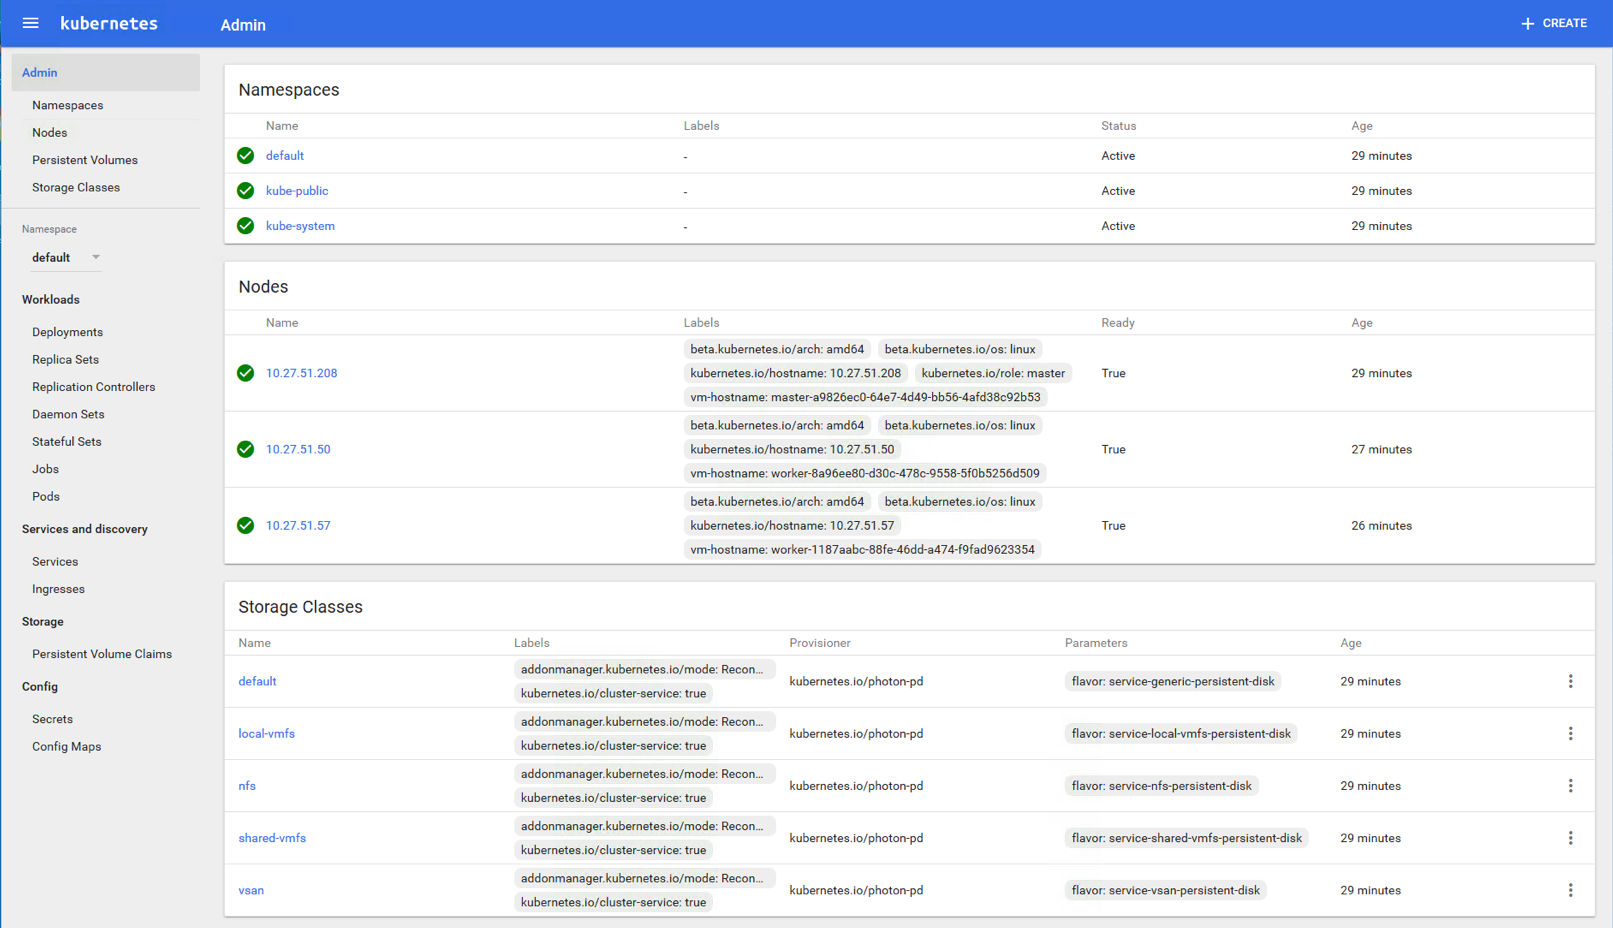
2. Deploy a containerized application

In this example, I am going to use some pre-existing YAML files to deploy some containerized application on K8s, namely nginx and tomcat web servers. Both YAML files  have a similar look and feel, as you will see. First is the tomcat YAML file. It contains both a “Service” section and a “ReplicationController” section. The Service has the port mapping, and it will map the tomcat port 8080 to master port 30001. This will mean that the tomcat service on whichever worker will be accessible from the K8s master via port 30001. This applicationwill  only have 1 pod/replica initially since replicas is set to 1. The image is tomcat, which will be fetched from an external resource once deployment begins.
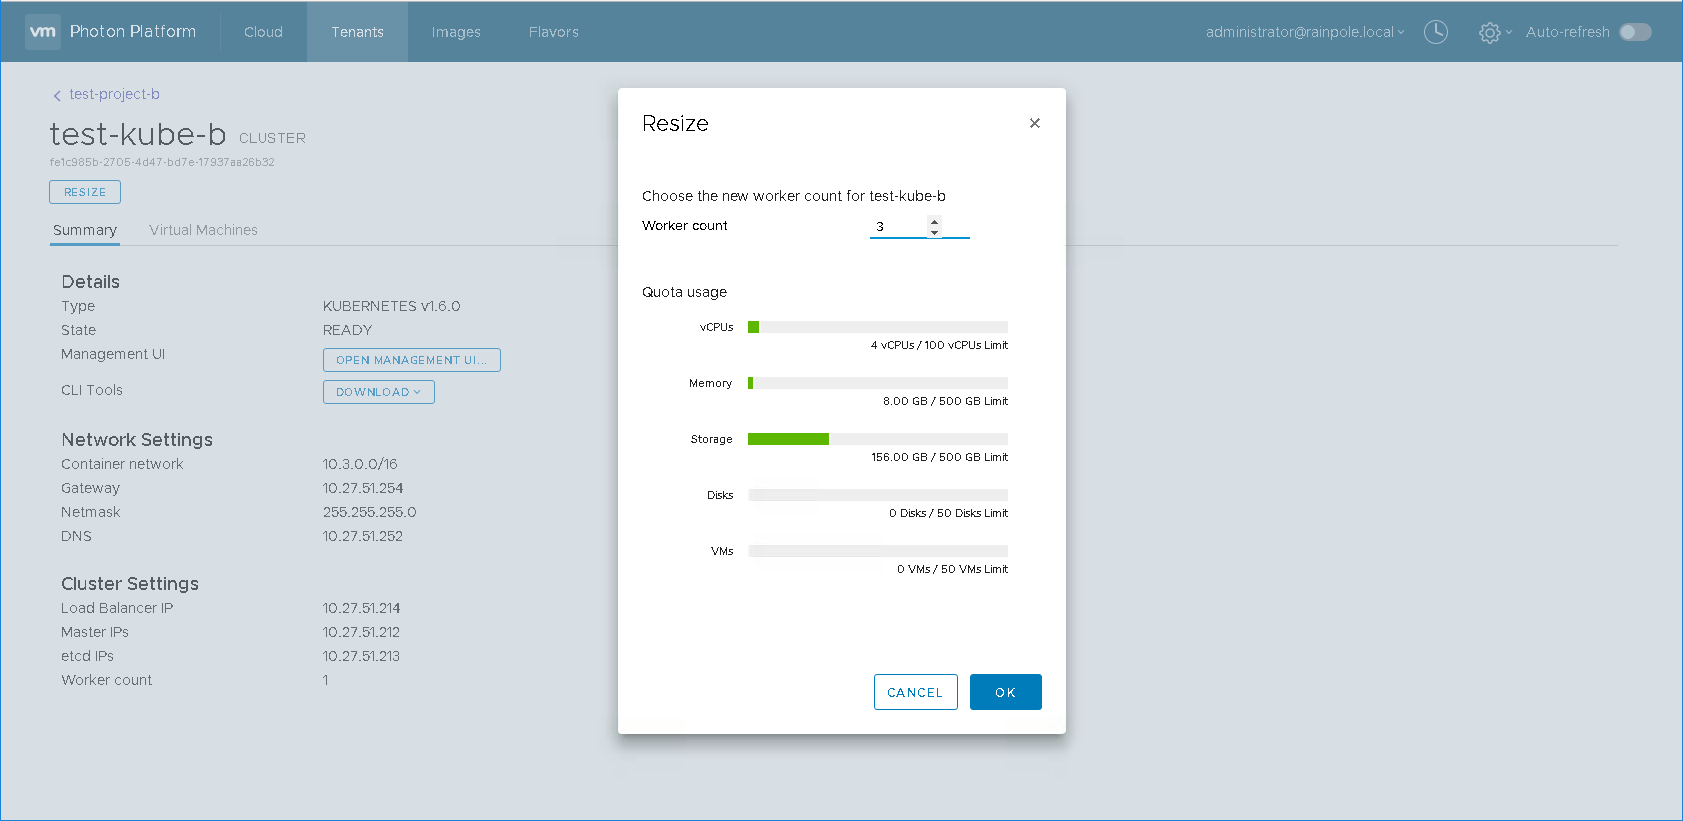
apiVersion: v1
kind: Service
metadata:
  name: tomcat-demo-service
  labels:
    name: tomcat
spec:
  type: LoadBalancer
  ports:
  - port: 8080
    targetPort: 8080
    protocol: "TCP"
    nodePort: 30001
  selector:
    name: tomcat-server
---
apiVersion: v1
kind: ReplicationController
metadata:
  name: tomcat-server
spec:
  replicas: 1
  selector:
    name: tomcat-server
  template:
    metadata:
      labels:
        name: tomcat-server
    spec:
      containers:
        - name: tomcat-frontend
          image: tomcat
          ports:
            - containerPort: 8080

Lets now look at the nginx YAML file. The layout is very similar, with some minor differences. This app will have 3 x pods since replicas is set to 3, the image is nginx, and we have not set a node port, so we will be allocated a mapped port at deployment.

apiVersion: v1
kind: Service
metadata:
  name: nginx-demo-service
  labels:
    app: nginx-demo
spec:
  type: NodePort
  ports:
  - port: 80
    protocol: TCP
    name: http
  selector:
    app: nginx-demo
---
apiVersion: v1
kind: ReplicationController
metadata:
  name: nginx-demo
spec:
  replicas: 3
  template:
    metadata:
      labels:
        app: nginx-demo
    spec:
      containers:
      - name: nginx-demo
        image: nginx
        ports:
        - containerPort: 80

These YAML files can be uploaded directly into the Kubernetes UI using the 4 steps highlighted below. The Kubernetes management interface can be launched directly from the Photon Platform UI, and is available in the same screen where we resized the cluster in part 1 above. Simply click on the “Open Management UI” button and it will take you to it.

This will automatically create the application defined in the YAML file. The deployments can be queried to see which port they are accessible on from the master node. For example, if I now point my browser at my master node and the node port of 30001 defined in the YAML file, I should see the default tomcat landing page:

Remember the master IP address is not the same IP as the management UI, which uses the load-balancer IP address. This caught me out.

You can use the same process for testing the nginx deployment, but you would have to examine the deployment to see what port the nginx port 80 has been mapped to on the master.

3. Add additional pods for an application

A pod is a term used for a group of one or more containers, the shared storage for those containers, and options about how to run the containers. You could also think of this as a term of applications running on the cluster.

The purpose of a replica controller is to ensure that a specified number of pod “replicas” are running at any one time to ensure that, even in the event of a failure, the pods (or applications running in containers) continues to run.

To increase the number of pods, simply navigate to the replication controller section in the management UI, click on the dots to the right hand side of the replication controller for your application, and select scale. You can then input the number of pods required. This will create additional pods for your application. Earlier, I deployed tomcat with only a single replica. I can’t increase this to 3 using the procedure outlined here.

The application will automatically scale, and now the tomcat-server should be shown with 3/3 pods, the same as nginx.

One thing to note, and it is a question that comes up a lot. There is no way to specify that workers should have affinity to an ESXi host at this point. Therefore, even though we can specify a number of replicas/pods for a service, multiple pods may end up on the same ESXi host. Going forward, my understanding is that there are definitely plans to have some sort of anti-affinity which prevents pods from the same application being placed on workers on the same host, thus having a single failure impact multiple pods.

 4. Using kubectl to manage your K8S deployment

Many folks well versed in Kubernetes will be familiar with the CLI tool, kubectl. You can also use this tool to manage your K8s service on Photon Platform. You can download the kubectl tool from the same page as resizing the cluster and opening the management UI that we saw in part 1. In this example, I have downloaded it to my Windows desktop. The firs thing I must do is get authenticated. VMware provides a very useful photon CLI command to create the kubectl commands that must be run to authenticate against K8S. Here are the commands, which include logging into Photon Platform, setting the tenant and project, locating the K8S service, and then generating the authentication commands using photon service get-kubectl-auth once you have the service id for K8s running on Photon Platform.

E:\PP1.2\.kube>photon -v
photon version 1.2.1 (Git commit hash: dc75225)

E:\PP1.2\.kube>photon target set -c https://10.27.51.68
API target set to 'https://10.27.51.68'

E:\PP1.2\.kube>photon target login
User name (username@tenant): administrator@rainpole.local
Password:
Login successful

E:\PP1.2\.kube>photon tenant set test-tenant-b
Tenant set to 'test-tenant-b'

E:\PP1.2\.kube>photon project set test-project-b
Project set to 'test-project-b'

E:\PP1.2\.kube>photon service list
ID                                    Name         Type        State  Worker Count
fe1c985b-2705-4d47-bd7e-17937aa26b32  test-kube-b  KUBERNETES  READY  1
Total: 1
READY: 1

E:\PP1.2\.kube>photon service get-kubectl-auth -u administrator@rainpole.local -p xxx fe1c985b-2705-4d47-bd7e-17937aa26b32

kubectl config set-credentials administrator@rainpole.local \
    --auth-provider=oidc \
    --auth-provider-arg=idp-issuer-url=https://10.27.51.35/openidconnect/rainpole.local \
    --auth-provider-arg=client-id=d816f411-6da2-475d-af2c-3b85dfc37103 \
    --auth-provider-arg=client-secret=d816f411-6da2-475d-af2c-3b85dfc37103 \
    --auth-provider-arg=refresh-token=eyJhbGciOiJSUzI1NiJ9.eyJzdWIiOiJhZG1... \
    --auth-provider-arg=id-token=eyJhbGciOiJSUzI1NiJ9.eyJzdWIiOiJhZG1pbmlzd... \
    --auth-provider-arg=idp-certificate-authority=C:\Users\chogan\AppData\Local\Temp\lw-ca-cert-TSRY.pem941182995

kubectl config set-cluster test-kube-b --server=https://10.27.51.214:6443 --insecure-skip-tls-verify=true

kubectl config set-context test-kube-b-context --cluster test-kube-b --user=administrator@rainpole.local

kubectl config use-context test-kube-b-context

E:\PP1.2\.kube>

The output is rather long and obscure (I shortened the token outputs for the post), but the point is that you will have to run the 4 x kubectl config commands output from the previous photon service command. This updates the .kube/config file with the appropriate credentials, cluster information and content information to allow the user to run further kubectl commands. One thing to note when running this in a Windows command window: the trailing ‘\’ do not work. So you will have to edit the first command, remove the trailing ‘\’ and place the command all on one line. Another thing to note is that not all four commands are displayed when the command options are not provided as I have done above. You will need all four kubectl config commands to enable kubectl to run from your environment.

When these commands have been successfully run, you can now start to use kubectl commands to examine your K8S cluster:

E:\PP1.2>kubectl get nodes
NAME           STATUS         AGE       VERSION
10.27.51.208   Ready,master   21h       v1.6.0
10.27.51.50    Ready          21h       v1.6.0
10.27.51.76    Ready          5m        v1.6.0
10.27.51.77    Ready          5m        v1.6.0


E:\PP1.2>kubectl get pods 
NAME                  READY     STATUS    RESTARTS   AGE 
tomcat-server-wqfzr   1/1       Running   0          20h


E:\PP1.2>kubectl get pods --all-namespaces 
NAMESPACE     NAME                                    READY     STATUS    RESTARTS   AGE 
default       tomcat-server-wqfzr                     1/1       Running   0          20h 
kube-system   k8s-master-10.27.51.208                 4/4       Running   10         21h 
kube-system   k8s-proxy-v1-27j2r                      1/1       Running   0          21h 
kube-system   k8s-proxy-v1-4p324                      1/1       Running   0          21h 
kube-system   kube-addon-manager-10.27.51.208         1/1       Running   0          21h 
kube-system   kube-dns-806549836-rqwlh                3/3       Running   0          21h 
kube-system   kubernetes-dashboard-2917854236-2k1sv   1/1       Running   0          21h


E:\PP1.2>kubectl get nodes
NAME           STATUS         AGE       VERSION
10.27.51.208   Ready,master   21h       v1.6.0
10.27.51.50    Ready          21h       v1.6.0
10.27.51.76    Ready          5m        v1.6.0
10.27.51.77    Ready          5m        v1.6.0


E:\PP1.2>kubectl get svc
NAME         CLUSTER-IP   EXTERNAL-IP   PORT(S)          AGE
kubernetes   10.0.0.1     <none>        443/TCP          21h
tomcat       10.0.0.104   <pending>     8080:30001/TCP   20h


E:\PP1.2>kubectl create -f C:\Users\chogan\Downloads\nginx.yaml
service "nginx-demo-service" created
replicationcontroller "nginx-demo" created


E:\PP1.2>kubectl get svc
NAME                 CLUSTER-IP   EXTERNAL-IP   PORT(S)          AGE
kubernetes           10.0.0.1     <none>        443/TCP          21h
nginx-demo-service   10.0.0.82    <nodes>       80:30570/TCP     6s
tomcat               10.0.0.104   <pending>     8080:30001/TCP   20h


E:\PP1.2>kubectl describe svc nginx-demo-service
Name:                   nginx-demo-service
Namespace:              default
Labels:                 app=nginx-demo
Annotations:            <none>
Selector:               app=nginx-demo
Type:                   NodePort
IP:                     10.0.0.82
Port:                   http    80/TCP
NodePort:               http    30570/TCP
Endpoints:              10.2.71.2:80,10.2.75.3:80,10.2.89.2:80
Session Affinity:       None
Events:                 <none>
E:\PP1.2>

As I mentioned in the beginning, if you’re already well-versed in K8s, then this is not going to be of much use to you. However, if you are only just getting started with it, especially on Photon Platform v1.2, you might find this useful.

The post Fun with Kubernetes on Photon Platform v1.2 appeared first on CormacHogan.com.

Project Hatchway – VMware Persistent Storage for Containers

$
0
0

Earlier yesterday, I had the opportunity to sit in on a VMworld 2017 session delivered by one of my colleagues, Tushar Thole. Tushar presented “Project Hatchway” to the audience, and like the description of this post suggests, this is all about providing VMware persistent storage to containers. In a nutshell, volumes can now be created on VMFS, NFS and on vSAN in the form of VMDKs, and these volumes can now be consumed by containers instantiated within a container host, i.e. a virtual machine. But there have been some interesting new enhancements which Tushar shared with us in the session.

Tushar began by sharing an interesting nugget with the audience. There are a lot of cloud native apps which require state, for example mySQL, MongoDB, Redis, etc. Tushar then showed us the results of a survey to see which of the most common cloud native apps actually did have a requirement on persistent storage. The result was that 7 of the top 10 apps had a requirement:

So obviously there is a need for persistent, and this is where ‘Project Hatchway” comes in. There were 4 key parts to this presentation.

  • vSphere Docker Volume Service (vDVS) – enabling persistent storage for docker containers, including Swarm
  • vSphere Cloud Provider (VCP) – enabling persistent storage for containers orchestrated by Kubernetes
  • vDVS support for stateful storage in Windows container hosts running on ESXi
  • vFile – shared file storage for containers on top of VMware storage

I’m not going to say too much more about vDVS; I’ve talked about this multiple times already on this blog and you can find some of the links here. vDVS is made up of 2 components – one is installed on the ESXi host and the other is installed in the container host/VM. This then allows the container host (VM) to request that a volume is created when a docker volume request is made.

As well as being certified by Docker, vDVS now also supports persistent storage for Windows container hosts and not just Linux container hosts, which is something worth highlighting, as I do not think there are many products that can do that currently.

The other new announcement was vFile. vFile is an experimental feature, but also very interesting as this now allows us to share volumes between multiple containers. It comes in the form of a docker plugin and requires zero configuration. You simply specify that a docker volume is of type ‘vFile’ when you instantiate it, and this makes it automatically sharable.

I’ve also talked about the vSphere Cloud Provider (VCP) on this blog before now, as we have used this for other Kubernetes initiatives in the past, such as kubernetes-anywhere. One other thing to point out is that the VCP is also the component that provides persistent storage for PKS, the recently announced Pivotal Container Service. There are no components needed for VCP on the ESXi host; all the components are already built into Kubernetes. When we create a service on Kubernetes, we specify the storage class to pick the type of storage we want for the container/service. Kubernetes now talks to VC to make these requests. As a summary slide, I think the following screenshots shows very well what vDVS and VCP can do for persistent storage for containers on vSphere.

And the point to take away is that you will be using standard docker commands and standard kubectl commands to consume this. We do have one important additional feature however, and that is to say that both of these features (vDVS and VCP) can leverage VMware’s Storage Policy Based Management framework. So let’s say that your underlying storage was provided by vSAN. When creating a docker volume, or when specifying a Kubernetes storage class, one can also specify a particular policy for the container volume that you are instantiating. So you could include additional items like stripe width, failures to tolerate, and all of those other policy settings that you can associate with vSAN storage via SPBM. Very nice indeed.

Here are some additional links where you can find more information.

The post Project Hatchway – VMware Persistent Storage for Containers appeared first on CormacHogan.com.

A closer look at Minio S3 running on vSAN

$
0
0

While we are always looking at what other data services vSAN could provide natively, at the present moment, there is no native way to host S3 compatible storage on vSAN. After seeing the question about creating an S3 object store on vSAN raised a few times now, I looked into what it would take to have an S3 compatible store running on vSAN. A possible solution, namely Minio, was brought to my attention. While this is by no means an endorsement of Minio, I will admit that it was comparatively easy to get it deployed. Since the Minio Object Store seemed to be most easily deployed using docker containers, I leveraged VMware’s own Project Hatchway – vSphere Docker Volume Service to create some container volumes on vSAN, which are in turn utilized by the Minio Object Storage. Let’s look at the steps involved in a bit more detail.

i) Deploy a Photon OS 2.0 VM onto the vSAN datastore

Note that I chose to use Photon OS, but you could of course use a different OS for running docker if you wish. You can download the Photon OS in various forms here. This Photon OS VM will run the containers that make up the Minio application and create the S3 Object Store. I used the photon-custom-hw11-2.0-31bb961.ova as there seem to be some issues with the hw13 version. William Lam described them here in his blog post. Once deployed, I enabled and started the docker service.

root@photon-machine [ ~ ]# systemctl enable docker
Created symlink /etc/systemd/system/multi-user.target.wants/docker.service → /lib/systemd/system/docker.service.
root@photon-machine [ ~ ]# systemctl start docker
root@photon-machine [ ~ ]#


My next step is to get the vSphere Docker Volume Service (vDVS) up and running so that I can build some container volumes for Minio to consume.

ii) Installing the vSphere Docker Volume Service on ESXi hosts

All the vDVS software can be found on GitHub. This is part of Project Hatchway, which also include a Kubernetes vSphere Cloud Provider. We won’t be using that in this example. We’ll be sticking with the Docker Volume Service.

Deploying vDVS is a two stage installation process. First, a VIB must be deployed on each of the ESXi hosts in the vSAN cluster.  This can be done in a number of ways (even via esxcli), but I chose to do it via VUM, the vSphere Update Manager. First, I downloaded the zip file (patch) locally from GitHub, and then from the VUM Admin view in the vSphere client,  I uploaded the patch via the Manage > Settings > Download Settings > Import Patches, like I  am showing here:

Next, from the VUM > Manage > Host Baselines view,  I added a new baseline of type Host Extension and selected my newly uploaded VIB, called vDVS_Driver Bulletin:

When the baseline has been created, you need to attach it. Switch over to the VUM Compliance View for this step. The baselines should now look something like this:

Once the baseline is attached to the hosts, click on Remediate to deploy the VIB on all the ESXi hosts:

Finally, when the patch has been successfully installed on all hosts, the status should look something like this:

The DockerVolumeDriver extension is compliant. And yes, I know I need to apply a vSAN patch (the Non-Compliant message). I’ll get that sorted too 🙂 Now that the vDVS has been installed on all of my ESXi hosts in my vSAN cluster, let’s install the VM component, or to be more accurate, the Container Host component, since my Photon OS VM is my container host.
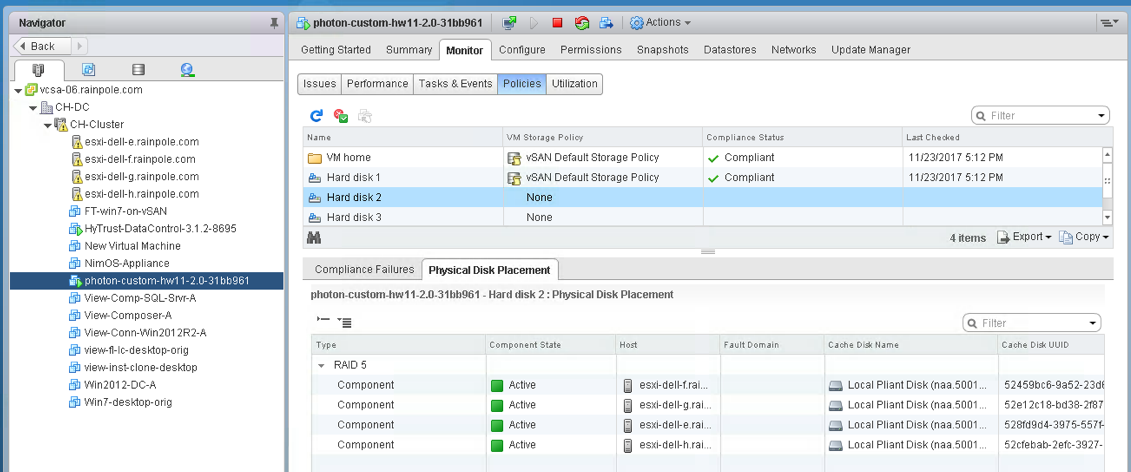
iii) Installing the vSphere Docker Volume Service on the Container Host/VM

This is just a single step that needs to be run on the Photon OS VM (or on your Container Host of choice):

root@photon-machine [ ~ ]# docker plugin install –grant-all-permissions –alias vsphere vmware/docker-volume-vsphere:latest
latest: Pulling from vmware/docker-volume-vsphere
7f45a9cb2d21: Download complete
Digest: sha256:b323d1884828a43cc4fcc55ef7547e9d50f07580d0bb235eaa3816d0a6ac1d7a
Status: Downloaded newer image for vmware/docker-volume-vsphere:latest
Installed plugin vmware/docker-volume-vsphere:latest


And we’re done.

iv) Creating Storage Polices for Docker Volumes

The whole point of installing the vSphere Docker Volume Driver is so that we can create individual VMDKs with different data services and different level of performance and availability on a per container volume basis. Sure, we could have skipped this and deployed all of our volumes locally on the Container Host VM, but then the data is not persisted when the application is stopped. Using the vDVS approach, we can have independent VMDKs per volume to persist the data. Even if the application is stopped and restarted, we can reuse the same volumes and our data is persisted.

As this application is being deployed on vSAN, let’s create some storage policies to begin with. Note that these have to be done from the ESXi host as vDVS cannot consume policies created via the vCenter Server at present. So how is that done?

Here is an example of creating a RAID-5 policy via the ESXi command line. Note that the “replicaPreference” set to “Capacity” is how we select Erasure Coding (RAID-5/6). The “hostFailuresToTolerate” determines if it is RAID-5 or RAID-6. With a value of 1, this is RAID-5 policy. If “hostFailuresToTolerate” is set to 2, this would be a RAID-6 policy. As I only have 4 hosts, I am limited to implementing RAID-5, which is a 3+1 (3 data + 1 parity) configuration, and requires 4 hosts. RAID-6 is implemented as a 4+2 and requires 6 hosts. Note the use of single and double quotes in the command:

[root@esxi-dell-e:~] /usr/lib/vmware/vmdkops/bin/vmdkops_admin.py policy create –name R5 –content ‘((“hostFailuresToTolerate” i1) (“replicaPreference” “Capacity”))’
Successfully created policy: R5
[root@esxi-dell-e:~] /usr/lib/vmware/vmdkops/bin/vmdkops_admin.py policy ls
Policy Name  Policy Content                                            Active
———–  ——————————————————–  ——
R5           ((“hostFailuresToTolerate” i1) (“replicaPreference” i1))  Unused


OK – the policy is now created. The next step is to create some volumes for our Minio application to use.

v) Create some container volumes

At this point, I log back into my Photon OS/Container Host. I am going to build two volumes, one to store my Minio configuration, and the other will be for my S3 buckets. I plucked two values out of the air, 10GB for my config (probably overkill) and 100GB for my S3 data store. These are the commands to create the volumes, run from within the container host/photon OS VM.

root@photon-machine [ ~ ]# docker volume create –driver=vsphere –name=S3Buckets -o size=100gb -o vsan-policy-name=R5
S3Buckets
root@photon-machine [ ~ ]# docker volume create –driver=vsphere –name=S3Config -o size=10gb -o vsan-policy-name=R5
S3Config
root@photon-machine [ ~ ]# docker volume ls
DRIVER VOLUME NAME
local 4bdbe7494bc9d27efe3cc10e16d08d3c7243c376aaff344990d3070681388210
vsphere:latest S3Buckets@vsanDatastore
vsphere:latest S3Config@vsanDatastore


Now that we have our volumes, let’s deploy the Minio application.

vi) Deploy Minio

Deploying Minio is simple, as it comes packaged in docker. The only options I needed to add are the volumes for the data and the configuration, specified with the -v option:

root@photon-machine [ ~ ]# docker run -p 9000:9000 –name minio1 -v “S3Buckets@vsanDatastore:/data” -v “S3Config@vsanDatastore:/root/.minio” minio/minio server /data
Endpoint: http://172.17.0.2:9000 http://127.0.0.1:9000
AccessKey: xxx
SecretKey: yyy

Browser Access:
http://172.17.0.2:9000 http://127.0.0.1:9000

Command-line Access: https://docs.minio.io/docs/minio-client-quickstart-guide
$ mc config host add myminio http://172.17.0.2:9000 xxx yyy

Object API (Amazon S3 compatible):
Go: https://docs.minio.io/docs/golang-client-quickstart-guide
Java: https://docs.minio.io/docs/java-client-quickstart-guide
Python: https://docs.minio.io/docs/python-client-quickstart-guide
JavaScript: https://docs.minio.io/docs/javascript-client-quickstart-guide
.NET: https://docs.minio.io/docs/dotnet-client-quickstart-guide

Drive Capacity: 93 GiB Free, 93 GiB Total


Minio is now up and running.

vii) Examine the configuration from a browser

Let’s create an S3 bucket. The easiest way is to point a browser at the URL displayed in the output above, and do it from there. At the moment, as you might imagine, there is nothing to see but at least it appears to be working. The icon on the lower right hand corner allows you to create buckets.

viii) Check out the VMDKs/Container Volumes on the vSAN datastore

If you remember, we requested that the container volumes get deployed with a RAID-5 policy on top of vSAN. Let’s see if that worked:

It appears to have worked perfectly. You can see the component placement for Hard Disk 2 (Config) is a RAID-5 by checking the Physical Disk Placement view. The same is true for Disk 3 (S3 Buckets) although it is not shown here. The reason for the VM Storage Policy showing up as None is that these policies were created at the host level and not the vCenter Server level. OK – lets push some data to the S3 store.

ix) Push some data to the S3 object store

I found a very nice free S3 Browser from NetSDK LLC. Once again, I am not endorsing this client, but it seems to work well for my testing purpose. Using this client, I was able to connect to my Minio deployment and push some data up to it. All I did was push the contents of one of my desktop folders up to the Minio S3 share. It worked quite well. He is a view from the S3 Browser of some of the data that I pushed:

And just to confirm that it was indeed going to the correct place, I refreshed on the web browser to verify:

Minio also has a client by the way. This is deployed as a container, and you can also connect to the buckets, display contents, and do other stuff:

root@photon-machine [ ~ ]# docker run -it –entrypoint=/bin/sh minio/mc
/ #  mc config host add myminio http://172.17.0.2:9000 <AccessKey> <SecretKey>
mc: Configuration written to `/root/.mc/config.json`. Please update your access credentials.
mc: Successfully created `/root/.mc/share`.
mc: Initialized share uploads `/root/.mc/share/uploads.json` file.
mc: Initialized share downloads `/root/.mc/share/downloads.json` file.
Added `myminio` successfully.
/ #
/ # mc ls myminio
[2017-11-23 16:44:22 UTC]     0B cormac-bucket/
/ # mc ls myminio/cormac-bucket
[2017-11-23 17:58:28 UTC]     0B Software/
/ # mc ls myminio/cormac-bucket/Software
[2017-11-23 16:44:28 UTC] 908KiB ChromeSetup.exe
[2017-11-23 16:44:53 UTC] 1.5MiB SetupVirtualCloneDrive5.exe
[2017-11-23 16:45:23 UTC] 1.4KiB VMware-ovftool-4.1.0-3018522-win.x86_64.msi – Shortcut.lnk
[2017-11-23 16:45:11 UTC]  40KiB ViewPM.adm
[2017-11-23 16:45:11 UTC]  16KiB ViewPMAdv.adm
[2017-11-23 16:45:17 UTC] 2.0KiB ViewPMAutomation.adm
[2017-11-23 16:45:24 UTC] 1.2MiB Win64OpenSSL_Light-0_9_8zc.exe
[2017-11-23 16:45:30 UTC] 1.6MiB WinCDEmu-4.1.exe
[2017-11-23 16:44:22 UTC]  48KiB admfiles.zip
[2017-11-23 16:44:28 UTC] 187KiB cormac.jpg
[2017-11-23 16:44:34 UTC] 2.2MiB flash-for-other-browsers.zip
[2017-11-23 16:44:34 UTC]    29B map-corkisos.bat
[2017-11-23 16:44:41 UTC]  25MiB nmap-6.49BETA5-setup-xp.exe
[2017-11-23 16:44:47 UTC]  63KiB pcoip.adm
[2017-11-23 16:44:47 UTC]  29KiB pcoip.client.adm
[2017-11-23 16:44:53 UTC] 1.8MiB putty-0.63-installer.exe
[2017-11-23 16:44:59 UTC]  21KiB vdm_agent.adm
[2017-11-23 16:44:59 UTC]  41KiB vdm_client.adm
[2017-11-23 16:45:05 UTC] 9.7KiB vdm_common.adm
[2017-11-23 16:45:05 UTC] 2.6KiB vdm_server.adm
[2017-11-23 16:45:17 UTC]  12KiB view_agent_direct_connection.adm
/ #

Conclusion

If you just want to get something up and running very quickly to evaluation an S3 on-prem object store running on top of vSAN, Minio alongside the vSphere Docker Volume Server (vDVS) will do that for you quite easily. I’ll caveat this by saying that I’ve done no real performance testing or comparisons at this point. My priority was simply trying to see if I could get something up and running that provided an S3 object store, but which could also leverage the capabilities of vSAN through policies. That is certainly achievable using this approach.

I’m curious if any readers have used any other solutions to get an S3 object store on vSAN. Was it easier or more difficult than this approach? I’m also interested in how if performs. Let me know.

One last thing to mention. Our team has also tested this out with the Kubernetes vSphere Cloud Provider (rather than the Docker Volume Service shown here). So if you want to run Minio on top of Kubernetes on top of vSAN, you can find more details here.

The post A closer look at Minio S3 running on vSAN appeared first on CormacHogan.com.

A closer look at Scality S3 running on vSAN

$
0
0

After last week’s post of Minio running on top of vSAN to provide an S3 object store, a number of folks said that I should also check out Scality S3 server. After a bit of research, it seems that Scality S3 server is akin to the CloudServer from Zenko.io. I “think” Zenko CloudServer is an umbrella for a few different projects, one of which is the S3server. In fact, clicking on the GitHub link on the Zenko.io CloudServer page takes me to the scality/S3 page. Anyway, let’s look at how to set this up.

I’m not going to repeat all the configuration steps here. If you want to see how to deploy the vSphere Docker Volume Service VIB via VUM, or setup docker on Photon OS, check out the Minio post referenced above. The steps will be the same. Instead, I’ll focus on how to create the volumes on vSAN, how to consume those volumes when launching Scality S3server, and then creating and using buckets.

1. Create docker volumes for Scality Data and MetaData

We start by creating two volumes for Scality, one for metadata, and one for data. I picked some random sizes again:

# docker volume create –driver=vsphere –name=S3Data -o size=100gb
S3Data

# docker volume create –driver=vsphere –name=S3MetaData -o size=10gb
S3MetaData


2. Verify that the volumes were created

In the previous commands, no policy was specified, so the volumes (VMDKs) should be created with the default RAID-1 policy. We can verify this by examining the Physical Disk Placement on the container host (Photon OS VM). Here we see that it is indeed a RAID-1 configuration for the new volumes, with a witness component for quorum.

And in fact, if we examine the vSAN datastore, we can see all of the volumes residing in the dockvols folder:

Again, if you want to create volumes with policies other than the vSAN default, such as a RAID-5 rather than a RAID-1, the steps on how to do this are also in the Minio post.


3. Launch Scality S3 Server and consume the volumes

We can now go ahead and run the Scality application, specifying our new volumes at the docker command line:

root@photon-machine [ ~ ]# docker run  -p 8000:8000 –name s3 -v “S3Data@vsanDatastore:/usr/src/app/localData” -v “S3MetaData:/usr/src/app/localMetadata” scality/s3server

Unable to find image ‘scality/s3server:latest’ locally
latest: Pulling from scality/s3server
85b1f47fba49: Pull complete
ba6bd283713a: Pull complete
b9968e24de01: Pull complete
838ee1f471db: Pull complete
0fdc242cad3b: Pull complete
832bbed4fceb: Pull complete
1bacc437e315: Pull complete
c58945087818: Pull complete
627033e6eca0: Pull complete
Digest: sha256:35fe6b8587847159303779d53cd917ea260ee4b524772df74132825acb939f20
Status: Downloaded newer image for scality/s3server:latest
 
> s3@7.0.0 start /usr/src/app
> npm-run-all –parallel start_dmd start_s3server
 
> s3@7.0.0 start_s3server /usr/src/app
> node index.js
 
> s3@7.0.0 start_dmd /usr/src/app
> npm-run-all –parallel start_mdserver start_dataserver
 
> s3@7.0.0 start_dataserver /usr/src/app
> node dataserver.js
 
> s3@7.0.0 start_mdserver /usr/src/app
> node mdserver.js


4. Access the Scality S3 Server buckets

Scality S3 server is now up and running. The endpoint for Scality S3 server is the container host (Photon OS) IP address, and port 8000. The default access Key is accessKey1 and the default secret key for Scality are verySecretKey1. You can once again use something like an S3 Browser from NetSDK LLC to create, upload or read from the S3 buckets, as shown in the previous post. There are many other S3 clients, so use whichever you prefer. After adding the location and access key/secret key, you should be able to create buckets, and upload files/folders.

Now if you stop and start the Scality application, but use the same volumes in the docker command line, your buckets and their contents are persisted and available.

Scality, deployed via docker, is another option for those of you who are looking for an S3 object store running on vSAN, utilizing Project Hatchway to create persistent container volumes.

The post A closer look at Scality S3 running on vSAN appeared first on CormacHogan.com.

Viewing all 78 articles
Browse latest View live