 Its been a while since I had a chance to look at our Photon Platform product. Version 1.2 launched last month, with a bunch of new features. You can read about those here. I really just wanted to have a look at what changed from a deployment perspective. I’d heard that the whole process has now become more stream-lined, with the Photon Installer OVA being able to deploy the Photon Controller(s), push the necessary agents to the ESXi hosts, deploy the Lightwave authentication appliance as well as the load-balancer appliance that sits in front of the Photon Controllers. And all of this can be done from a single YAML file on the Photon Installer using a new deployment tool. Sounds cool – let’s see how I got on.
Before you begin
In my setup, I had 4 ESXi hosts running vSphere 6.5. You need vSphere 6.5 for Photon Platform v1.2. However note that Photon Platform only supports ESXi versions up to 6.5EP1 (Path ESXi650-201701001). The patch’s build number is 4887370.
If you plan to deploy vSAN, you will need an unused cache device and a capacity device on 3 out of 4 of the hosts.
From a network perspective, you will need static IP addresses for the following appliances:
- Photon Controller
- Lightwave Appliance
- Load Balancer Appliance
- vSAN Management Server (if deploying vSAN)
The wiki on GitHub for Photon Controller also has some really good information that is worth reviewing before starting out.
Step 1 – Deploy the Photon Installer
You can start by downloading the Photon Installer OVA from GitHub. Then it is a simple deploy of the OVA. Once it is deployed, the easiest thing to do would be to SSH to the installer for the next steps.
Step 2 – Configure the YAML configuration file
The YAML file is made up of 4 distinct parts (there may be others for NSX and vSAN, but these are not included here). There is the compute section where the ESXi hosts are defined, then there is the Lightwave appliance section, then the photon controller and finally the load balancer. There is a sample YAML file shipped with the Photon Controller. This can be found in /opt/vmware/photon/controller/share/config and is called pc-config.yaml. Let’s look at each part of the file, which I have updated for my environment:
Compute
compute:
  hypervisors:
    esxi-1:
      hostname: "esxi-dell-e.rainpole.com"
      ipaddress: "10.27.51.5"
      allowed-datastores: "isilion-nfs-01"
      dns: "10.27.51.35"
      credential:
        username: "root"
        password: "xxx"
    esxi-2:
      hostname: "esxi-dell-f.rainpole.com"
      ipaddress: "10.27.51.6"
      allowed-datastores: "isilion-nfs-01"
      dns: "10.27.51.35"
      credential:
        username: "root"
        password: "xxx"
    esxi-3:
      hostname: "esxi-dell-g.rainpole.com"
      ipaddress: "10.27.51.7"
      allowed-datastores: "isilion-nfs-01"
      dns: "10.27.51.35"
      credential:
        username: "root"
        password: "xxx"
    esxi-4:
      hostname: "esxi-dell-h.rainpole.com"
      ipaddress: "10.27.51.8"
      allowed-datastores: "isilion-nfs-01"
      dns: "10.27.51.35"
      credential:
        username: "root"
        password: "xxx"
The only thing to point out here is that the DNS entry points to the Lightwave server. It does not point to any other DNS that you may have configured. Let’s look at the Lightwave appliance next:
Lightwave
lightwave:
  domain: "rainpole.local"
  credential:
    username: "Administrator"
    password: "xxx"
  controllers:
    lightwave-1:
      site: "cork"
      appliance:
        hostref: "esxi-1"
        datastore: "isilion-nfs-01"
        memoryMb: 2048
        cpus: 2
        enable-ssh-root-login: false
        credential:
          username: "root"
          password: "xxx"
        network-config:
          type: "static"
          hostname: "lightwave.rainpole.local"
          ipaddress: "10.27.51.35"
          network: "NAT=VM Network"
          dns: "10.27.51.35"
          ntp: "10.133.60.176"
          netmask: "255.255.255.0"
          gateway: "10.27.51.254"
Again, nothing too much to say about this. My domain is rainpole.local, I provided an administrator password for the domain, and a root password for the appliance itself. This appliance will be deployed to the host with esxi-1 reference (as will the rest of my appliances). Note that the DNS entry is the same as the Lightwave appliance IP address. The next part is for the Photon controller:
Photon Controller
photon:
  imagestore:
    img-store-1:
      datastore: "isilion-nfs-01"
      enableimagestoreforvms: "true"
  cloud:
    hostref-1: "esxi-2"
    hostref-2: "esxi-3"
    hostref-3: "esxi-4"
  administrator-group: "rainpole.local\\CloudAdministrators"
  controllers:
    photonctlr:
      appliance:
        hostref: "esxi-1"
        datastore: "isilion-nfs-01"
        memoryMb: 2048
        cpus: 2
        enable-ssh-root-login: false
        credential:
          username: "root"
          password: "xxx"
        network-config:
          type: "static"
          hostname: "photonctlr.rainpole.local"
          ipaddress: "10.27.51.30"
          network: "NAT=VM Network"
          netmask: "255.255.255.0"
          dns: "10.27.51.35"
          ntp: "10.133.60.176"
          gateway: "10.27.51.254"
OK, in this stanza, I specify that hosts esxi-2, 3 and 4 are my cloud hosts. These are the ones that will be used for deploying my container frameworks, etc. I’ve already used esxi-1 for the lightwave appliance, and I will use it once again for hosting the photon controller. The rest of the entries are straight-forward I think. Let’s look at the final appliance, the load balancer.
Load Balancer
loadBalancer:
  pploadbalancer:
    appliance:
        hostref: "esxi-1"
        datastore: "isilion-nfs-01"
        memoryMb: 2048
        cpus: 2
        enable-ssh-root-login: false
        credential:
          username: "root"
          password: "xxx"
        network-config:
          type: "static"
          hostname: "pploadbalancer.rainpole.local"
          ipaddress: "10.27.51.68"
          network: "NAT=VM Network"
          netmask: "255.255.255.0"
          dns: "10.27.51.35"
          ntp: "10.133.60.176"
          gateway: "10.27.51.254"
Once more, this is very similar to the previous appliances. As before, it is deployed on the first ESXi host. With the YAML file configured, we can now move onto deployment.
Step 3: Deployment with photon-setup
Now this is something new. There is a new photon-setup commands. The nice thing about this is that you can deploy individual components (photon controller, lightwave server) or the whole platform in one go. I used this to make sure individual appliances would deploy successfully before embarking on a complete platform deployment, which I found very useful. Here are the options:
# ../../bin/photon-setup
Usage: photon-setup <component> <command> {arguments}

Component:
    platform:      Photon Platform including multiple components
    lightwave:     Lightwave
    controller:    Photon Controller Cluster
    agent:         Photon Controller Agent
    vsan:          Photon VSAN Manager
    load-balancer: Load balancer
    help:          Help
Command:
    install:   Install components
    help:      Help about component
Run 'photon-setup <component> help' to find commands per component
root@photon-installer [ /opt/vmware/photon/controller/share/config ]# ../../\
bin/photon-setup controller install -config /opt/vmware/photon/controller/\
share/config/pc-config.yaml
Using configuration at /opt/vmware/photon/controller/share/config/pc-config.yaml
INFO: Parsing Lightwave Configuration
INFO: Parsing Credentials
INFO: Lightwave Credentials parsed successfully
INFO: Parsing Lightwave Controller Config
INFO: Parsing appliance
INFO: Parsing Credentials
INFO: Appliance Credentials parsed successfully
INFO: Parsing Network Config
INFO: Appliance network config parsed successfully
INFO: Appliance config parsed successfully
INFO: Lightwave Controller parsed successfully
INFO: Lightwave Controller config parsed successfully
INFO: Lightwave Section parsed successfully
INFO: Parsing Photon Controller Configuration
INFO: Parsing Photon Controller Image Store
INFO: Image Store parsed successfully
INFO: Managed hosts parsed successfully
INFO: Parsing Photon Controller Config
INFO: Parsing appliance
INFO: Parsing Credentials
INFO: Appliance Credentials parsed successfully
INFO: Parsing Network Config
INFO: Appliance network config parsed successfully
INFO: Photon Controllers parsed successfully
INFO: Photon section parsed successfully
INFO: Parsing Compute Configuration
INFO: Parsing Compute Config
INFO: Parsing Credentials
INFO: Parsing Credentials
INFO: Parsing Credentials
INFO: Parsing Credentials
INFO: Compute Config parsed successfully
INFO: NSX CNI config is not provided. NSX CNI is disabled
2017-05-23 08:10:23 INFO  Info: Installing the Photon Controller Cluster
2017-05-23 08:10:23 INFO  Info: Photon Controller peer node at IP address [10.27.51.30]
2017-05-23 08:10:23 INFO  Info: 1 Photon Controller was specified in the configuration
2017-05-23 08:10:23 INFO  Start [Task: Photon Controller Installation]
2017-05-23 08:10:23 INFO  Info [Task: Photon Controller Installation] : \
Deploying and powering on the Photon Controller VM on ESXi host: 10.27.51.5
2017-05-23 08:10:23 INFO  Info: Deploying and powering on the Photon Controller VM \
on ESXi host: 10.27.51.5
2017-05-23 08:10:23 INFO  Info [Task: Photon Controller Installation] : Starting \
appliance deployment
2017-05-23 08:10:32 INFO  Progress [Task: Photon Controller Installation]: 20%
2017-05-23 08:10:35 INFO  Progress [Task: Photon Controller Installation]: 40%
2017-05-23 08:10:39 INFO  Progress [Task: Photon Controller Installation]: 60%
2017-05-23 08:10:42 INFO  Progress [Task: Photon Controller Installation]: 80%
2017-05-23 08:10:45 INFO  Progress [Task: Photon Controller Installation]: 0%
2017-05-23 08:10:45 INFO  Stop [Task: Photon Controller Installation]
2017-05-23 08:10:45 INFO  Info: Getting OIDC Tokens from Lightwave to make API Calls
2017-05-23 08:10:47 INFO  Info: Waiting for Photon Controller to be ready
2017-05-23 08:11:13 INFO  Info: Using Image Store - isilion-nfs-01
2017-05-23 08:11:14 INFO  Info: Setting new security group(s): [rainpole.local\Administrators,\
 rainpole.local\CloudAdministrators]
COMPLETE: Install Process has completed Successfully.
For a full platform deployment, I would simply change the controller keyword in the command line to platform, and rerun the command.
Step 4. Verifying successful deployments
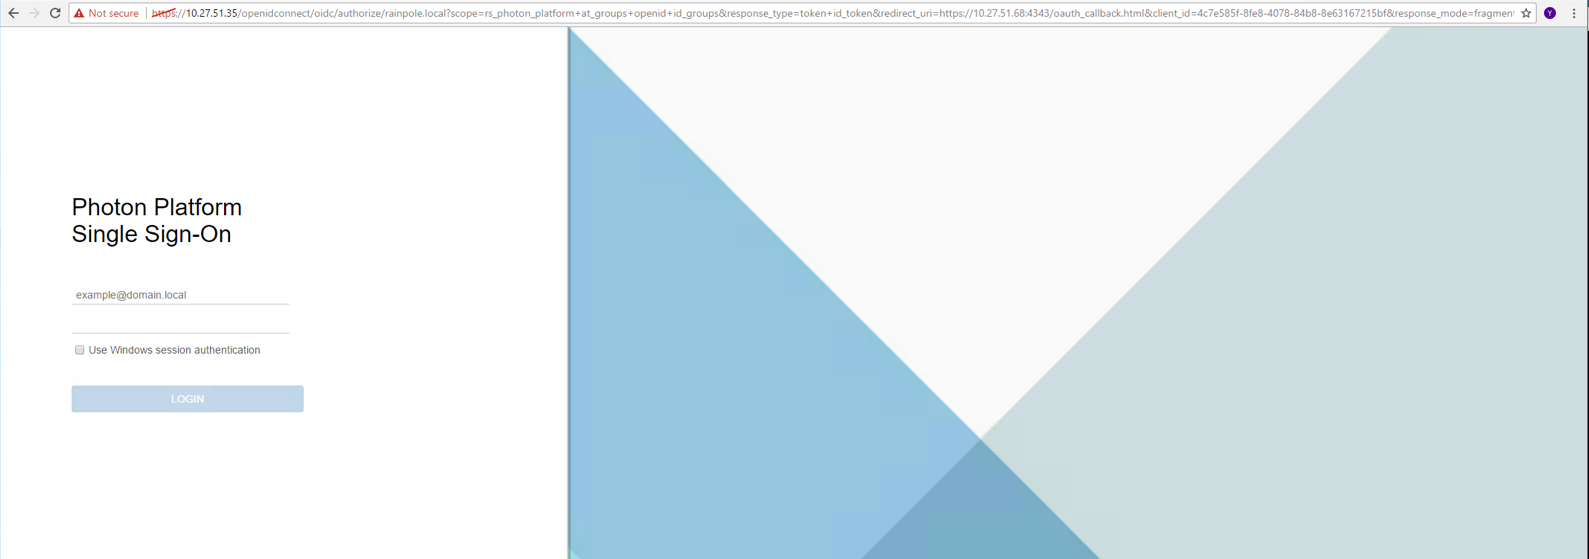
There are a number of ways to validate that the deployment has been successful, other than a successful run of the photon-setup command. The easiest ways are to check if the UI of the Photon Controller is accessible via the load balancer, and that you can login to the UI of the Lightwave server. Let’s begin with the Photon Controller. Point a browser to https://<ip-of-load-balancer>:4343. You should see something like this:

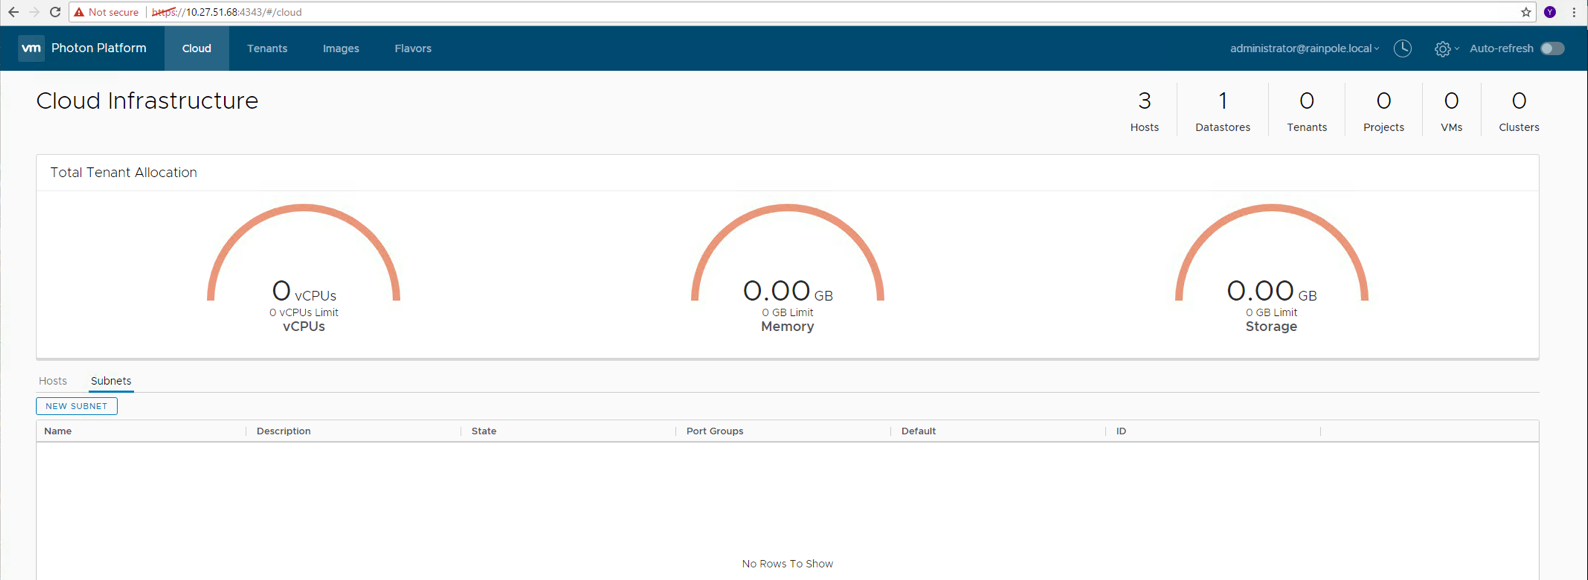
And if you login, using the admin credential provided in the YAML file, you should see the Photon Controller dashboard:
There is not much to see here yet, as we haven’t built any projects tenants, nor have we deployed any orchestration frameworks such as Kubernetes. The dashboard becomes much more interesting once we have done that.
There is another way of verifying that everything is working and that is to use the photon controller CLI. The landing page referenced in the getting started part of this post has all the necessary builds of photon controller CLI for different OS. In my case, I downloaded the Windows version. Using that “photon” command, I can point to this photon platform deployment, and verify I can login with my Lightwave credentials:
C:\Users\chogan>photon target set -c https://10.27.51.68:443
API target set to 'https://10.27.51.68:443'

C:\Users\chogan>photon target login --username administrator@rainpole.local \
--password xxx
Login successful

C:\Users\chogan>photon system status
Overall status: READY

Component Status
PHOTON_CONTROLLER READY

C:\Users\chogan>photon deployment list-hosts
ID State IP Tags
091f5715-fcaf-4029-a015-b93231cd190f READY 10.27.51.6 CLOUD
c2847a86-e957-499f-bd97-da8a575bbdb2 READY 10.27.51.8 CLOUD
faec361e-9c65-4a4c-a25f-601d7498ddb8 READY 10.27.51.7 CLOUD

Total: 3

C:\Users\chogan>
Step 5 – Troubleshooting
- Watch out for typos in the YAML file. I made a few.
- The DNS entries pointing to the LW server was another mistake I made. If you don’t get this right, the controller deployment times out trying to resolve. Fortunately, someone else hit this, and the solution was provided here.
- The final thing that I am very happy with is the fact that there now some really good logging for the deployments. This was something I struggled with in earlier versions of Photon Platform – and it is great to see it vastly improved in version 1.2. I was monitoring/tailing the /var/log/photon-installer.log whilst doing most of this work.
Step 6 – Next steps
My next steps will be to revisit the deployment of the VSAN Management Server and the setting up of VSAN for use as another datastore for Photon Platform. After that, I’ll come back and deploy Kubernetes v1.6 which is now supported on Photon Platform v1.2. Watch this space.
The post Photon Platform revisited – checking out v1.2 appeared first on CormacHogan.com.
