 Now that we have seen how to deploy Photon Controller v1.1 with vSAN, we will look at another new feature of this version of Photon Controller. At VMworld 2016 in Barcelona, Kit Colbert mentioned that one of the upcoming features of Photon Controller is the ability to deploy Kubernetes As A Service on top of Photon Controller. In this post, we will look at that feature, but also how to deploy the Kubernetes VMs (master, etcd, workers). While we have been able to deploy K8S on Photon Controller in previous releases, this version 1.1 simplifies that process greatly, as you will see shortly.
I am not going to go through the process of deploying Photon Controller in this post. You can read up on how to do that in previous posts that I created, such as this one here. Instead, we will assume that Photon Controller has been deployed, and that we now have access to the UI in order to deploy Kubernetes As A Service.
There are a number of distinct steps to follow:
- Create tenant and resource ticket
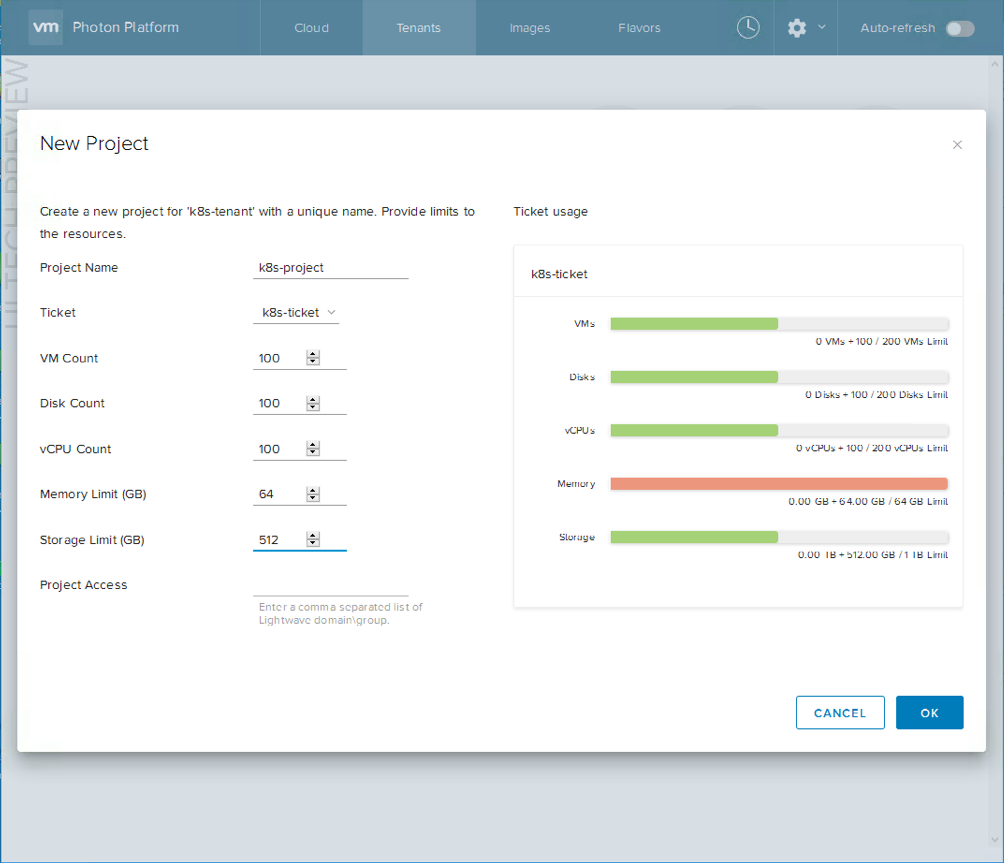
- Create project
- Upload the K8S 1.4.3 image (available from Photon Controller v1.1 on github)
- Create a cluster
However, not everything can be done from the UI at this point in time. There is 1 step that must be done from photon controller CLI. That is to create a default network. The commands are shown below. Talking with some of the team, this feature will be in an updated version of the UI.
root@photon-full-GA-1 [ ~ ]# photon -n network create --name dev-network \
--portgroups "VM Network" --description "Dev Network for VMs"
8564797254208b59300fa

root@photon-full-GA-1 [ ~ ]# photon -n network set-default 8564797254208b59300fa
8564797254208b59300fa

root@photon-full-GA-1 [ ~ ]# photon network list
Using target 'http://10.27.51.117:28080'
ID                     Name         State  PortGroups    Descriptions         IsDefault
8564797254208b59300fa  dev-network  READY  [VM Network]  Dev Network for VMs  true
Total: 1

root@photon-full-GA-1 [ ~ ]#
Note that this only needs to be done one time. Multiple K8S deployments can now be rolled out from the UI using the same default network if necessary. With that step completed, we can now do the rest of the deployment from the UI.
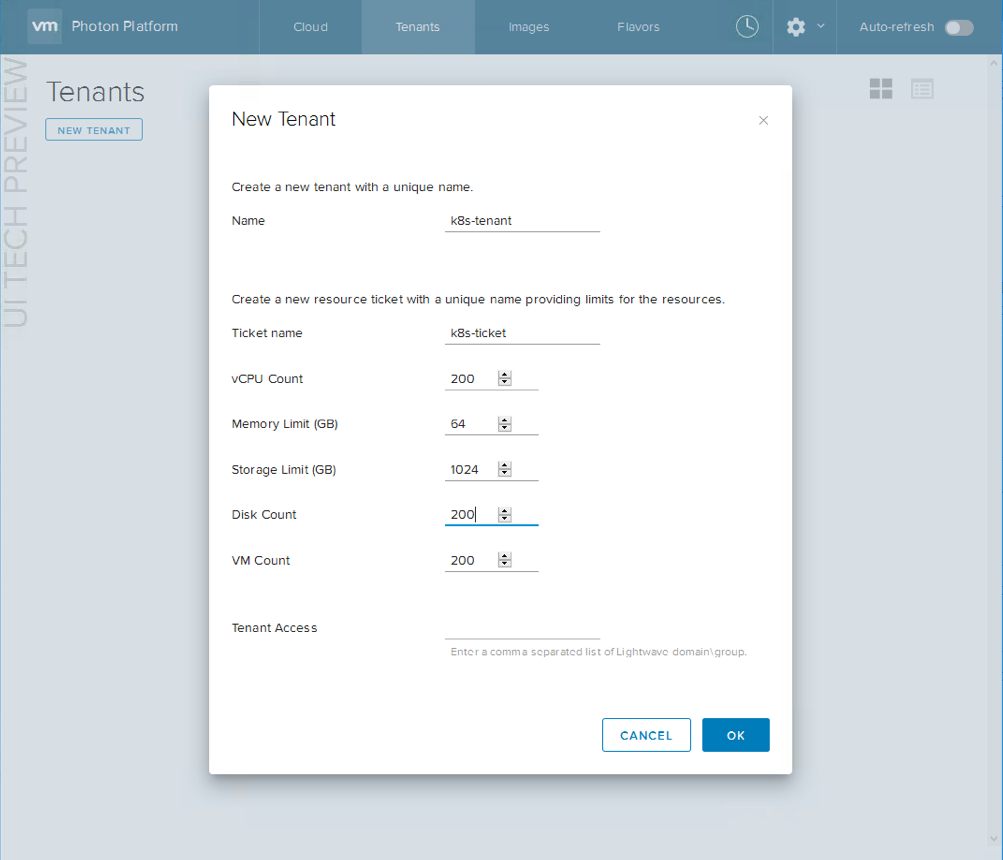
Step 1 – Create a new tenant and resource ticket
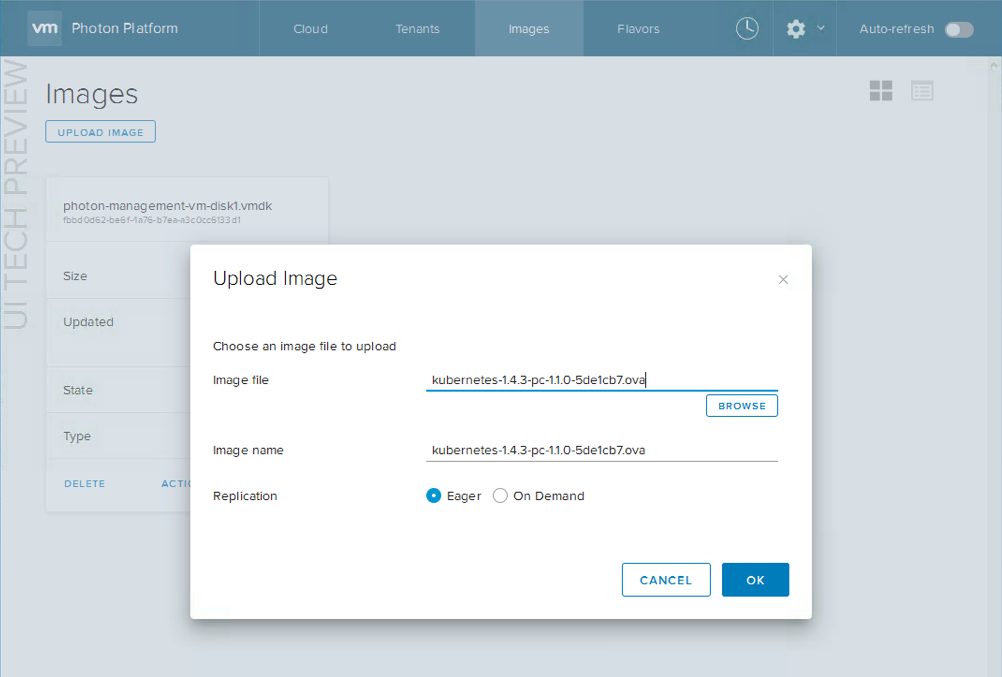
 Step 3 – Upload the K8s image, and mark it for K8s
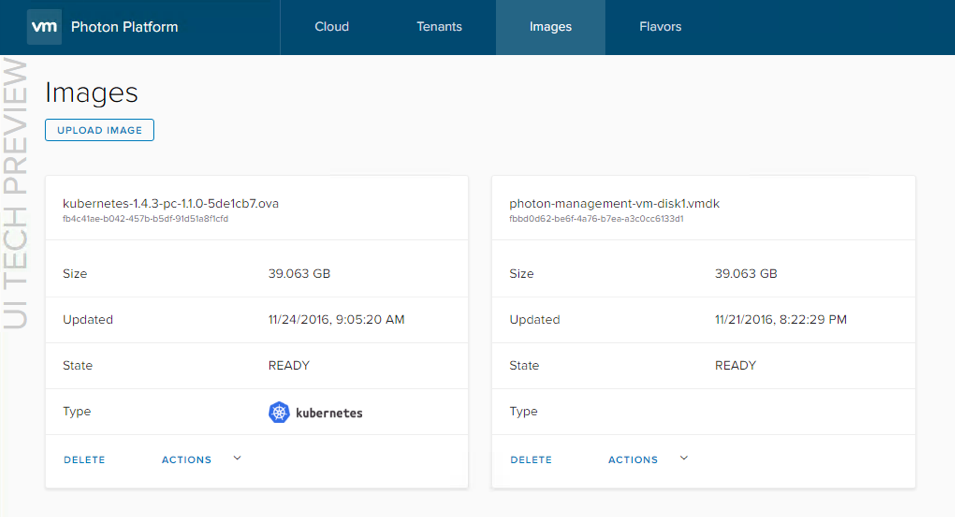
 Marking the image as Kubernetes is done from the actions drop-down menu. Once marked, it should show up as K8s in the “Type” field:
 Step 4 – Create the cluster
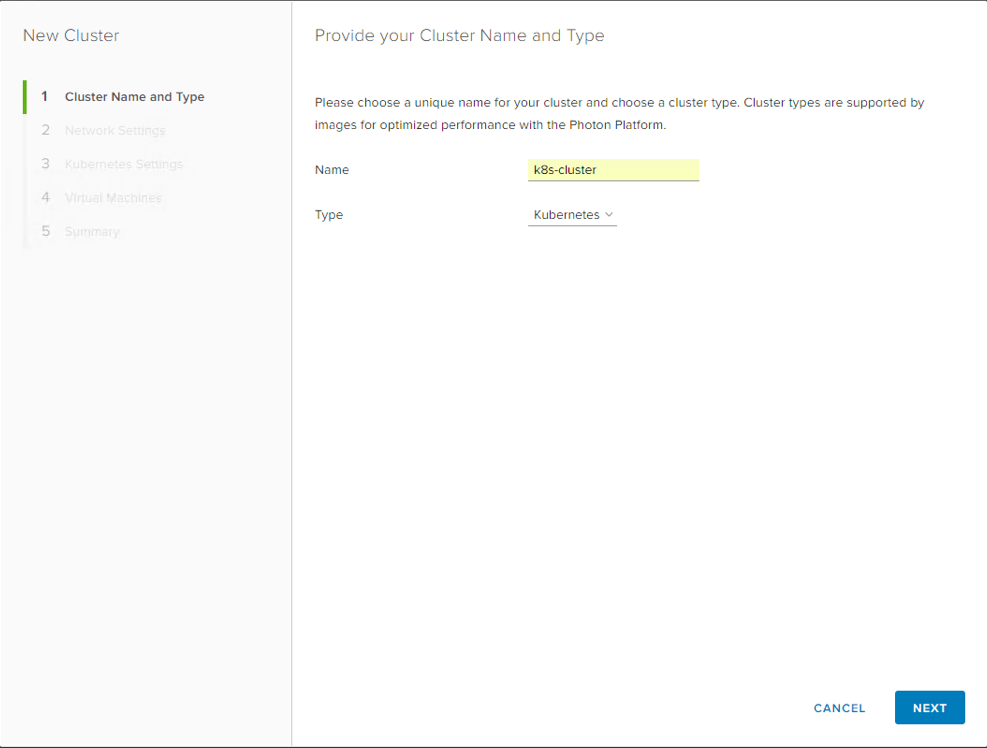
There are few distinct steps in creating the cluster. The first is to provide a name for the cluster. The type is then set to Kubernetes.
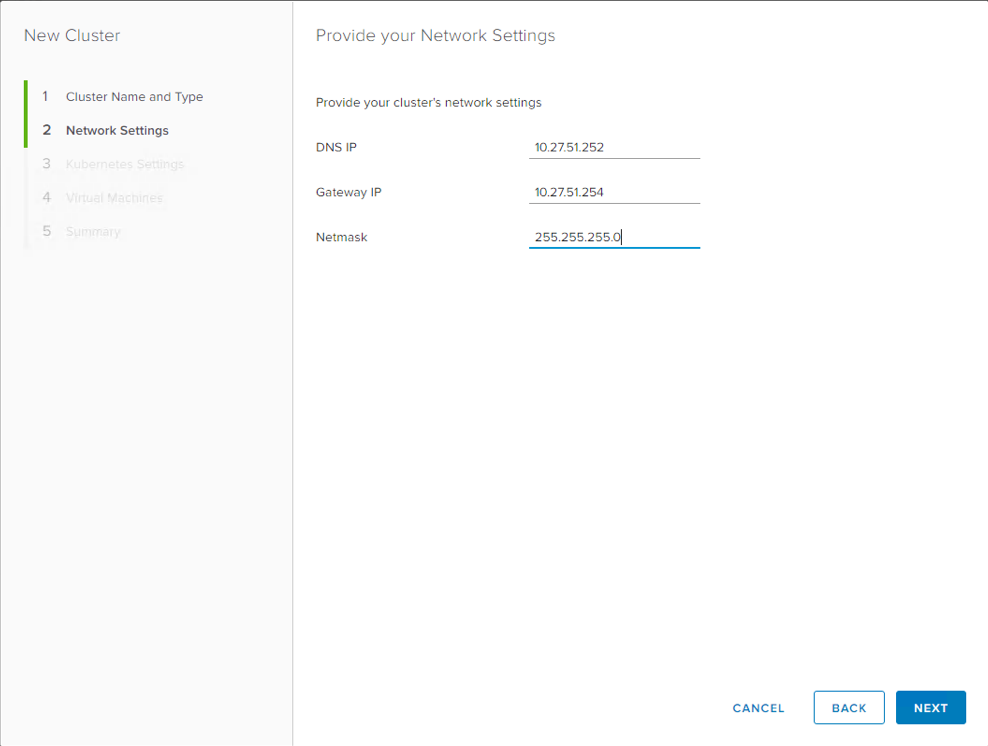
 Next, network details such as DNS, gateway and netmask must be provided.
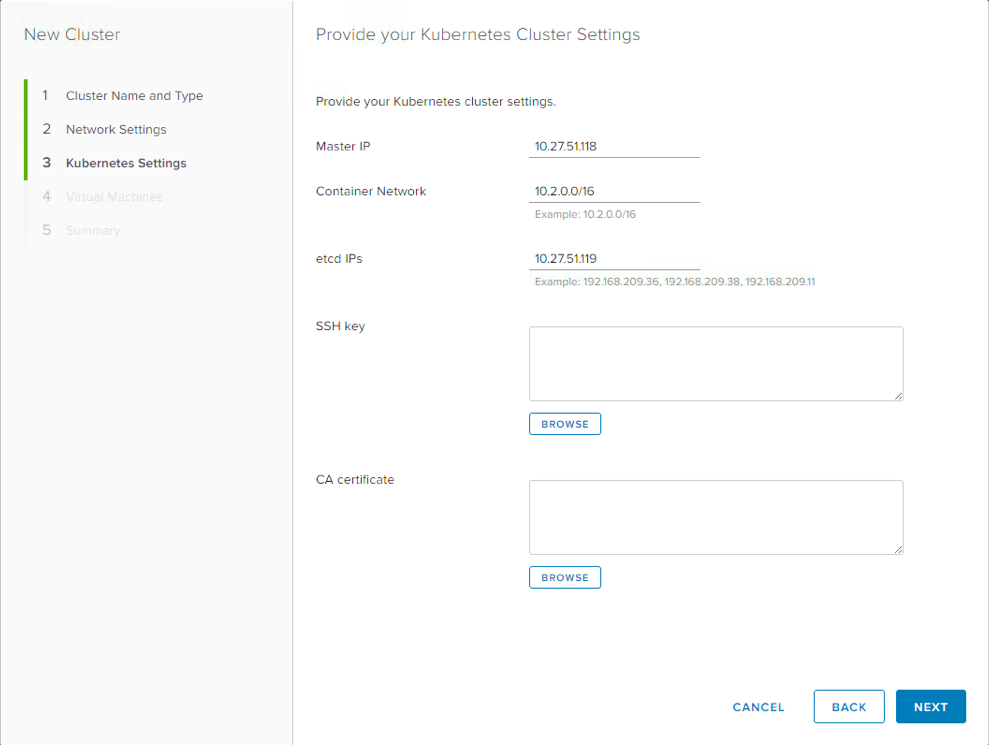
 Information specific to the K8s master and etcd VMs is provided in the Kubernets Cluster Settings, which is the next step. Included is the range of IP addresses that containers will use for communicate. I have not included any SSH key or cert info in this example:
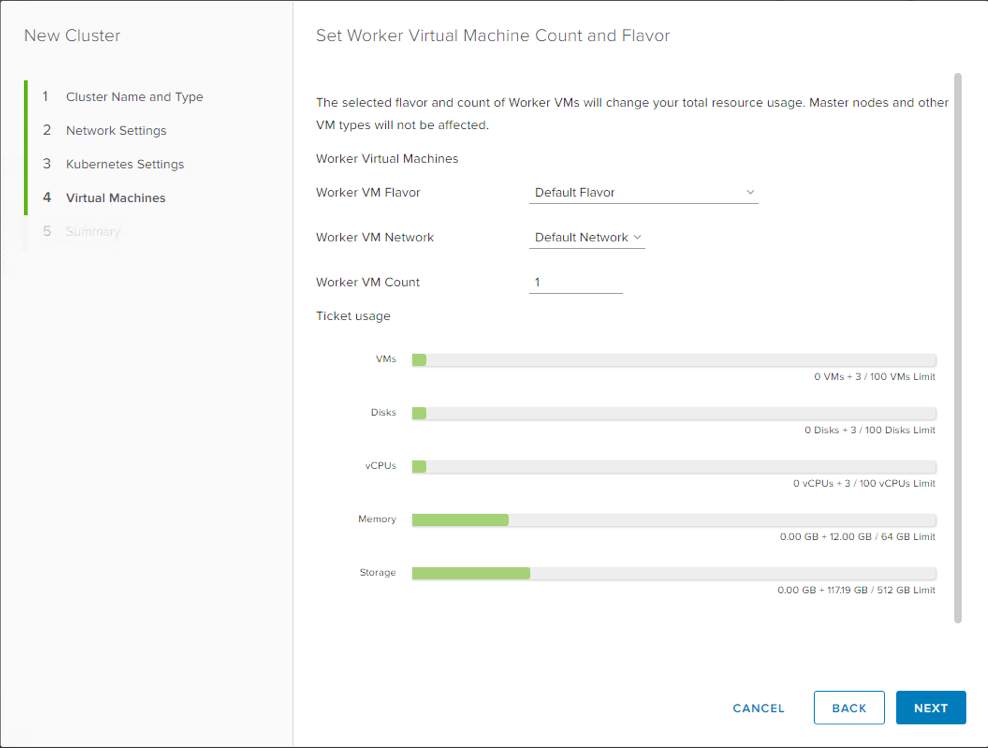
 Next, we must select the flavor and network. This is the default network that we created previously. Photon Controller v1.1 also comes with a set of built-in flavors for VMs and disk. At this point in time, there is no way to select a disk flavor, but once again, I am informed by the team that this will be included in a future version of the UI.
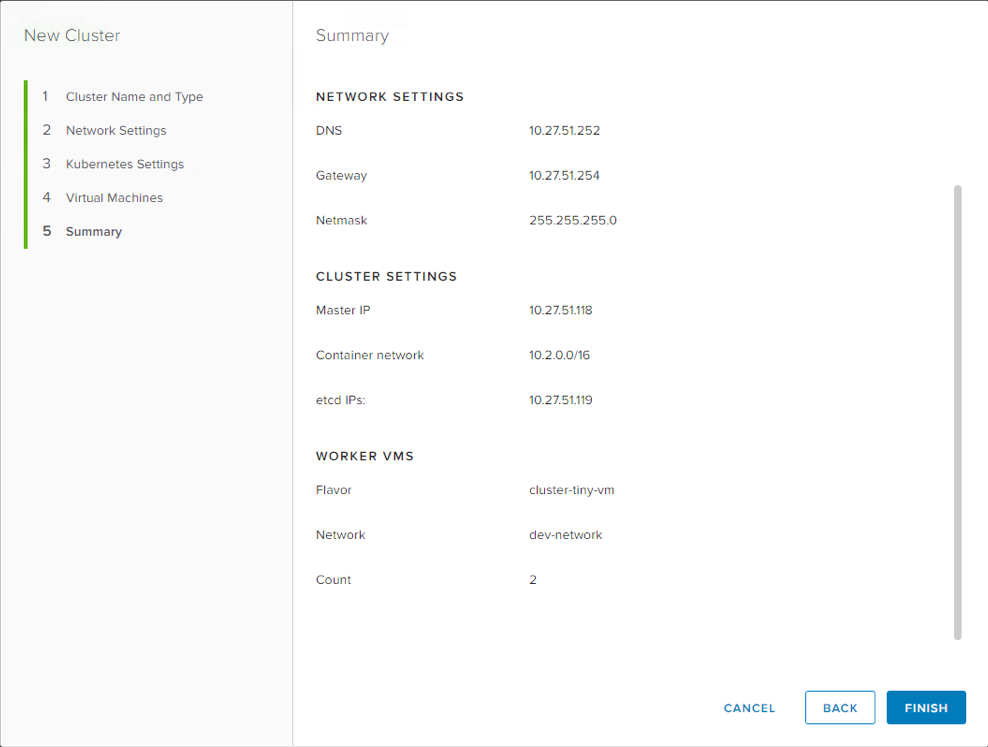
 Finally, we come to the summary tab. You can verify the settings here before clicking on Finish. That completes the setup. When the cluster is deployed, a link will be shown which will allow you to launch the Kubernetes dashboard.
 Resizing the cluster
It is very easy to resize the number of workers in the K8S cluster from the Photon Controller UI. In this deployment, we started with a single worker. Below, on the Kubernetes dashboard (which can be launched directly from the Photon Controller UI), in the nodes view, we can see the master and single worker.
 We can now roll-out additional workers by resizing the cluster from Photon Controller. We are going to scale from 1 worker to 5 workers:
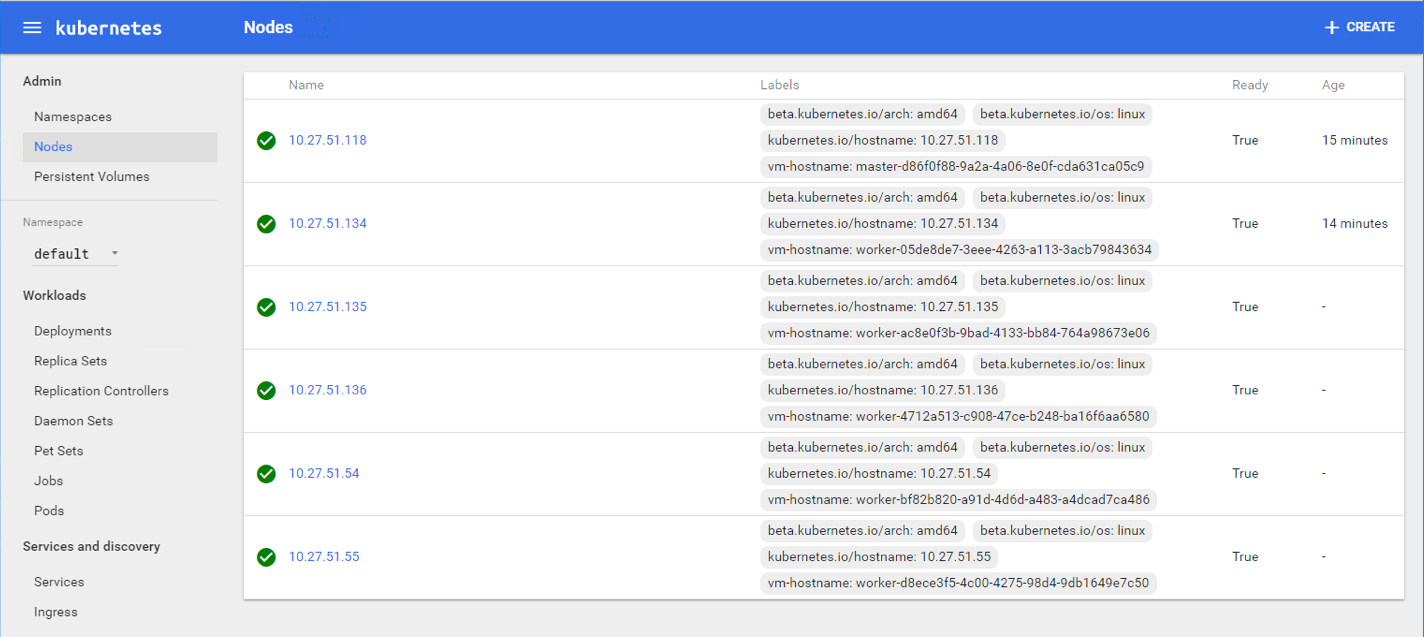
  This operation is very quick. Soon after initiating the resize, we now see 5 workers in the K8S dashboard:
 So hopefully this gives you some idea on how to utilize Kubernetes as a Service on Photon Controller version 1.1. We continue to see great improvements with every release of Photon Controller, but I think the ability to be able to deploy orchestration frameworks/clusters like K8S is a great feature. Yes, there are some enhancements to be made still (for example, networking and flavors, which were not ready in time for this release) but these are well understood as outstanding issues and should also appear in time.
The one thing that is not possible via the UI is the ability for K8S to consume vSAN storage (as there is no way to specify a disk flavor in this version). In an post that I plan to publish tomorrow, I will show how K8s can be deployed to consume vSAN storage via the photon controller CLI.
The post Deploy Kubernetes as a service on Photon Controller v1.1 appeared first on CormacHogan.com.
